Prefer video tutorials over written guides? Explore our video tutorials here.
This manual gives an instruction how to graphically join up to four different FSKX model files into a single combined model, which can then be edited and executed with creating an own simulation setting in FSK-Lab.
1
Read in FSKX files of the models
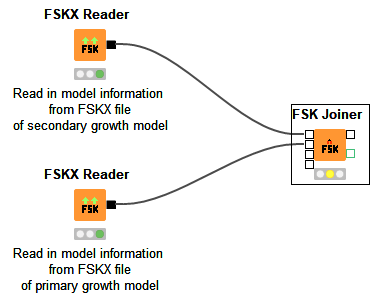
- The models of interest, which should be combined with each other, have to be loaded into the worfklow by using one FSKX Reader node per FSKX file
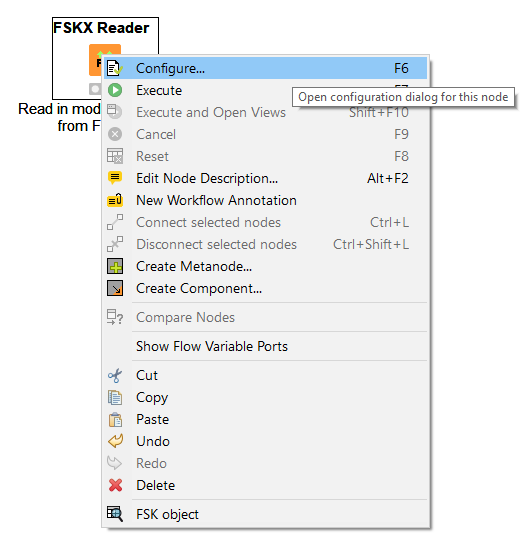
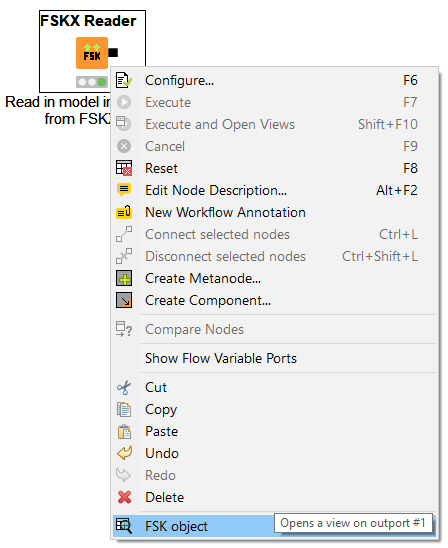
- First the FSKX Reader nodes should be configured by opening the node context menu (right click on the node) and selecting the option Configure
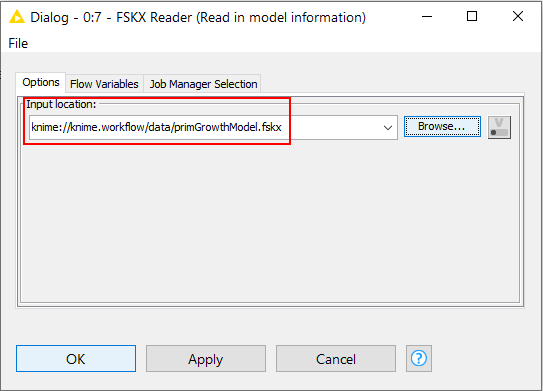
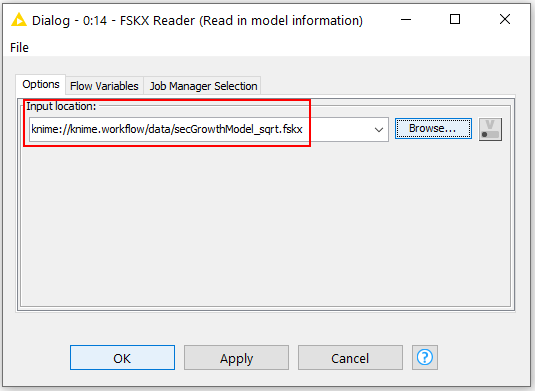
- In the configuration dialog, define the file path by clicking the Browse button in order to provide the input location for the FSKX file of the model
- The FSKX file can be stored inside the current workflow data area (e.g. C:/knime-workspace/workflow/data/modelname.fskx), so that the KNIME URL knime://knime.workflow/data/modelname.fskx could be used as input location for the model
- In order to apply the file path settings, close the configuration dialog by clicking OK
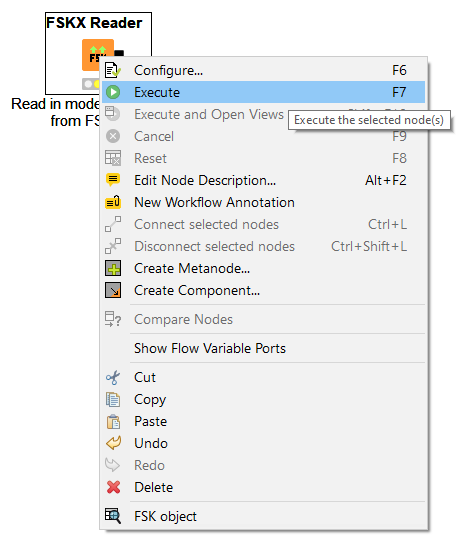
- The FSKX Reader nodes can be now executed by selecting the option Execute from the node context menu
- The FSK objects containing the metadata and scripts of the models can be viewed at the output port of the FSKX Reader nodes by selecting the option FSK object from the node context menu

2
Join FSKX files of the models
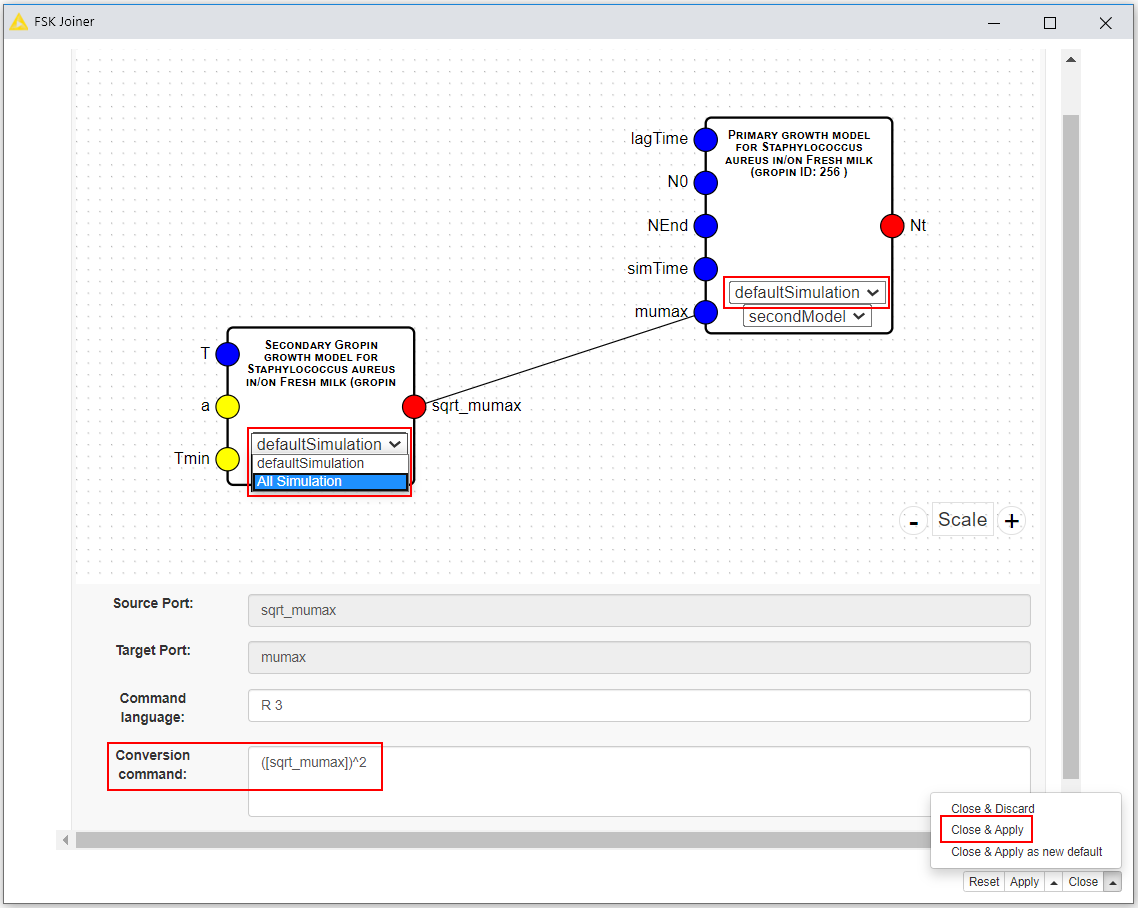
- The FSK Joiner node allows to combine two, three or four FSK objects and produces a combined FSK object
- First the output ports of the FSKX Reader nodes that hold the FSK objects should be connected with input ports of the FSK Joiner node
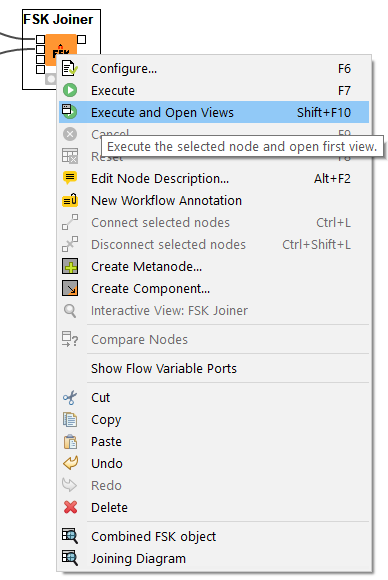
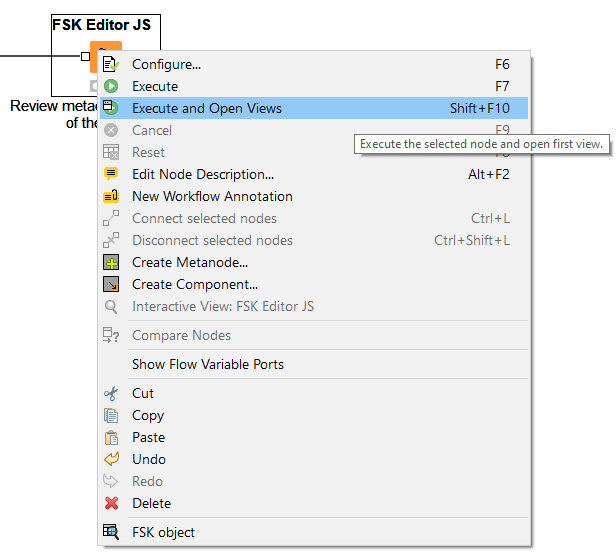
- The FSKX Joiner node can be now executed by selecting the option Execute and Open Views from the node context menu
- A graphical representation of the models will appear in the GUI of the FSK Joiner node
- The models can be connected with each other by creating links between one or more source parameters of a model with target parameters of other models
- Source parameters can be variable and constant input parameters as well as output parameters of a model
- Target parameters are only variable input parameters of other models
- The variable input parameters are displayed in blue, the constant input parameters in yellow and the output parameters in red
- After selecting a source parameter, the possible target parameters will be displayed in green
- To support the user in designing connections between parameters, further information of every parameter is displayed when clicking on it
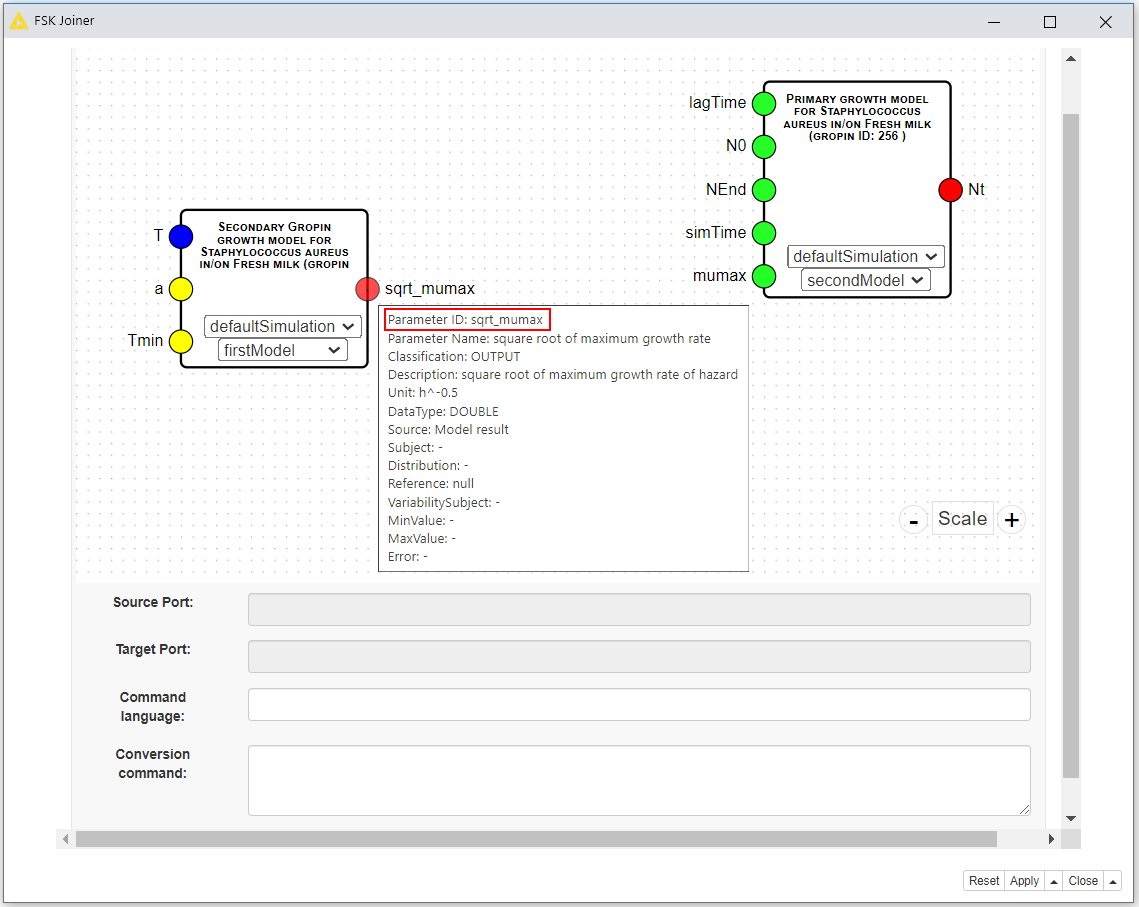
- If two parameters should be combined that are not compatible to each other regarding data type or unit for example, there is the opportunity to enter a command in the corresponding field (Conversion command) in order to convert the value of the source parameter to fit the constraints of the target parameter
- There is the option to choose one predefined simulation per model or all available simulations at once that should be carried over to the combined model
- The GUI of the FSK Joiner node can be closed and the defined settings for joining of the models saved by clicking on Close and Apply
3
Review metadata of the combined model
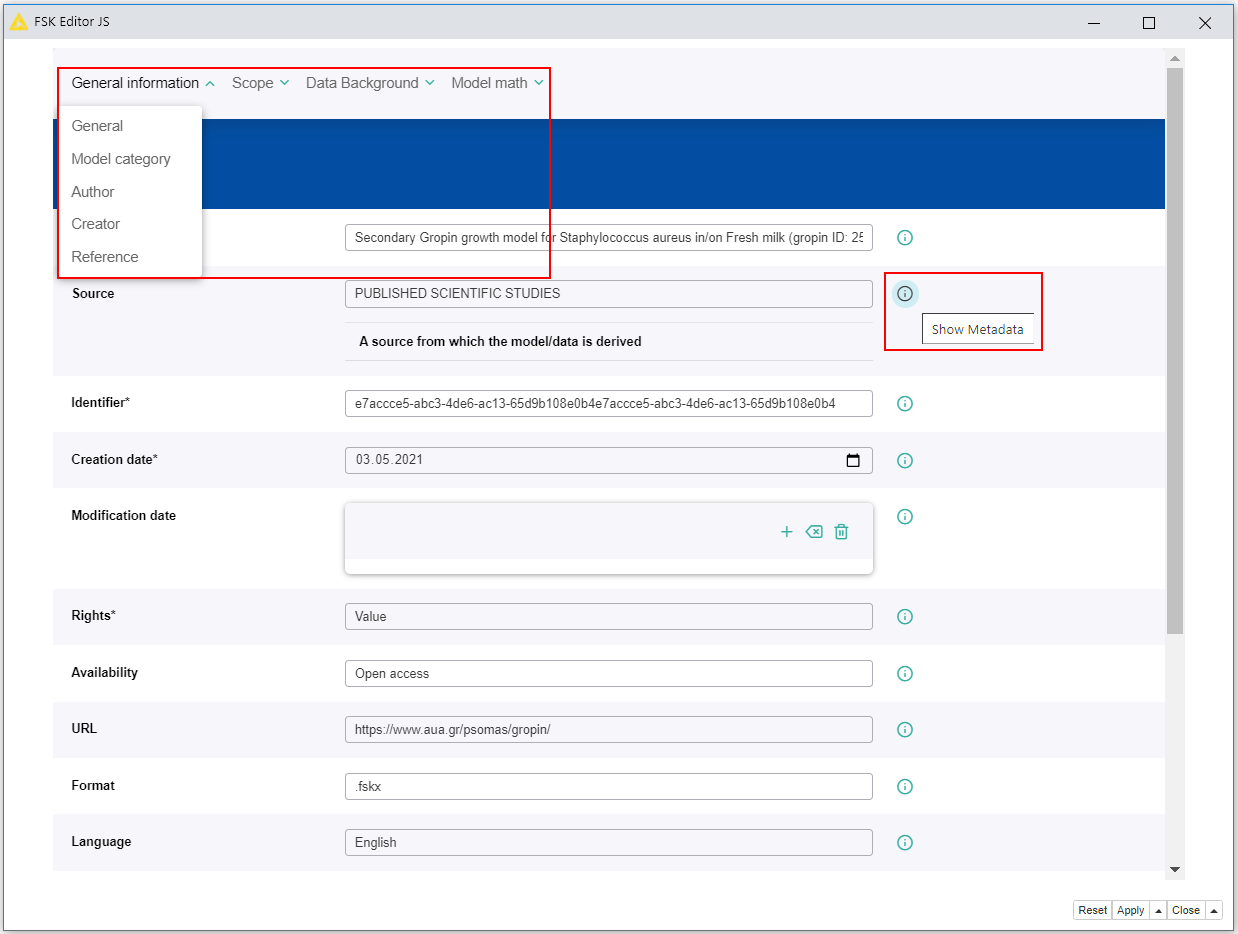
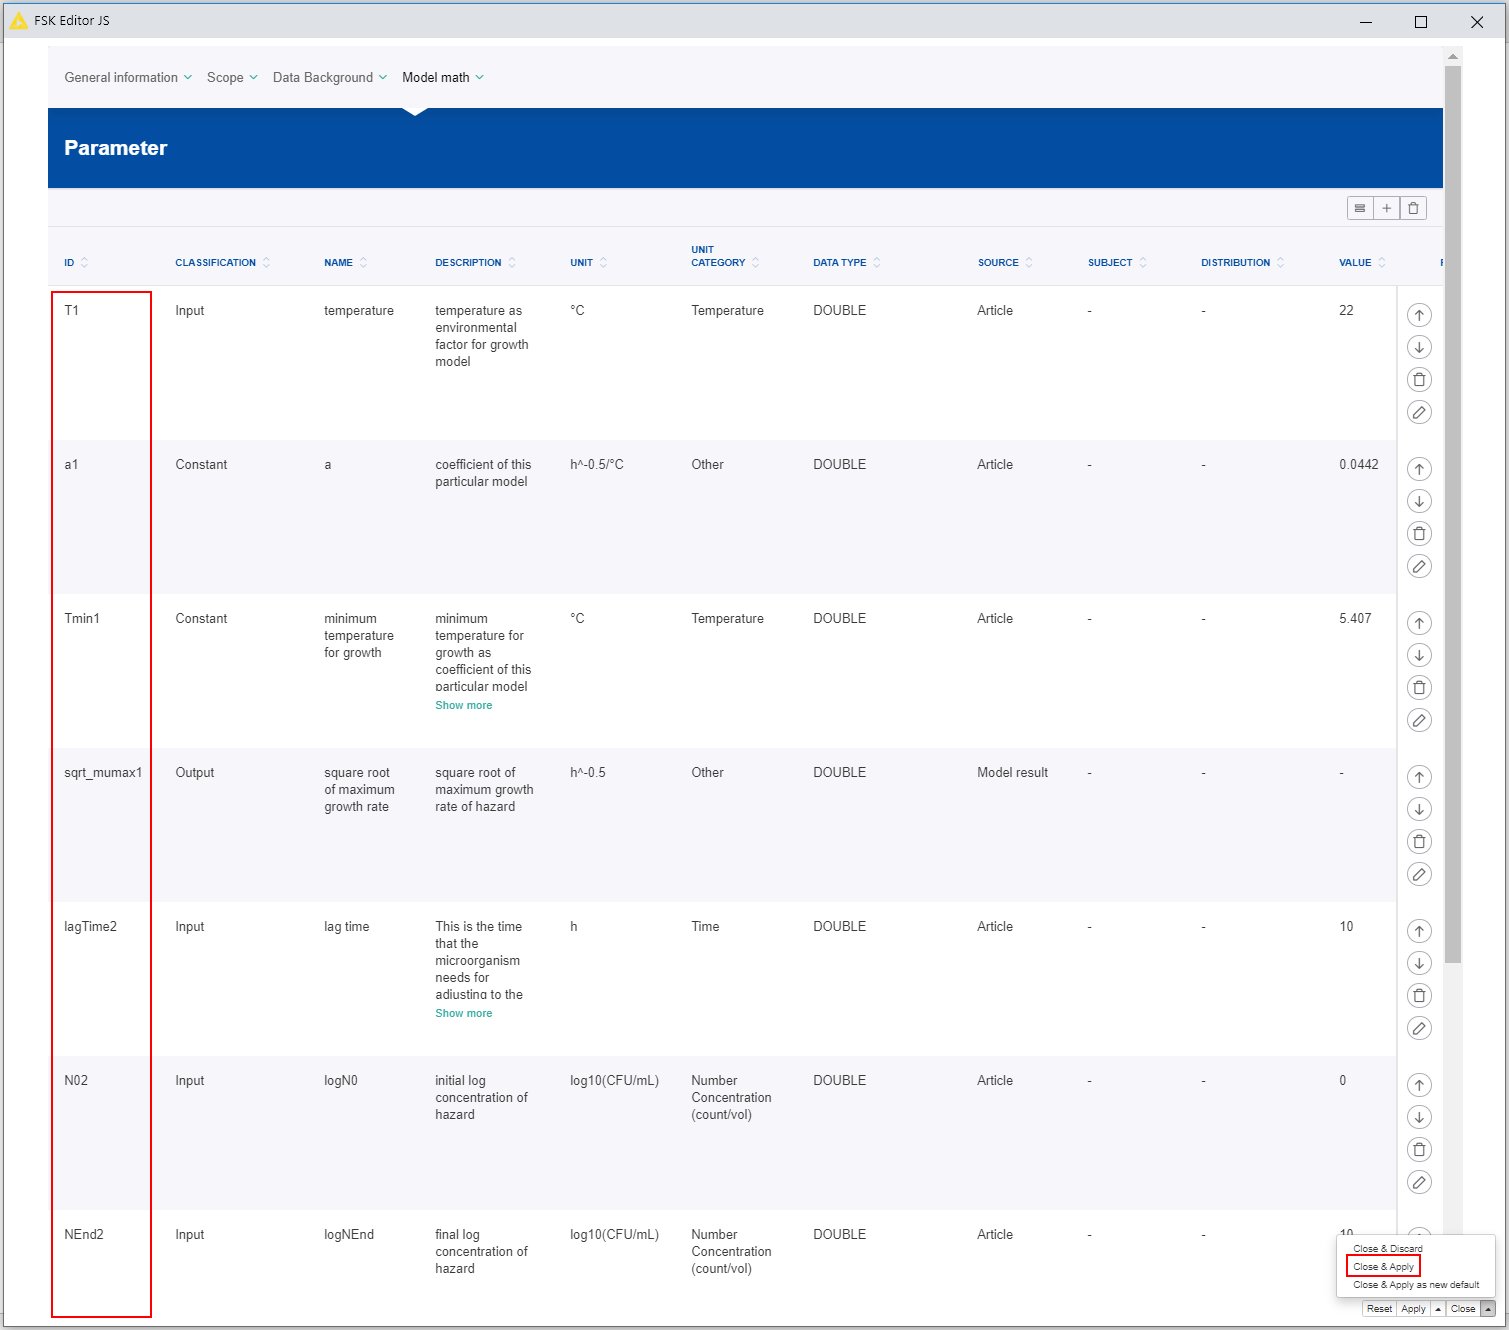
- The metadata of the combined model can be reviewed and modified by using the FSK Editor JS node
- By selecting the option Execute and Open Views from the node context menu (right click on the node) a new window will open with a GUI that allows to inspect and adjust the metadata and scripts provided for the combined model
- All metadata are concatenated within the combined model so that no information of individual models will get lost
- The model details are presented in a structured form via different tabs
- Information for every metadata field is displayed when clicking on the corresponding i symbol
- After joining, the parameters are numbered, indicating to which of the combined models they do belong
- The GUI of the FSK Editor JS node can be closed and the changes saved by clicking on Close and Apply
4
Create a new simulation setting
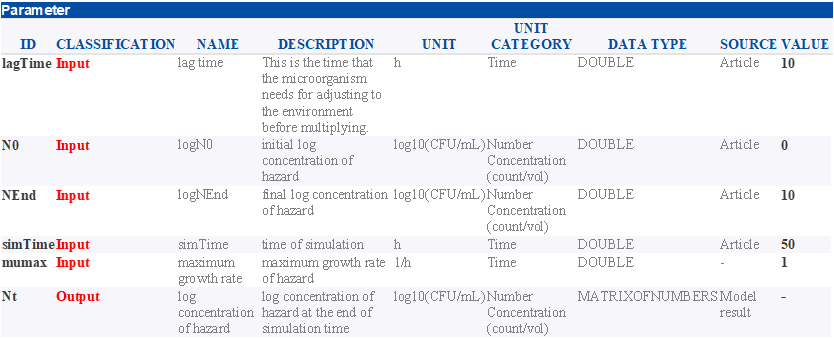
- The combined model can be executed based on predefined simulation scenarios or user-specific parameter values
- Therefore, parameters are defined
- These parameters are used as variables within the model code
- The parameters are classified as input or output parameter
- Each input parameter has an initial value, provided by the model creator, to generate the default simulation
- The values of the input parameters can be adjusted in order to create additional simulation scenarios
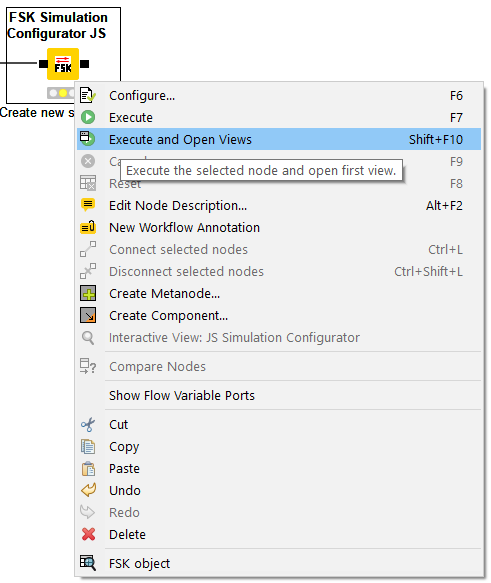
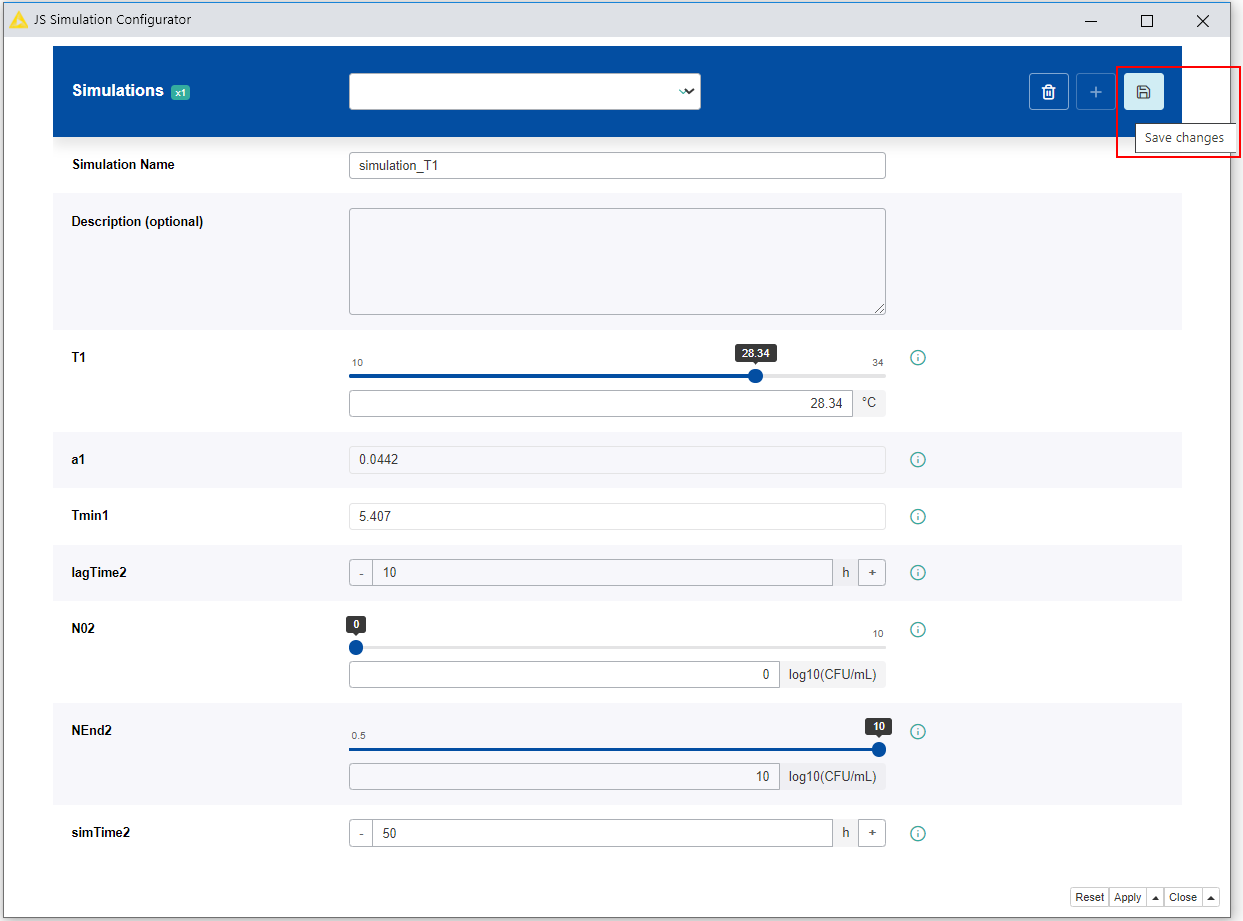
- A new simulation setting can be created by using the FSK Simulation Configurator JS node
- By selecting the option Execute and Open Views from the node context menu (right click on the node) a new window will open with a GUI that allows to review predefined simulation settings like the default simulation and to add new simulation scenarios
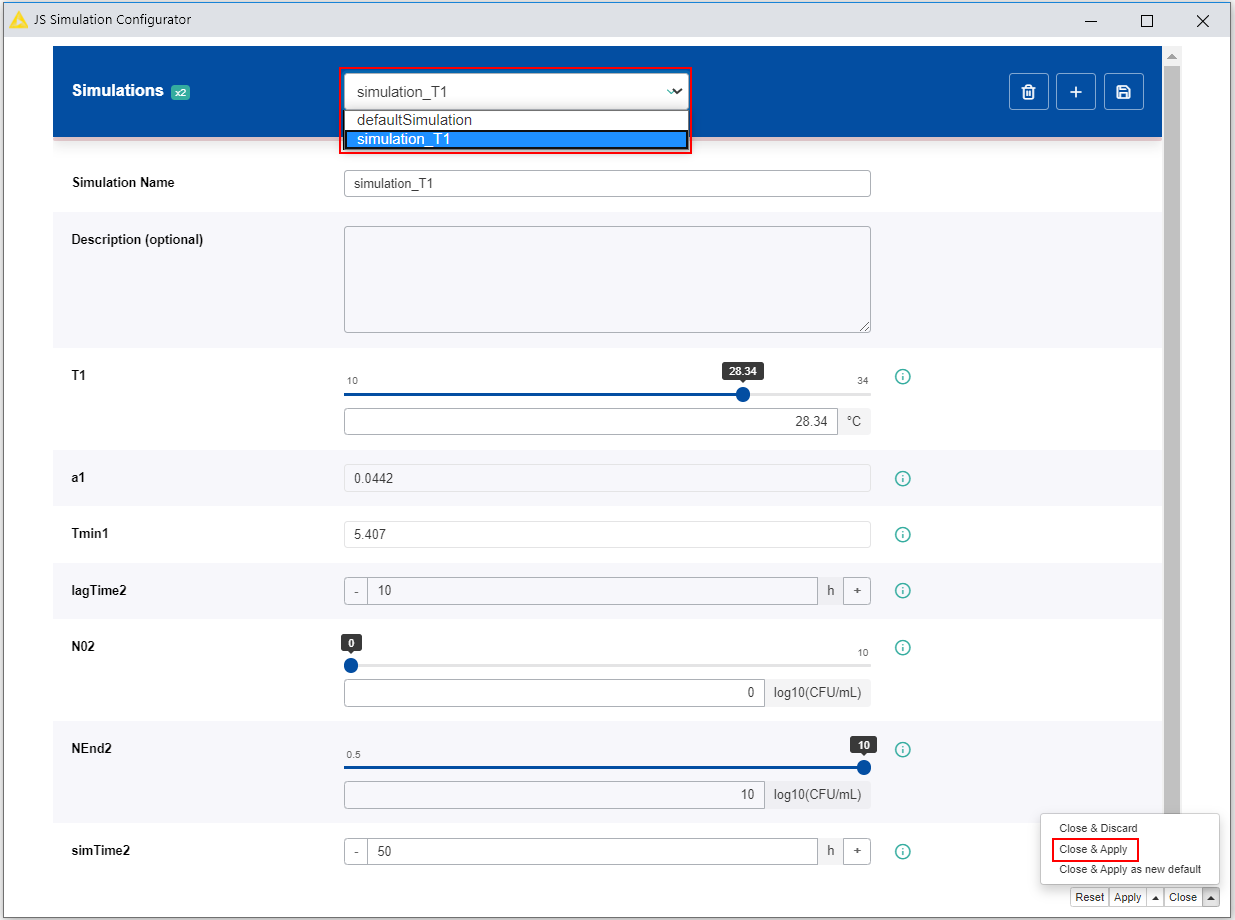
- It is possible to choose among the available predefined simulations, which were selected in the joiner setting, or to create a new one by modifying the input parameters listed
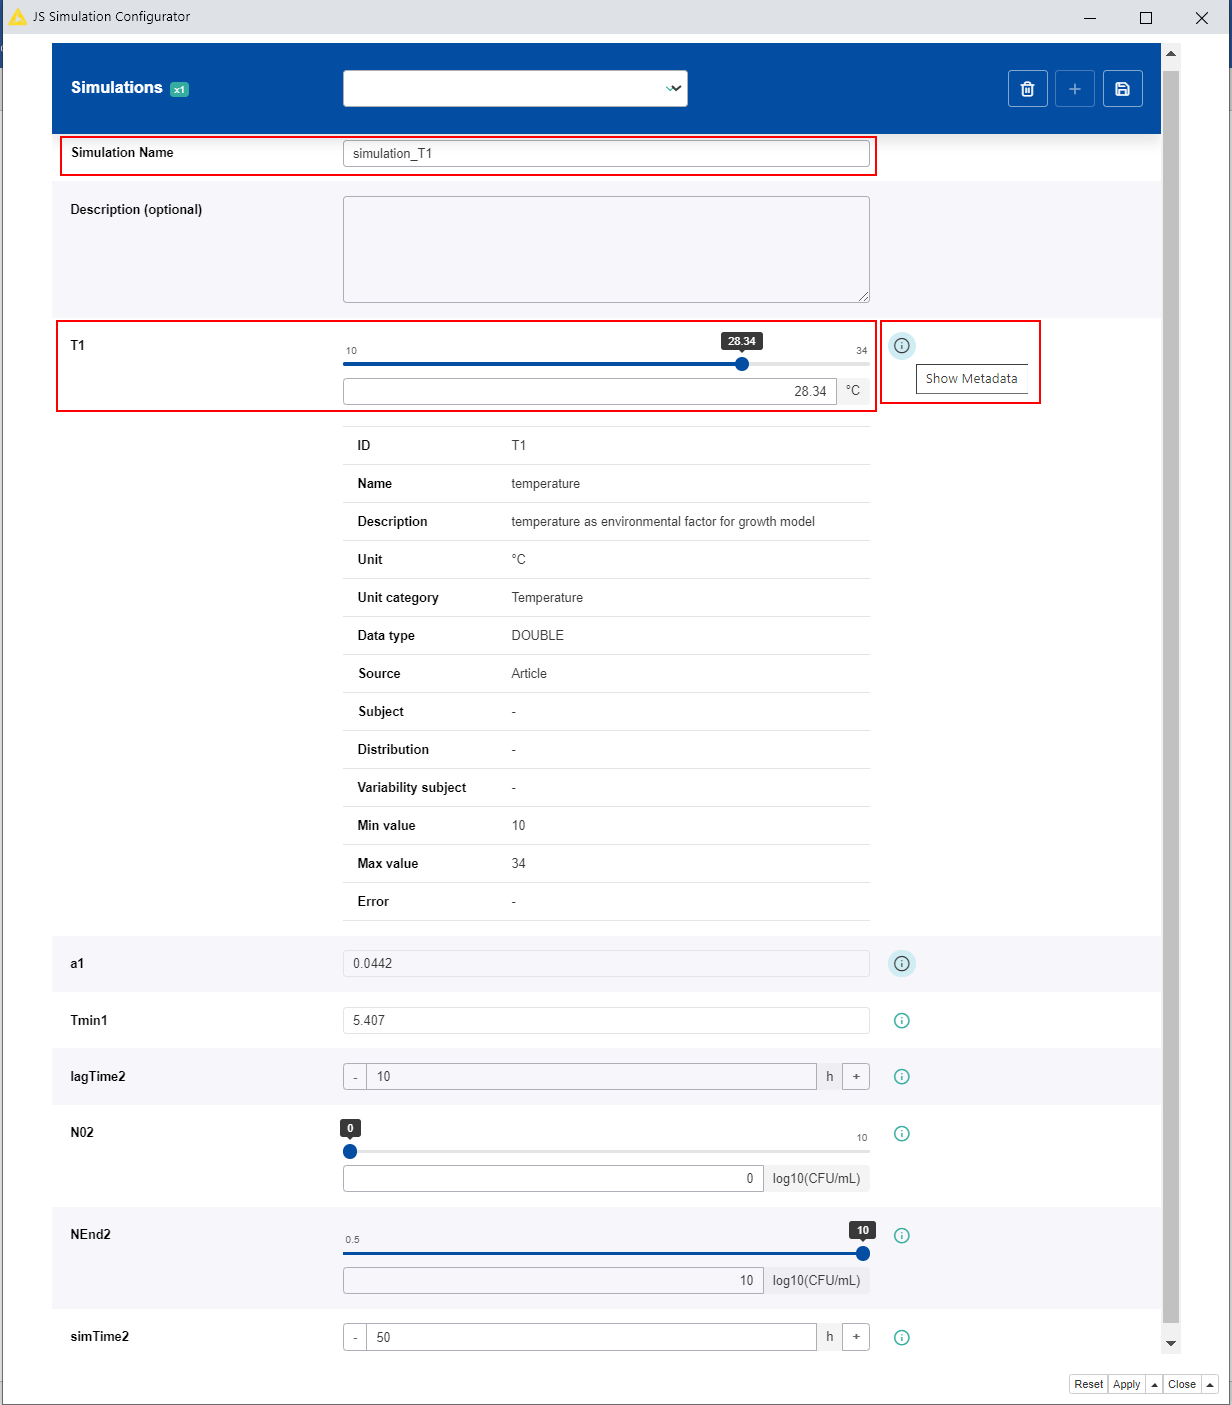
- After joining, the parameters are numbered, indicating to which of the combined models they do belong
- A new simulation setting can be added by clicking on the Add simulation button
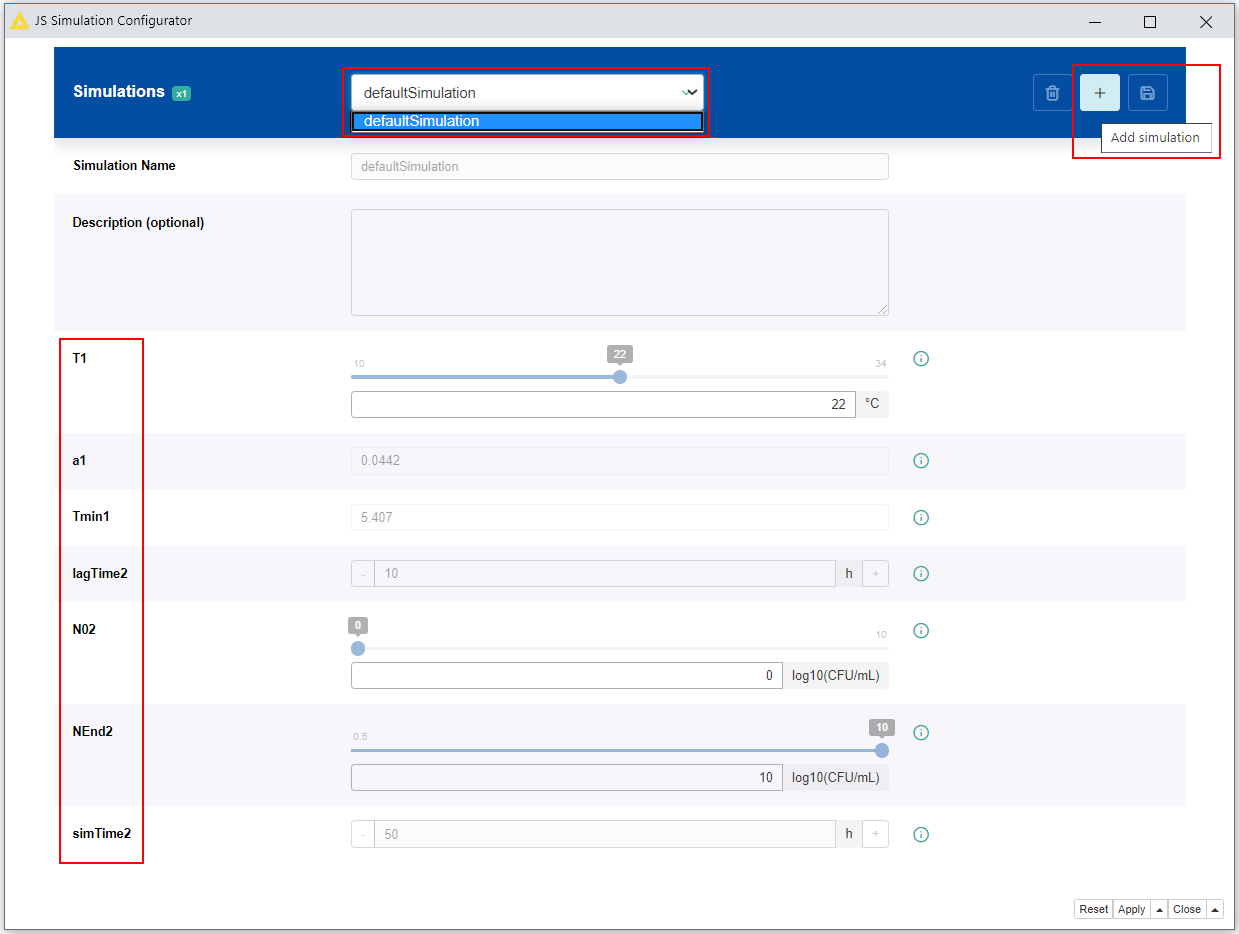
- For each new simulation setting a name has to be given
- The values of the parameters can be adjusted according to the scenario of interest
- It is possible that a range of valid values is predefined for a parameter based on a minimum and a maximum value
- Note: values of parameters which are classified as constant, cannot be modified
- To support the user in designing a new simulation, further information of every parameter is displayed when clicking on the corresponding i symbol
- The newly created simulation setting has to be saved by clicking on the Save changes button
- The simulation selected in the view of the drop-down menu is set as simulation to be executed
- The GUI of the FSK Simulation Configurator JS node can be closed and the selection of the simulation for execution saved by clicking on Close and Apply
5
Execute the combined model with a selected simulation setting
- The combined model can be executed by using the FSK Runner node, meaning each individual model will be executed in order, using generated parameter values from the previous models as input data in accordance with the joining configuration
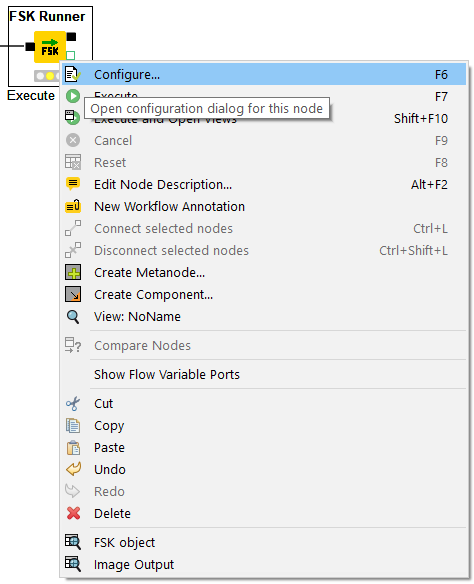
- First the FSK Runner node can be configured by opening the node context menu (right click on the node) and selecting the option Configure
- In the configuration dialog, a predefined simulation scenario can be selected for execution from the drop-down menu (defaultSimulation, additional simulation settings)
- If desired the output of the model can be saved to a JSON file by ticking the corresponding box
- In order to apply the execution settings, close the configuration dialog by clicking OK
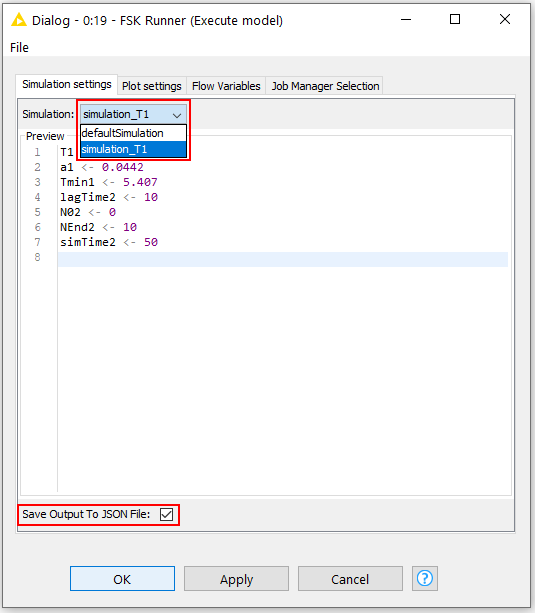
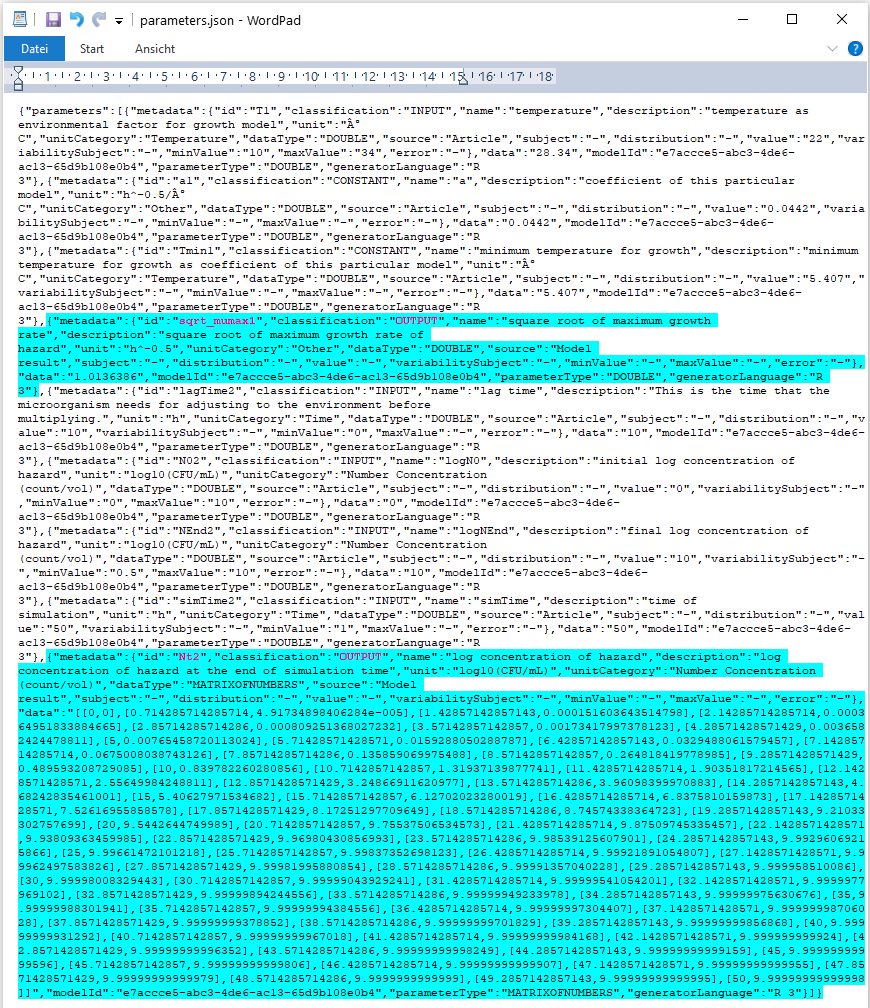
- The JSON file parameters.json, generated after the execution of the FSK Runner node, will contain a list of all input and output parameters with their corresponding values
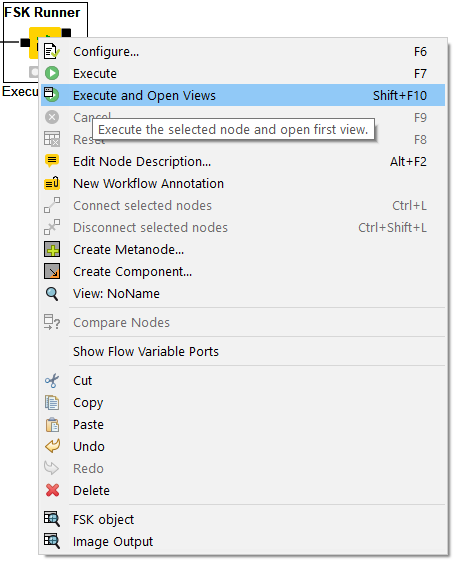
- The FSK Runner node can be now executed by selecting the option Execute and Open Views from the node context menu
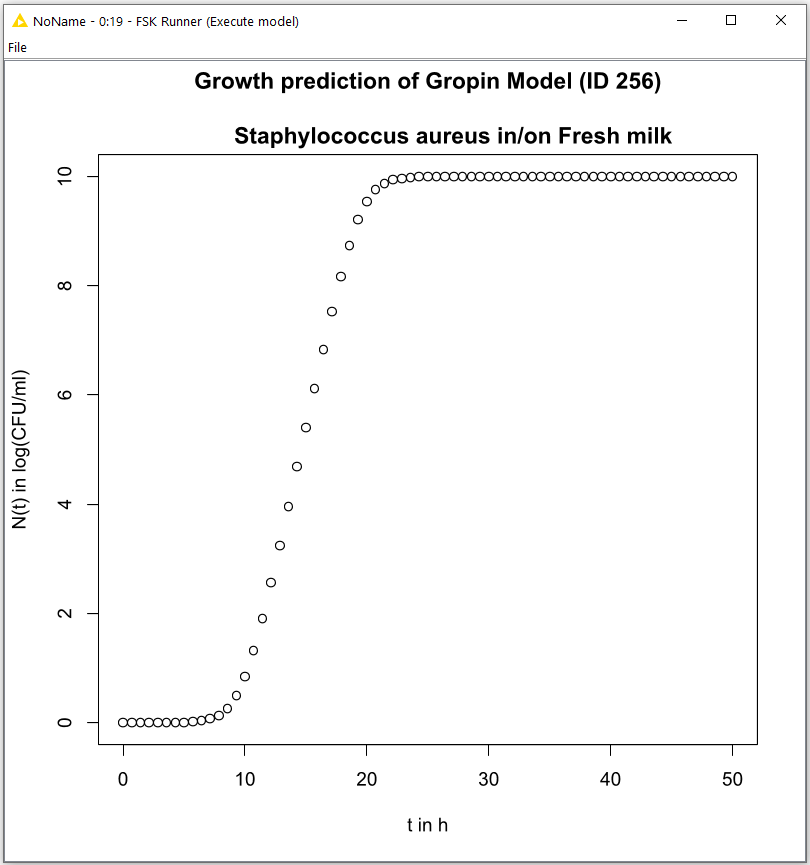
- The plot of the model result, generated based on the visualization script, will be shown in a pop-up window (Image output)
- The model results will be stored in a R workspace if the model script is provided in the programming language R
6
Write the FSK object of the combined model with simulation results into FSKX file
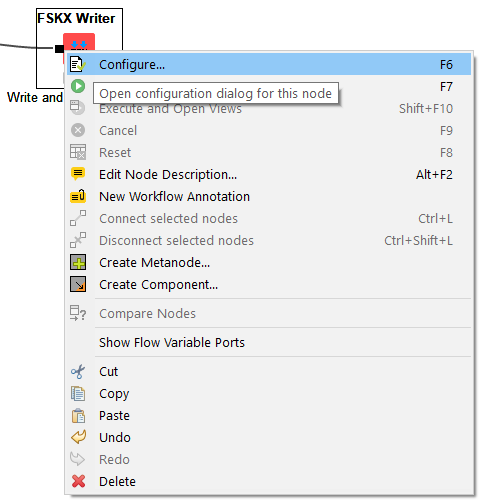
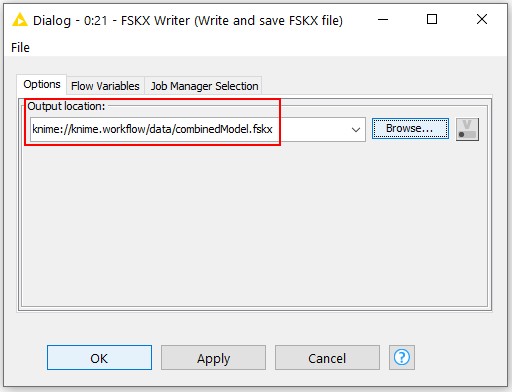
- First the FSKX Writer node should be configured by opening the node context menu (right click on the node) and selecting the option Configure
- In the configuration dialog, define the file path by clicking the Browse button in order to provide an output location and a name for the FSKX file of the model
- The FSKX file can be stored inside the current workflow data area (e.g. C:/knime-workspace/workflow/data/modelname.fskx), so that the KNIME URL knime://knime.workflow/data/modelname.fskx could be used as output location for the model
- In order to apply the file path settings, close the configuration dialog by clicking OK
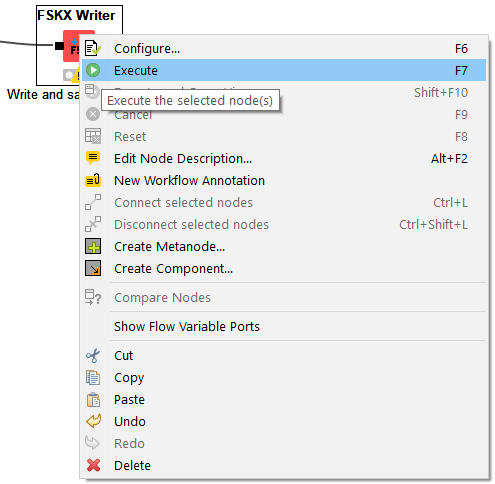
- The FSKX Writer node can be now executed by selecting the option Execute from the node context menu
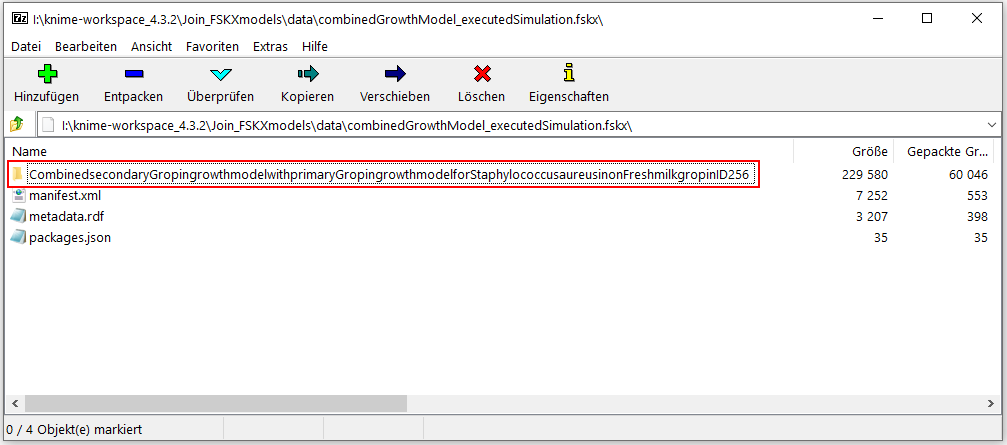
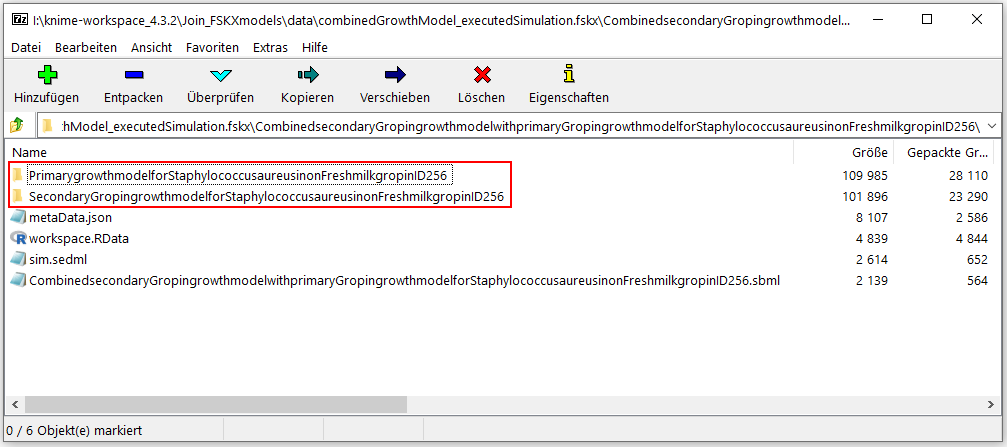
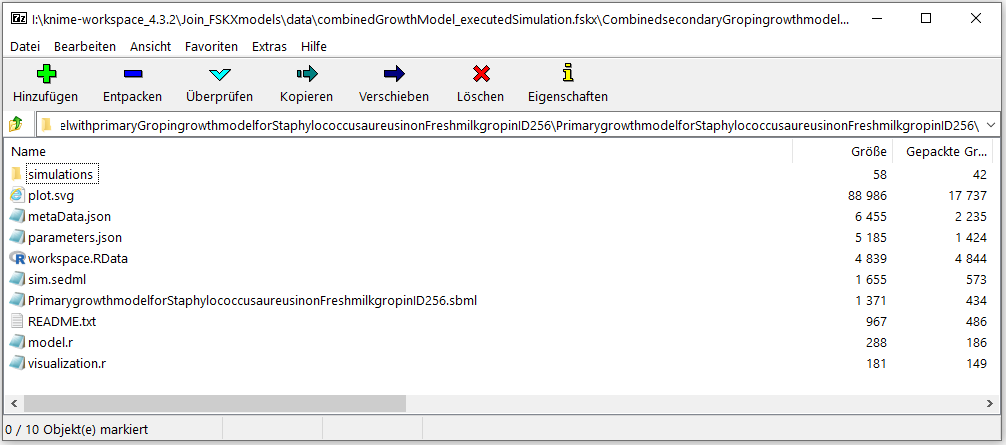
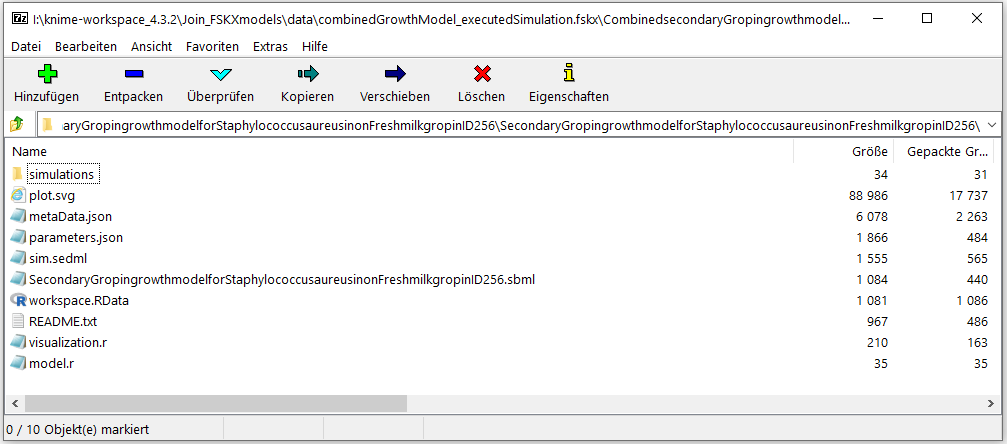
- The harmonized file format FSKX is a ZIP container which includes all necessary files for the annotation and execution of the combined model (model metadata and model code)
7
An example KNIME workflow for this manual can be downloaded here.