Prefer video tutorials over written guides? Explore our video tutorials here.
This manual gives an instruction how to create and execute a FSKX compliant model with different simulation settings in FSK-Lab using the FSK Editor JS node.
1
Create an FSKX object of the model
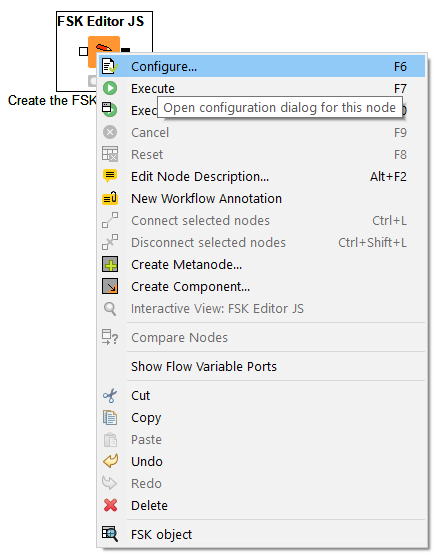
- If the model code requires additional resource files such as datasets (possible formats are .csv, .xlsx, .txt, .r, .RData, .py, .json, .sedml), first the FSK Editor JS node should be configured by opening the node context menu (right click on the node) and selecting the option Configure
- In the configuration dialog, on the tab “Environment” a path regarding the working directory for the resource files should be defined
- In order to provide a location path by clicking the Browse button, first the type of environment has to be selected
- directory environment for a folder with resource files
- files environment for resource files directly
- In order to apply the working directory settings, close the configuration dialog by clicking OK

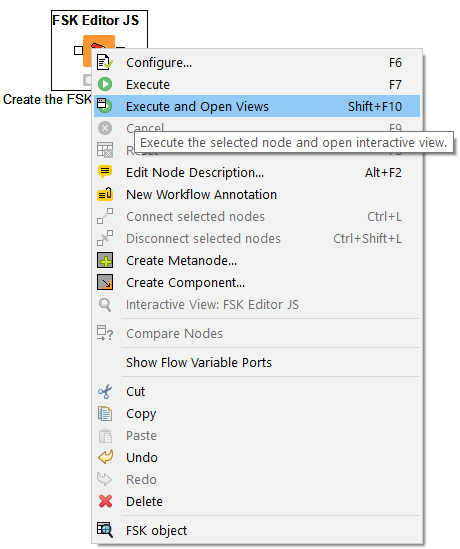
- The FSK Editor JS nodes can be now executed by selecting the option Execute and Open Views from the node context menu
- The FSK Editor JS node provides the opportunity to annotate and encode models in accordance with the harmonized metadata concepts and the harmonized information exchange format of the FSKX standards
- In general, the creation of a FSKX compliant model is based on the following information that should be provided by the model creator:
-
- metadata to annotate the model
- code for the mathematical model
- code for the visualization of the model result
- resource files (e.g. for datasets) if the script code requires them
-
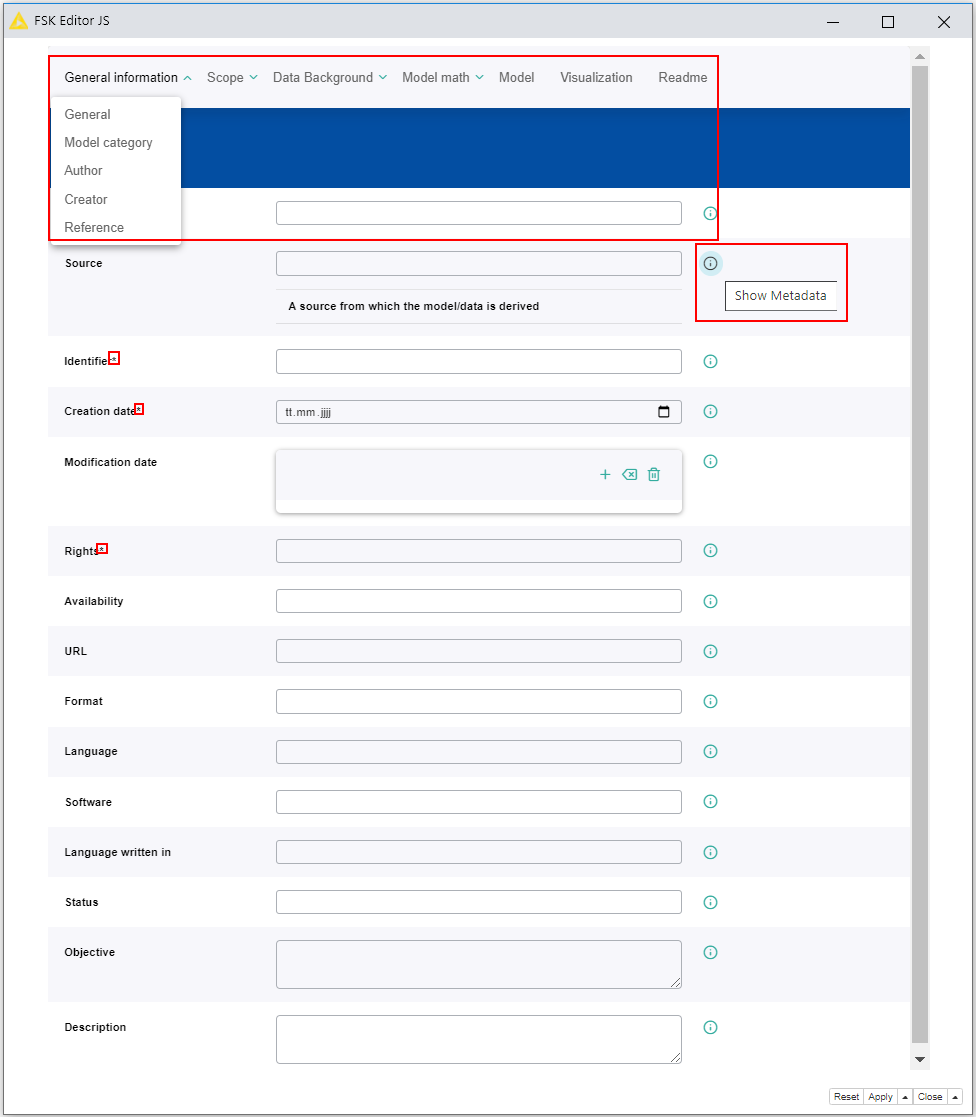
- According to the FSKX specifications, the model metadata cover the four main categories “General information”, “Scope”, “Data background” and “Model math”
- For each of these main categories the metadata are presented in a structured form via different tabs
- Further information about the FSKX format including the FSKX guidance document are provided here
- Metadata fields, which are highlighted with asterisks (*), are mandatory fields with respect to the MIRARAM guidelines
- Guidelines regarding the “Minimum Information Required to Annotate food safety Risk Assessment Models” (MIRARAM) can found here
- Information for every metadata field is displayed when clicking on the corresponding i symbol
- More details and definitions for all metadata fields, that are relevant for describing data and models, can be found here: Metadata_Master_Table
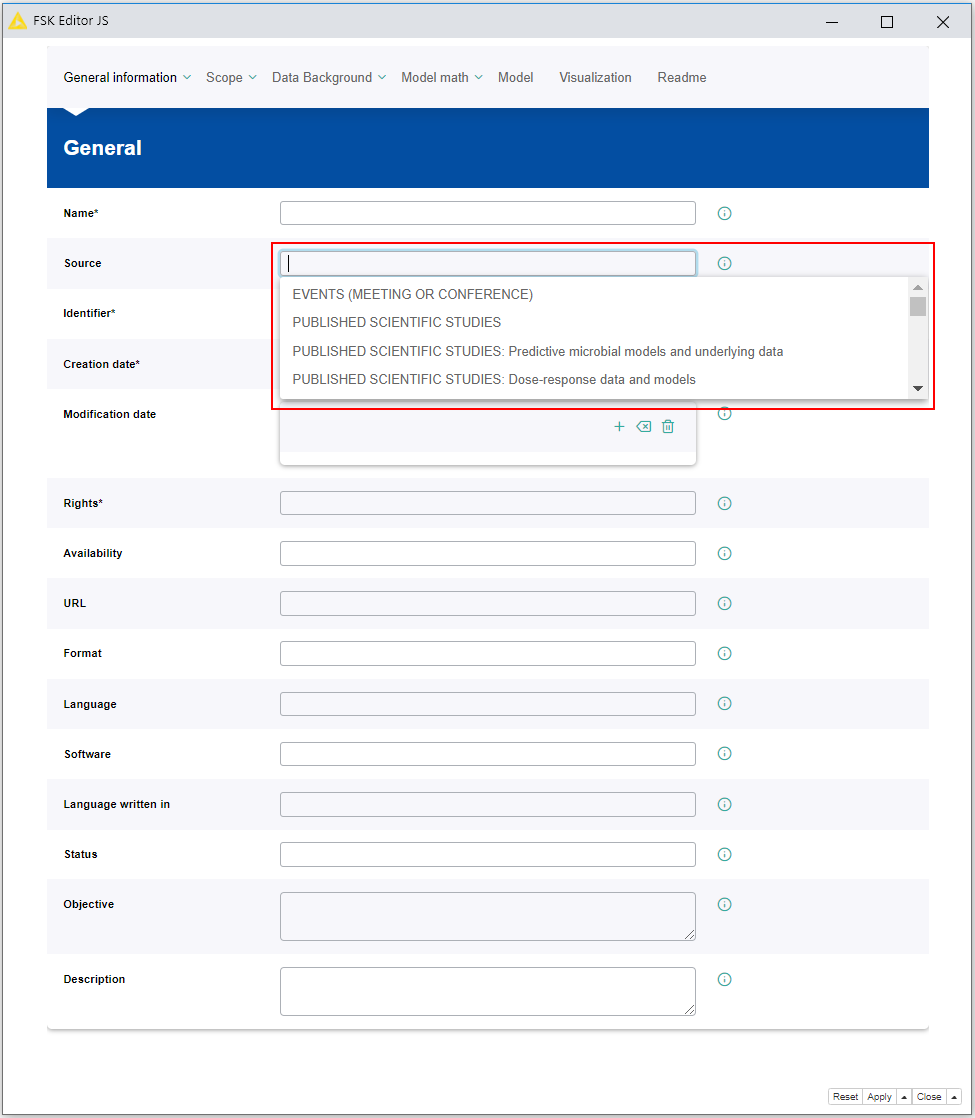
- To support harmonized annotation of the models, an online resource with controlled vocabularies for some metadata fields was established
- If provided, a drop-down menu of the available controlled vocabularies will be shown after setting the cursor to the corresponding metadata field
- The required term can be selected from the drop-down menu in order to appear in the metadata field
- The terms used as controlled vocabularies are listed here: Controlled_Vocabularies_Master_Table
Annotation of the model by providing appropriate metadata
General Information → General
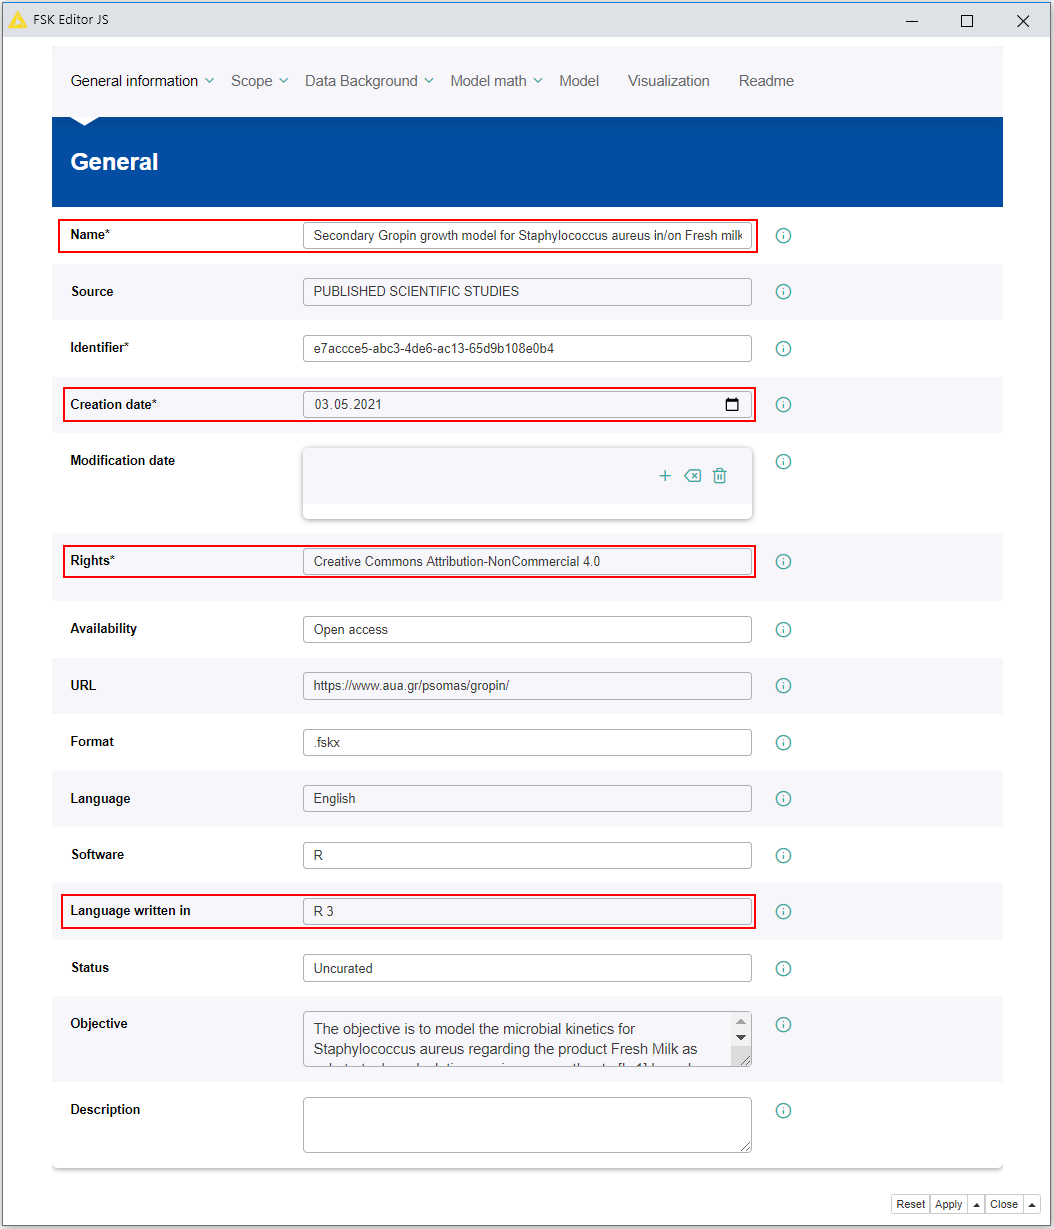
- Mandatory metadata fields: Name, Creation date, Rights and Language written in
- The field for the Identifier will be filled with an unambigous ID created automatically by the software tool
General Information → Model Category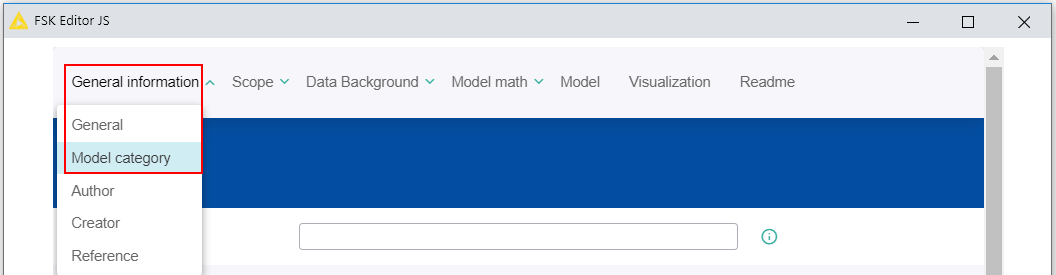
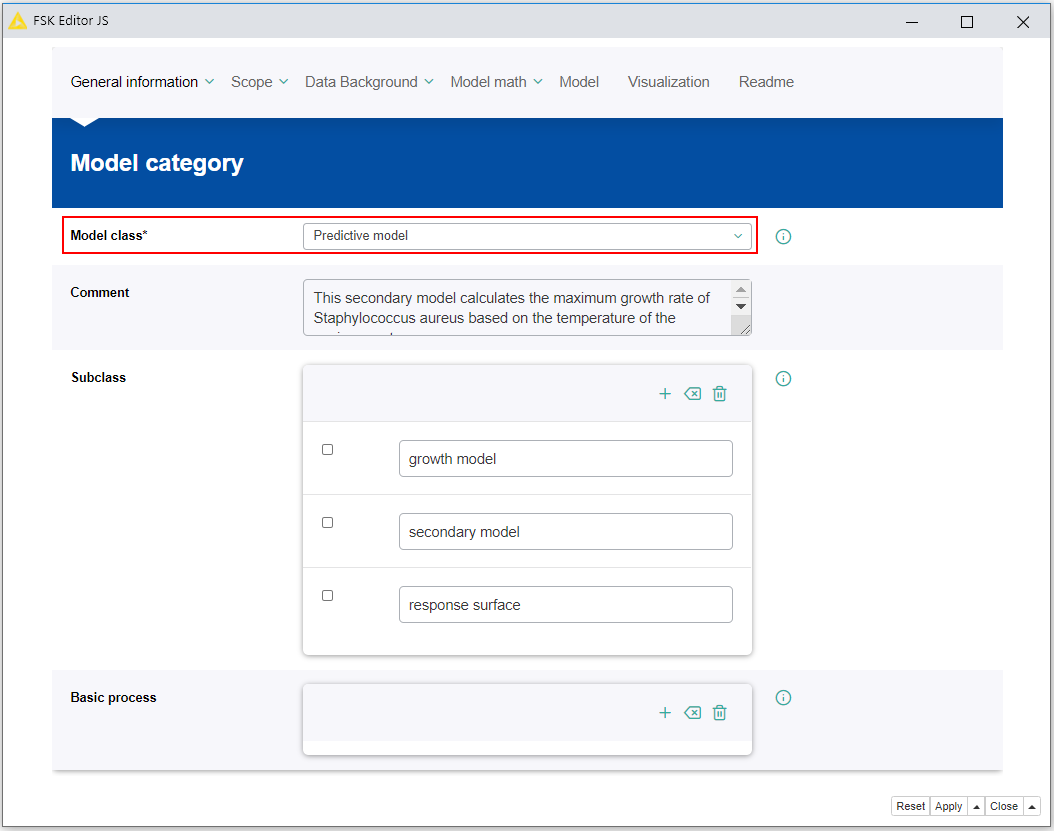
- Mandatory metadata fields: Model class
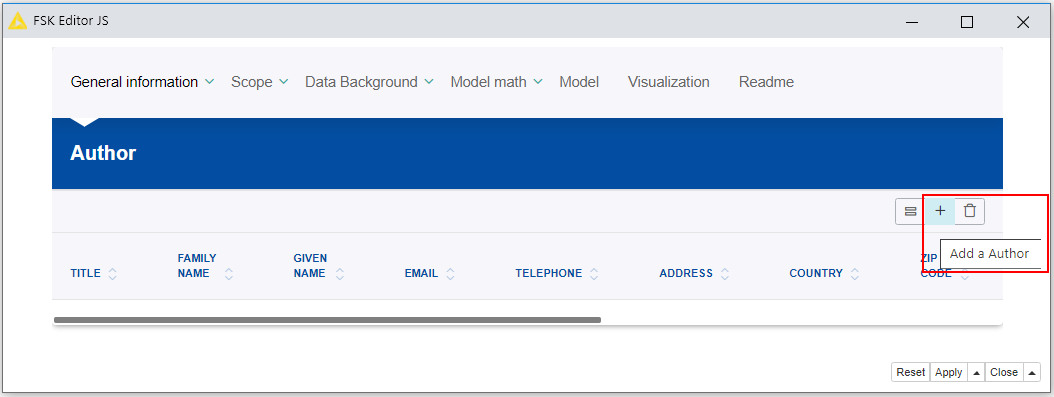
General Information → Author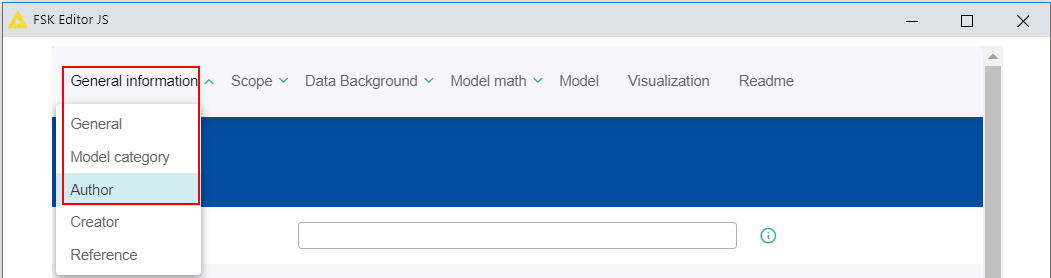
- To provide metadata about the author(s), the person(s) who generated the model code, is not mandatory
- In order to provide information, a set-up window for the metadata setting has to be opened by clicking on the Add a Author button (plus symbol)
- The new author setting should be saved by clicking on the Save changes button
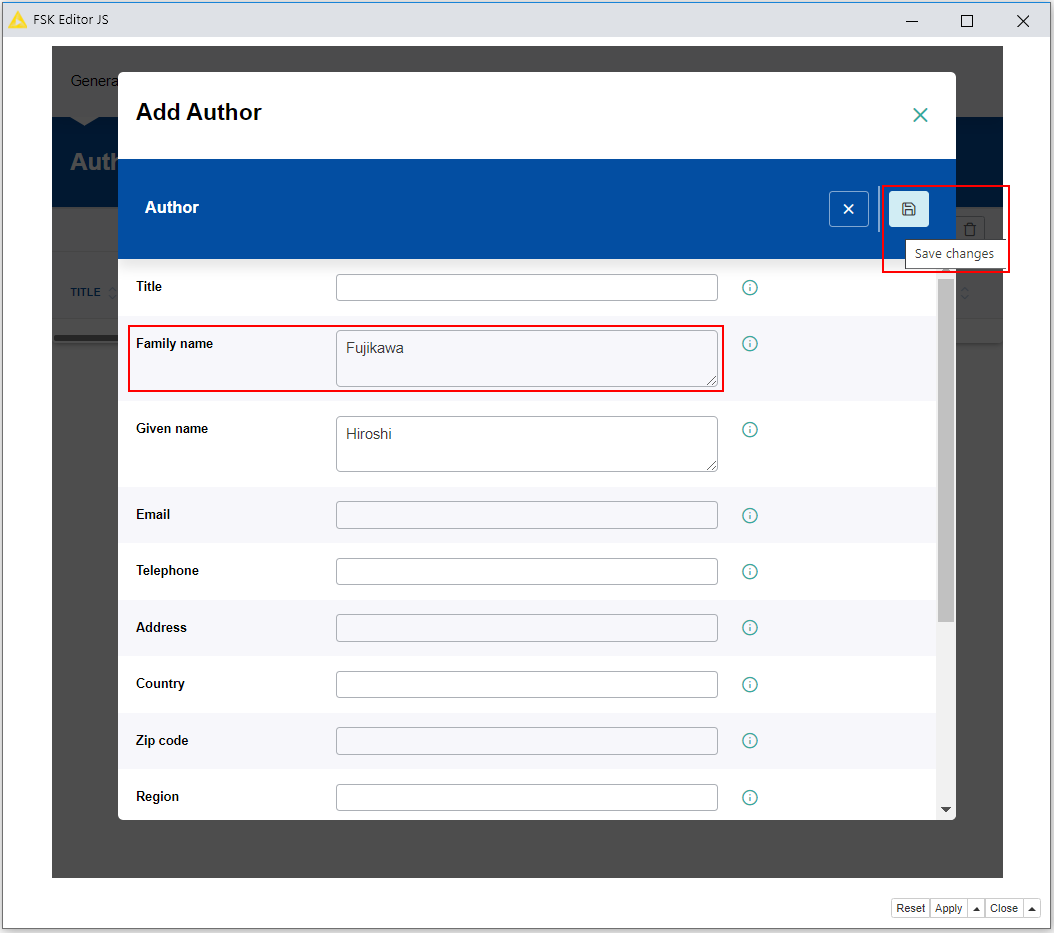
- Mandatory metadata fields: Family Name
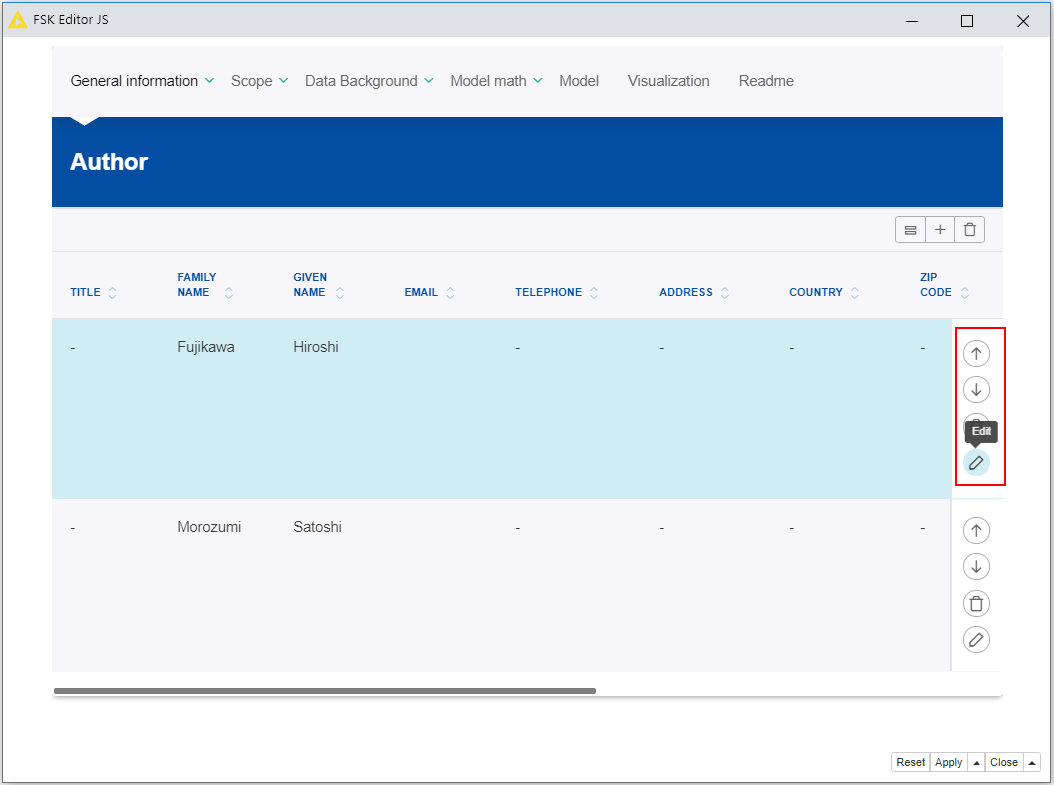
- After saving the metadata setting the new entry will appear in the corresponding metadata list
- An entry in a metadata list can be modified or deleted supsequently by clicking on the corresponding Edit or Trash button
- Also the order of the entries in a metadata list can be changed by clicking on the Move up or Move down buttons
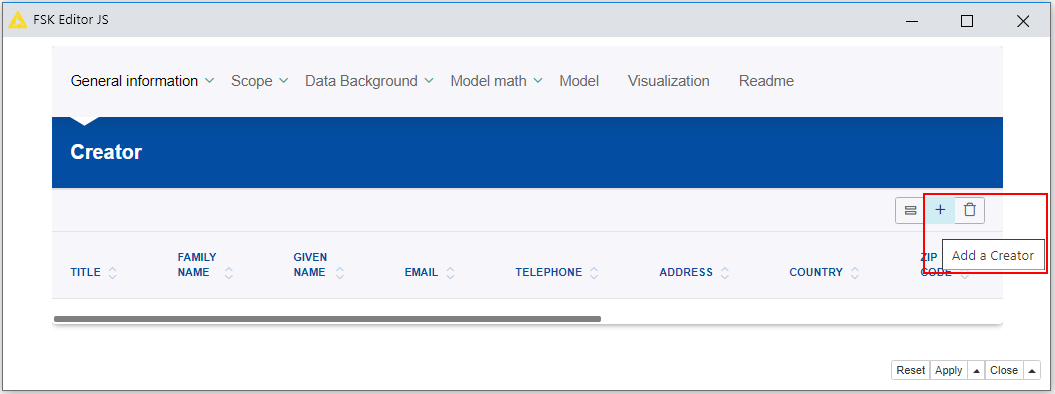
General Information → Creator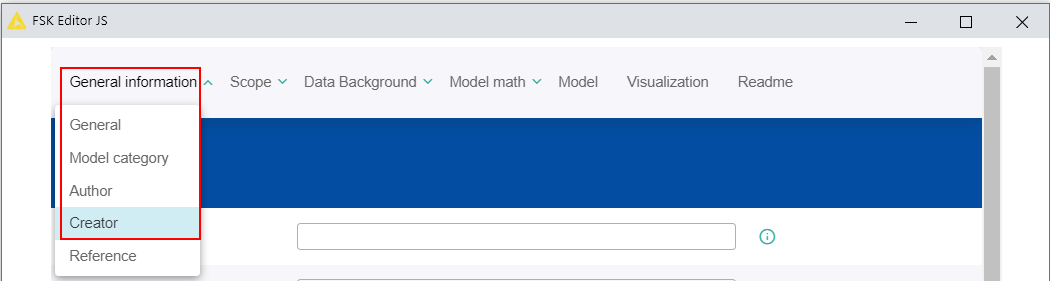
- To provide metadata about the creator(s), the person(s) who created the FSKX file for a model, is not mandatory
- In order to provide information, a set-up window for the metadata setting has to be opened by clicking on the Add a Creator button (plus symbol)
- The new creator setting should be saved by clicking on the Save changes button
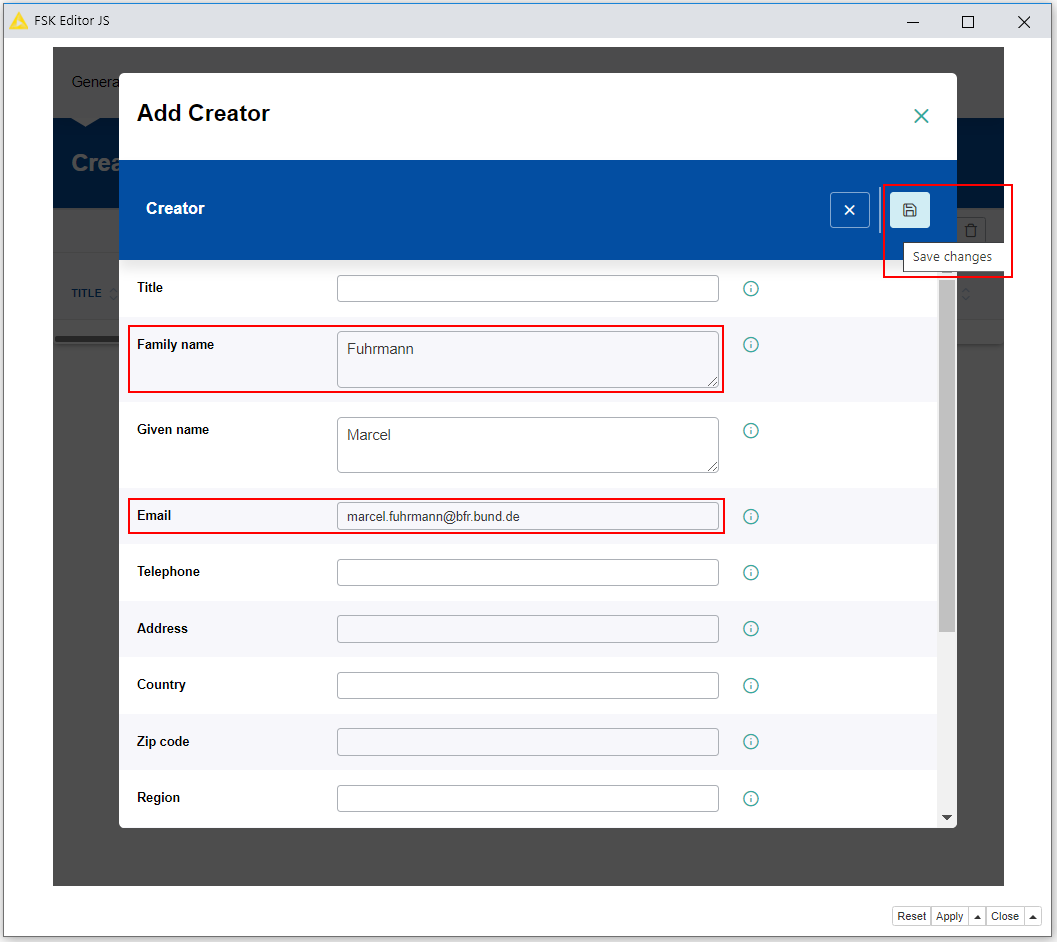
- Mandatory metadata fields: Family Name, Email
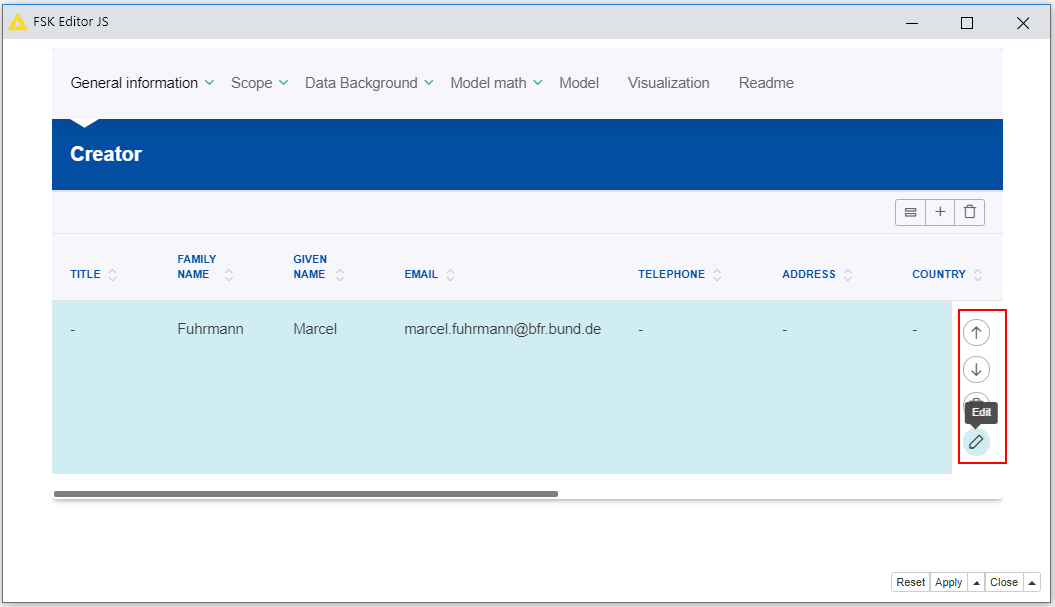
- After saving the metadata setting the new entry will appear in the corresponding metadata list
- An entry in a metadata list can be modified or deleted supsequently by clicking on the corresponding Edit or Trash button
- Also the order of the entries in a metadata list can be changed by clicking on the Move up or Move down buttons
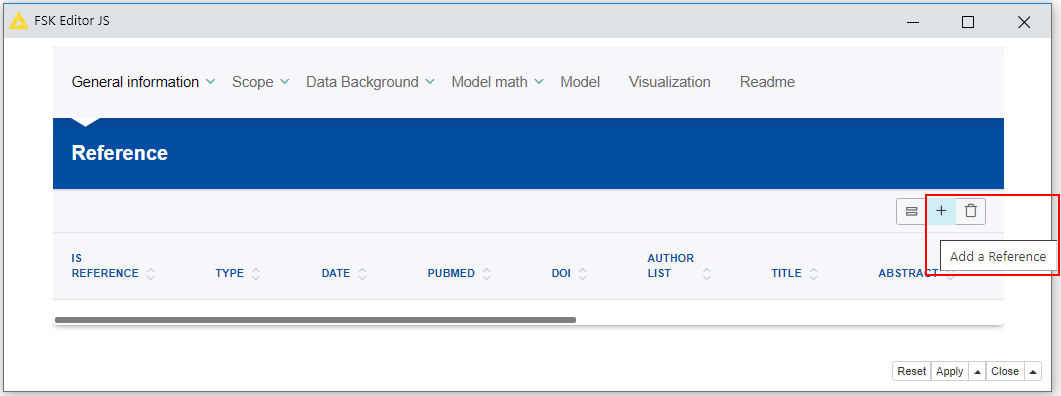
General Information → Reference
- To provide metadata about the reference(s) is not mandatory
- In order to provide information, a set-up window for the metadata setting has to be opened by clicking on the Add a Reference button (plus symbol)
- The new reference setting should be saved by clicking on the Save changes button
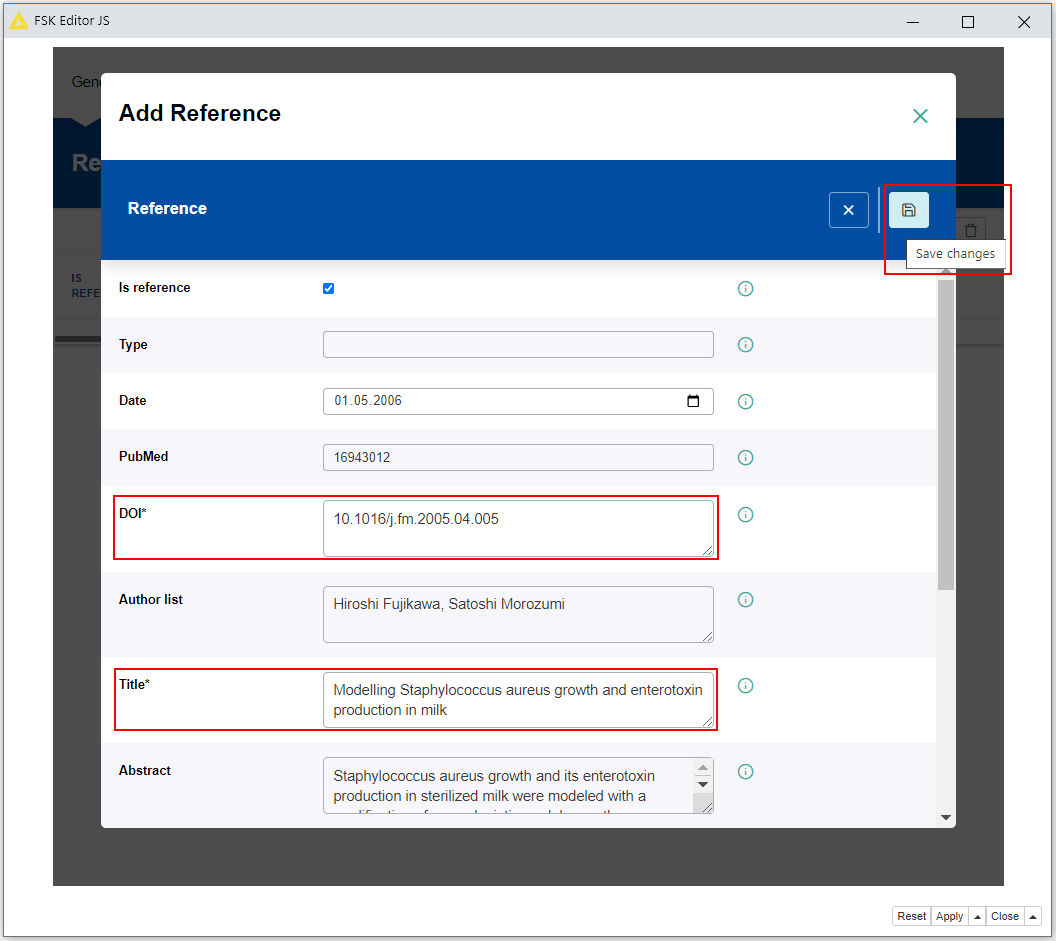
- Mandatory metadata fields: DOI, Title
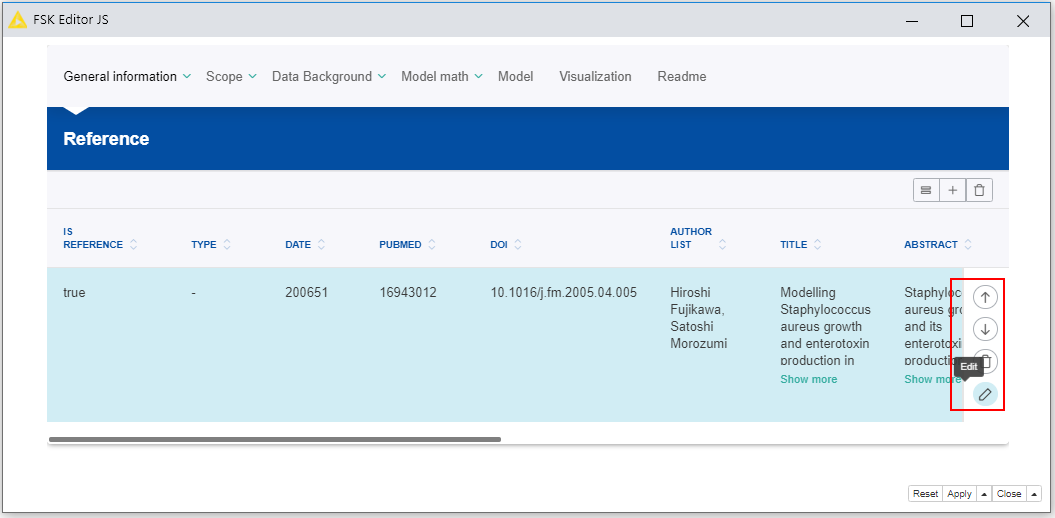
- After saving the metadata setting the new entry will appear in the corresponding metadata list
- An entry in a metadata list can be modified or deleted supsequently by clicking on the corresponding Edit or Trash button
- Also the order of the entries in a metadata list can be changed by clicking on the Move up or Move down buttons
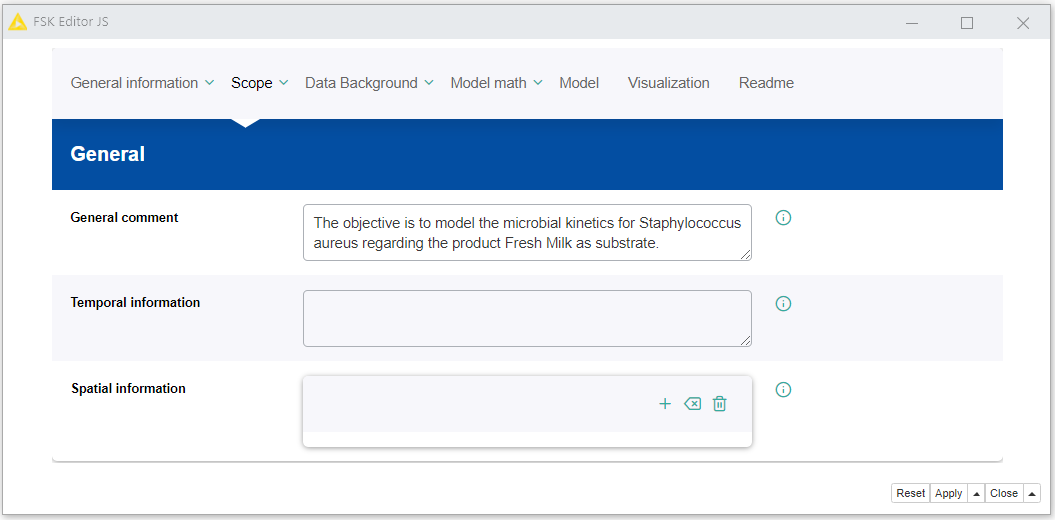
Scope → General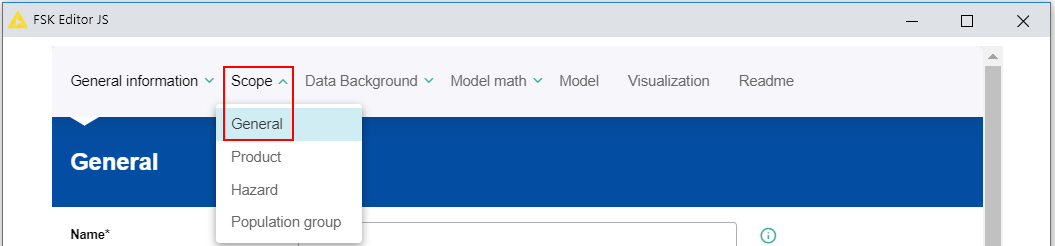
- To provide general metadata regarding the scope of the model, like a general comment as well as temporal and spatial information, is not mandatory
Scope → Product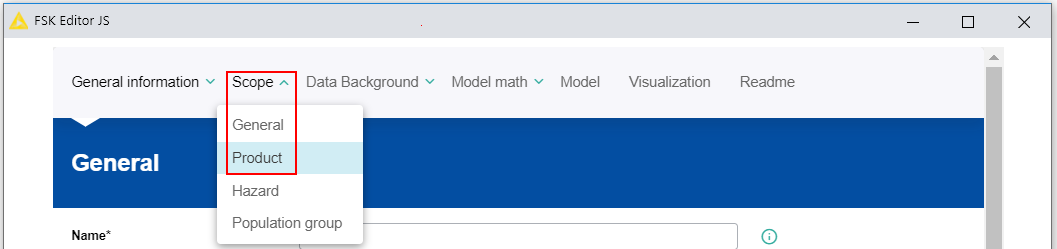
- To provide metadata about the product(s), for which the model applies, is not mandatory
- In order to provide information, a set-up window for the metadata setting has to be opened by clicking on the Add a Product button (plus symbol)

- The new product setting should be saved by clicking on the Save changes button
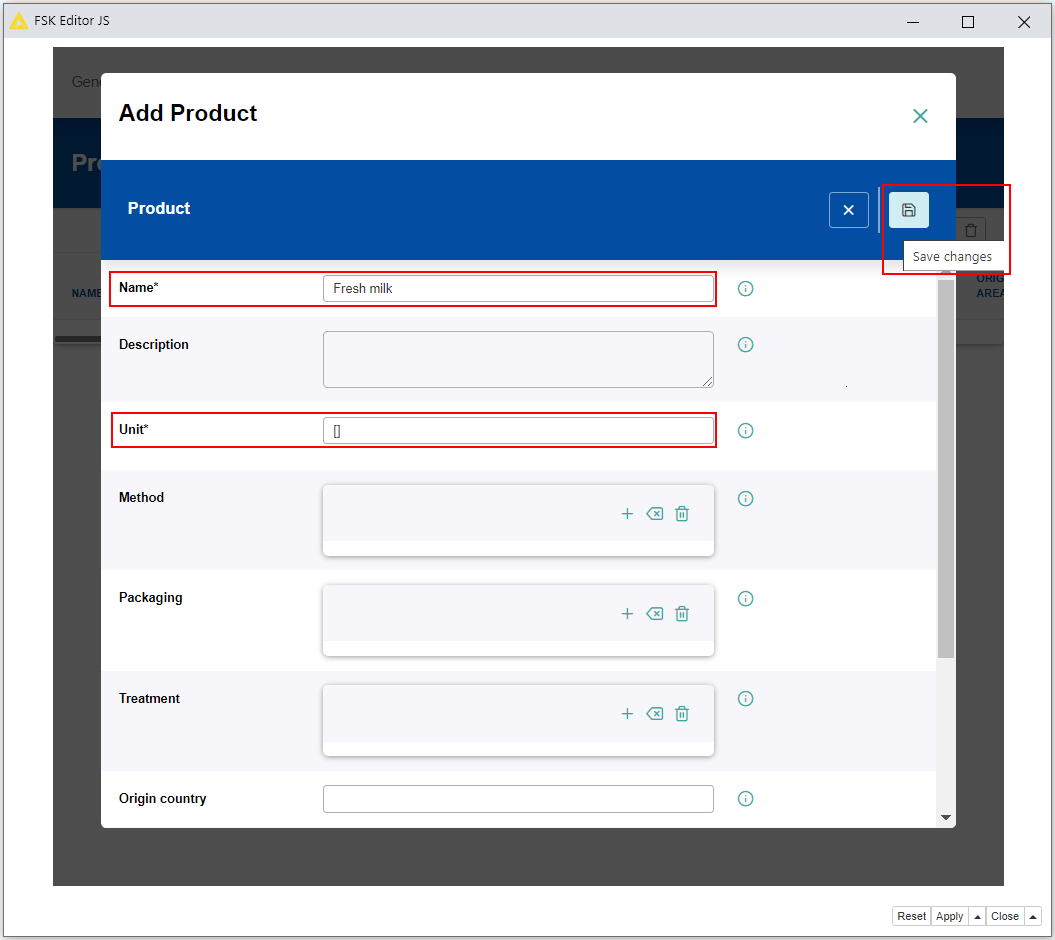
- Mandatory metadata fields: Name, Unit
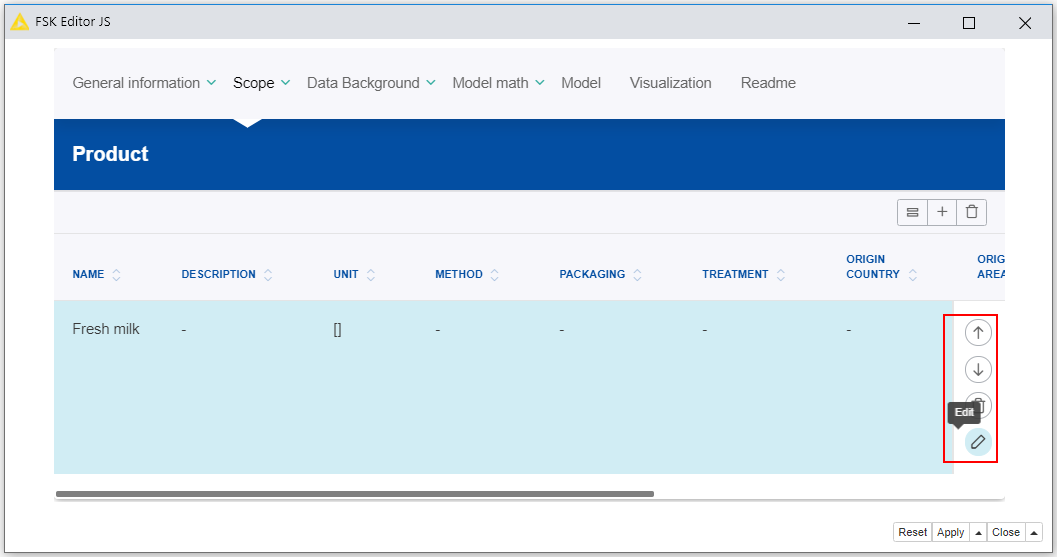
- After saving the metadata setting the new entry will appear in the corresponding metadata list
- An entry in a metadata list can be modified or deleted supsequently by clicking on the corresponding Edit or Trash button
- Also the order of the entries in a metadata list can be changed by clicking on the Move up or Move down buttons
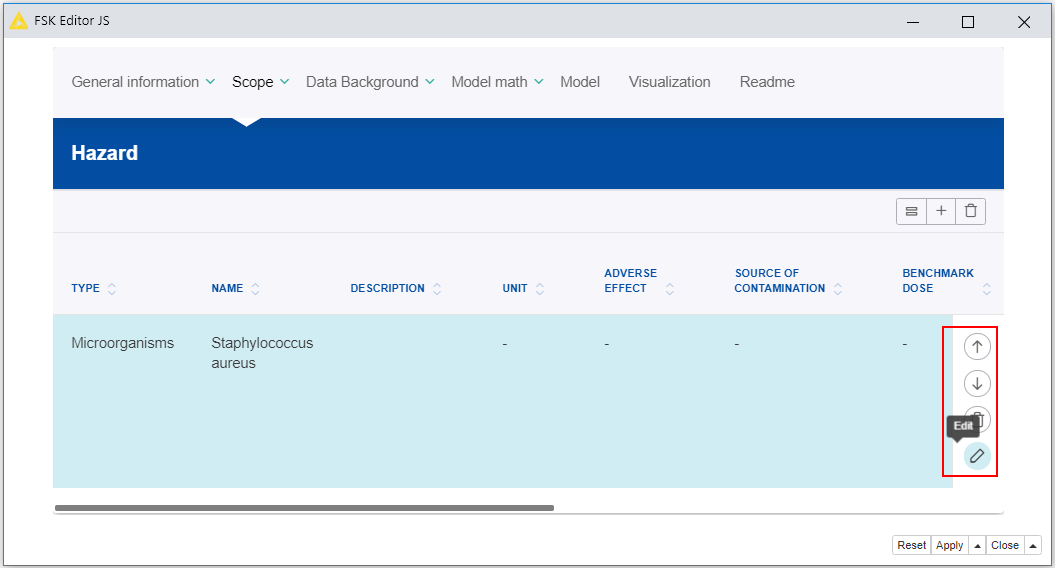
Scope → Hazard
- To provide metadata about the hazard(s), for which the model applies, is not mandatory
- In order to provide information, a set-up window for the metadata setting has to be opened by clicking on the Add a Hazard button (plus symbol)

- The new hazard setting should be saved by clicking on the Save changes button
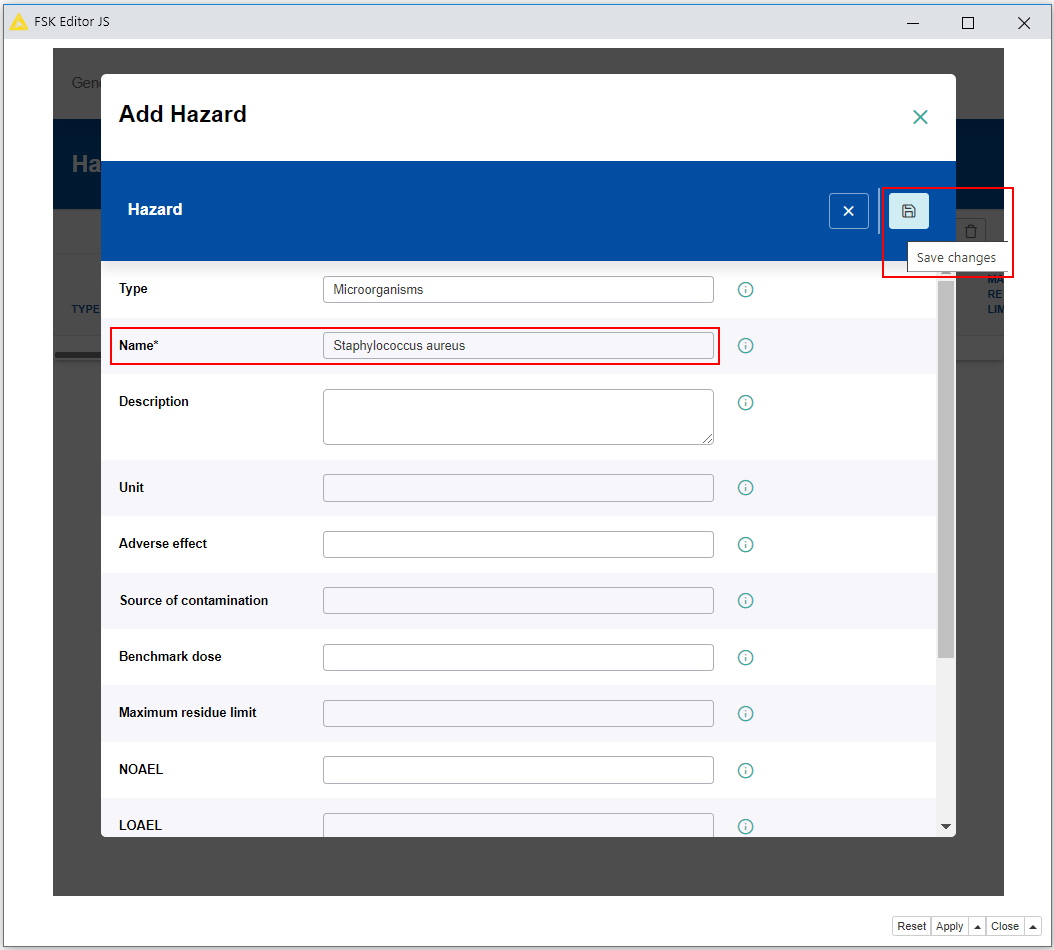
- Mandatory metadata fields: Name
- After saving the metadata setting the new entry will appear in the corresponding metadata list
- An entry in a metadata list can be modified or deleted supsequently by clicking on the corresponding Edit or Trash button
- Also the order of the entries in a metadata list can be changed by clicking on the Move up or Move down buttons
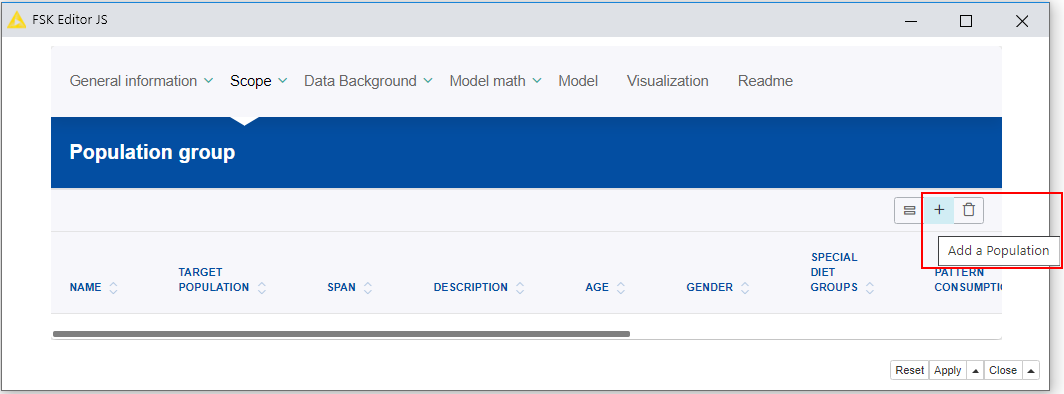
Scope → Population group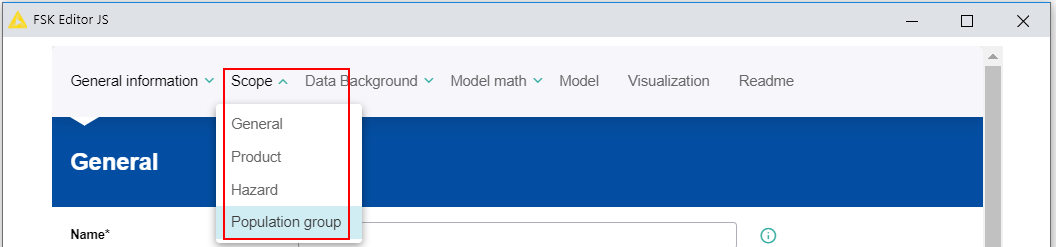
- To provide metadata about the population group(s), for which the model applies, is not mandatory
- In order to provide information, a set-up window for the metadata setting has to be opened by clicking on the Add a Population button (plus symbol)
- The new population setting should be saved by clicking on the Save changes button
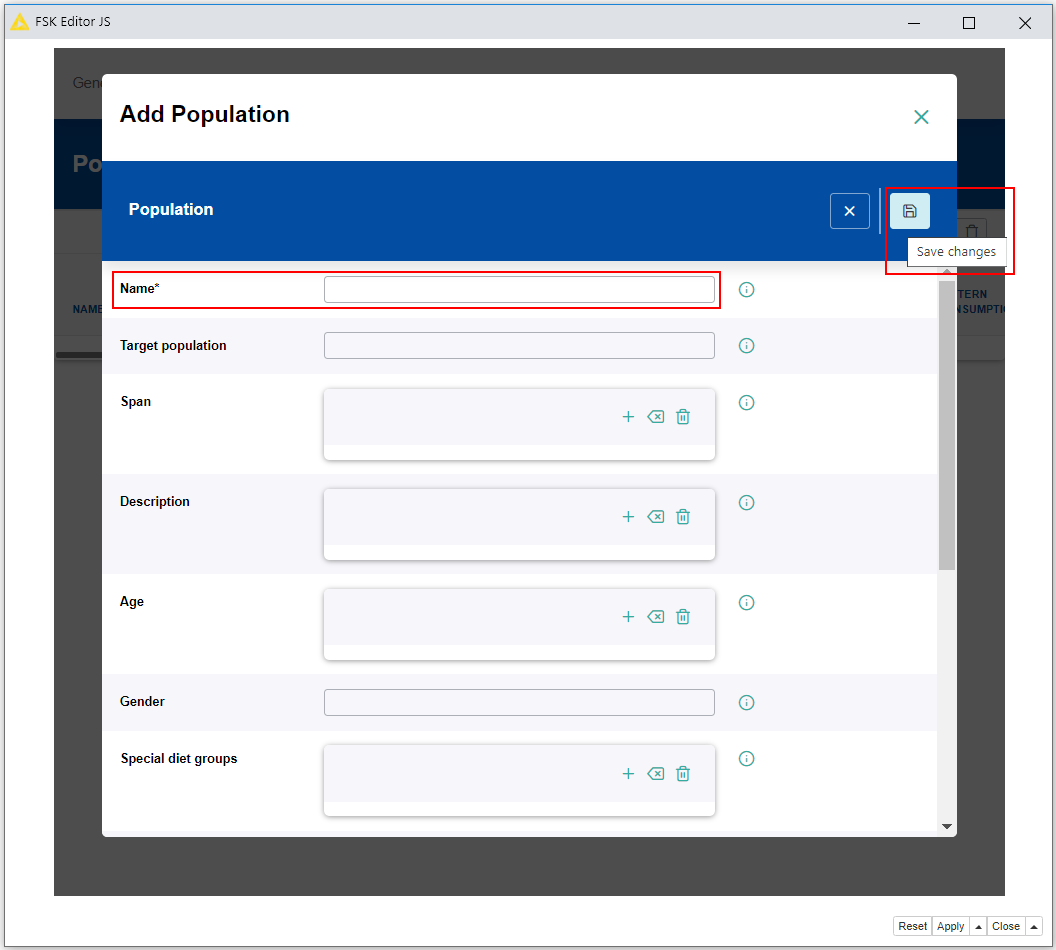
- Mandatory metadata fields: Name
- After saving the metadata setting the new entry will appear in the corresponding metadata list
- An entry in a metadata list can be modified or deleted supsequently by clicking on the corresponding Edith or Trash button
- Also the order of the entries in a metadata list can be changed by clicking on the Move up or Move down buttons
Data Background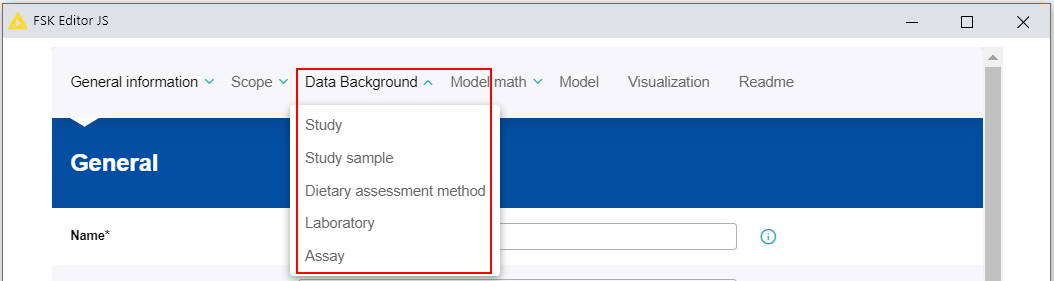
- To provide metadata about the data background of the model is not mandatory
- The main category “Data background” provides different tabs to describe the data background of the model
- On the tab “Study” different metadata fields are available to give information for example about the design, measurement, technology and protocol used within a study
- In addition, detailed metadata can be provided on further tabs like “Study sample”, “Dietary assessment method”, “Laboratory” and “Assay”
Model math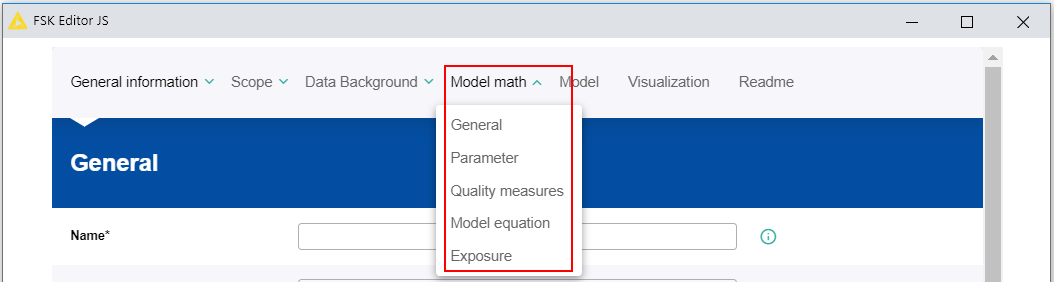
- To provide metadata regarding the description of the mathematical aspects of the model is not mandatory, except for the model parameters
- On the different tabs information can be added regarding the fitting procedure applied on the data (Model math → General), the quality measure like the mean squared error (Model math → Quality measures), the equations used within the model code (Model math → Model equation) and the handling of left-censored data (Model math → Exposure)
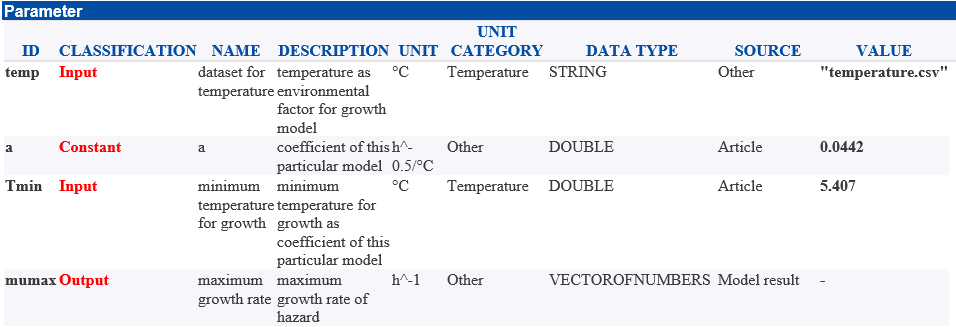
Model math → Parameter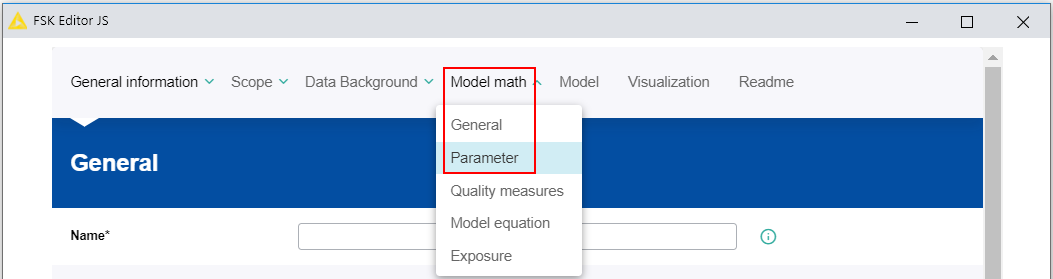
- A FSKX compliant model allows to create and execute different simulation scenarios
- Therefore, parameters have to be defined by the model creator
- These parameters are used as variables within the model code
- The parameters are classified as input (variable or constant) or output parameter
- Each input parameter has an initial value, that should be provided by the model creator, to generate the default simulation
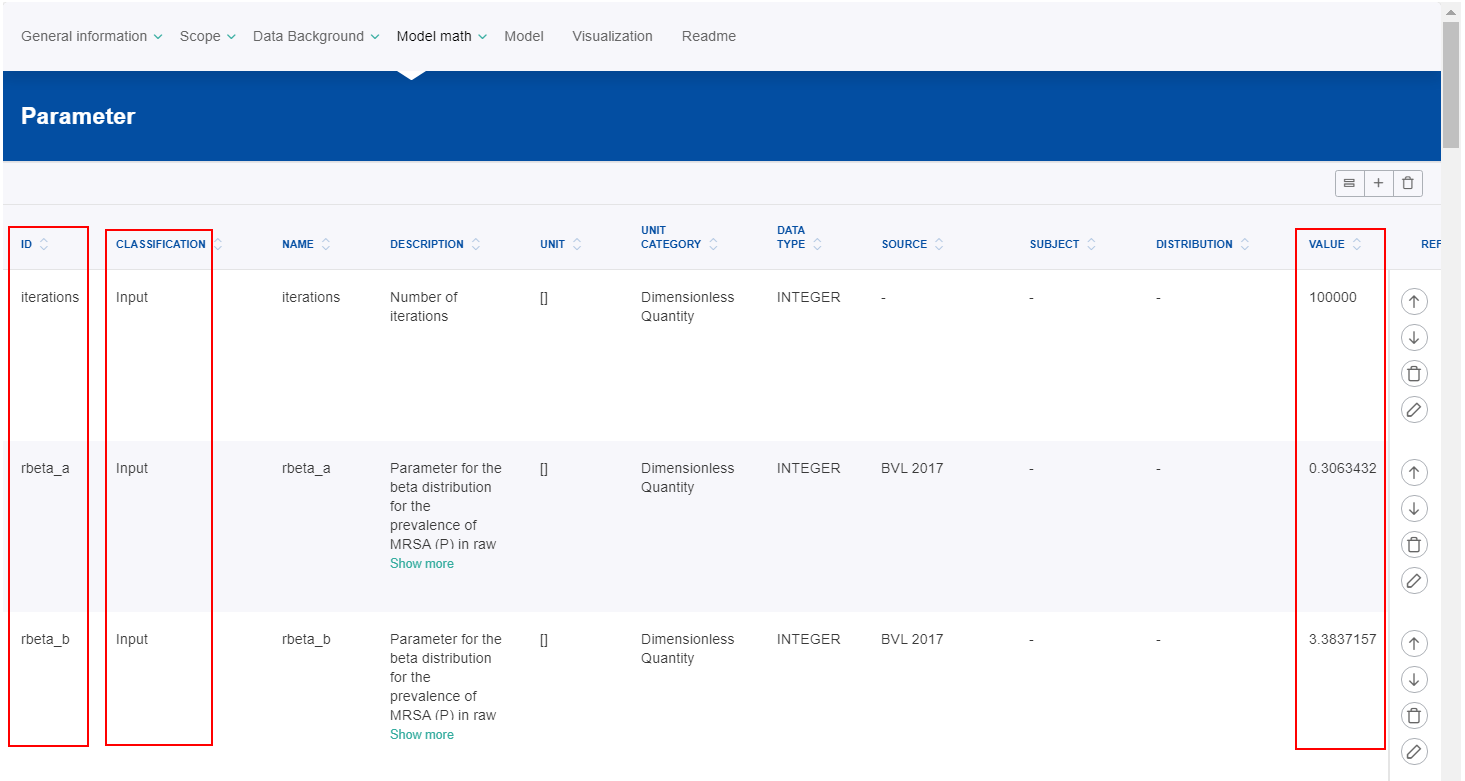
- In order to provide parameters, a set-up window for the metadata setting has to be opened by clicking on the Add a Parameter button (plus symbol)
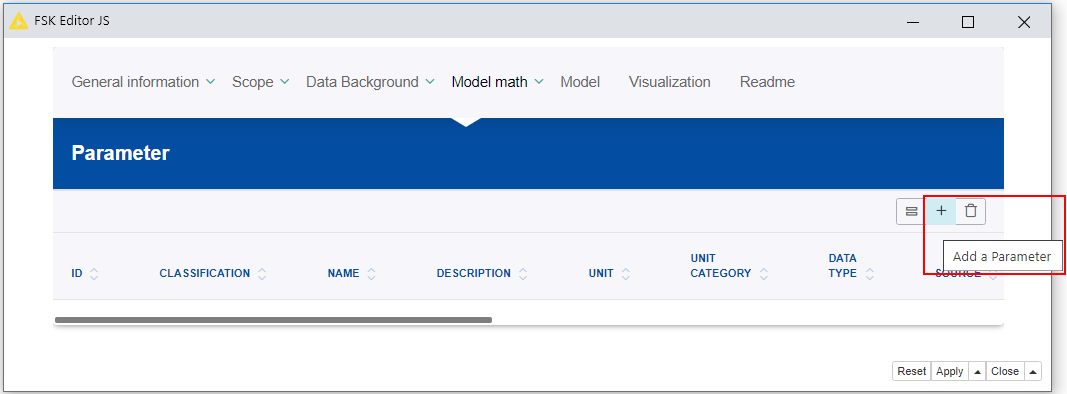
- The new parameter setting should be saved by clicking on the Save changes button
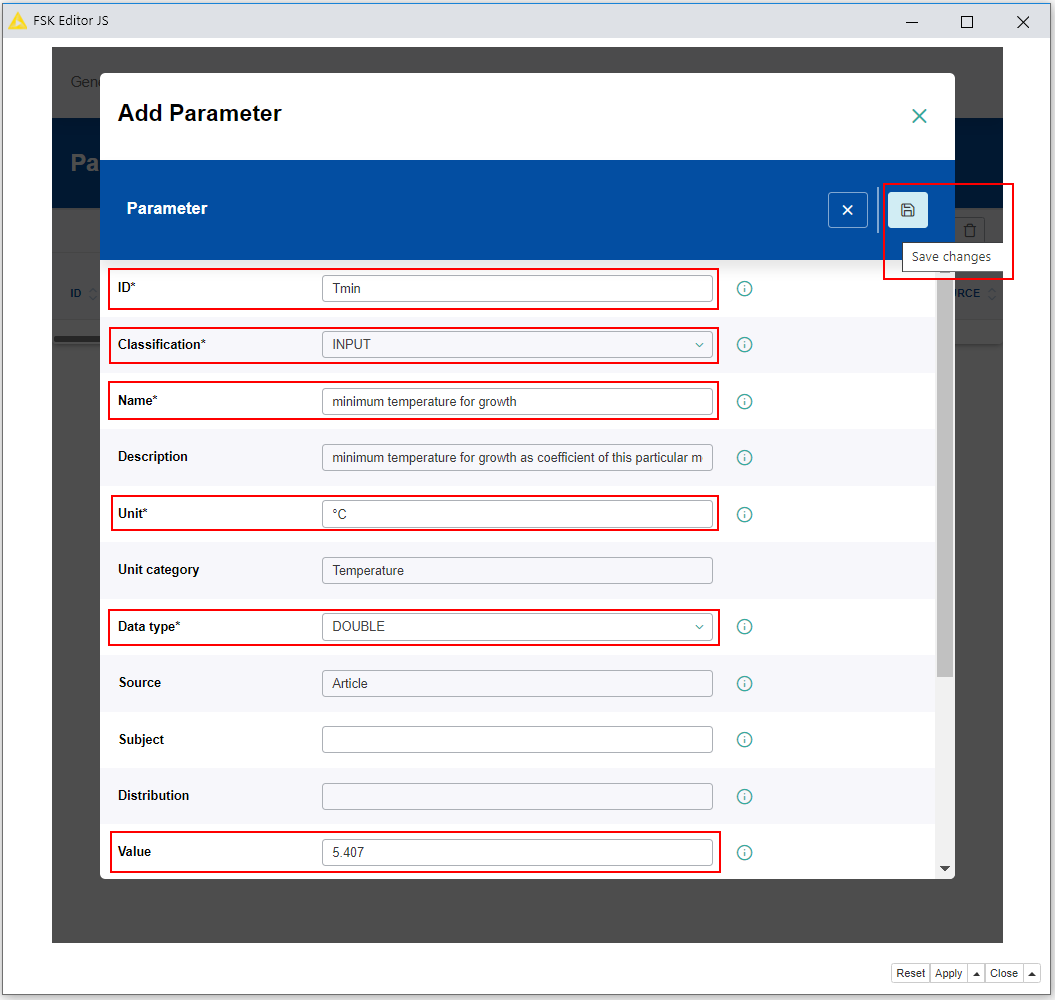
- Mandatory metadata fields: ID, Classification, Name, Unit, Data type, Value (for all parameters classified as “Input” and “Constant”)
- After saving the metadata setting the new entry will appear in the corresponding metadata list.
- An entry in a metadata list can be modified or deleted supsequently by clicking on the corresponding Edit or Trash button
- Also the order of the entries in a metadata list can be changed by clicking on the Move up or Move down buttons
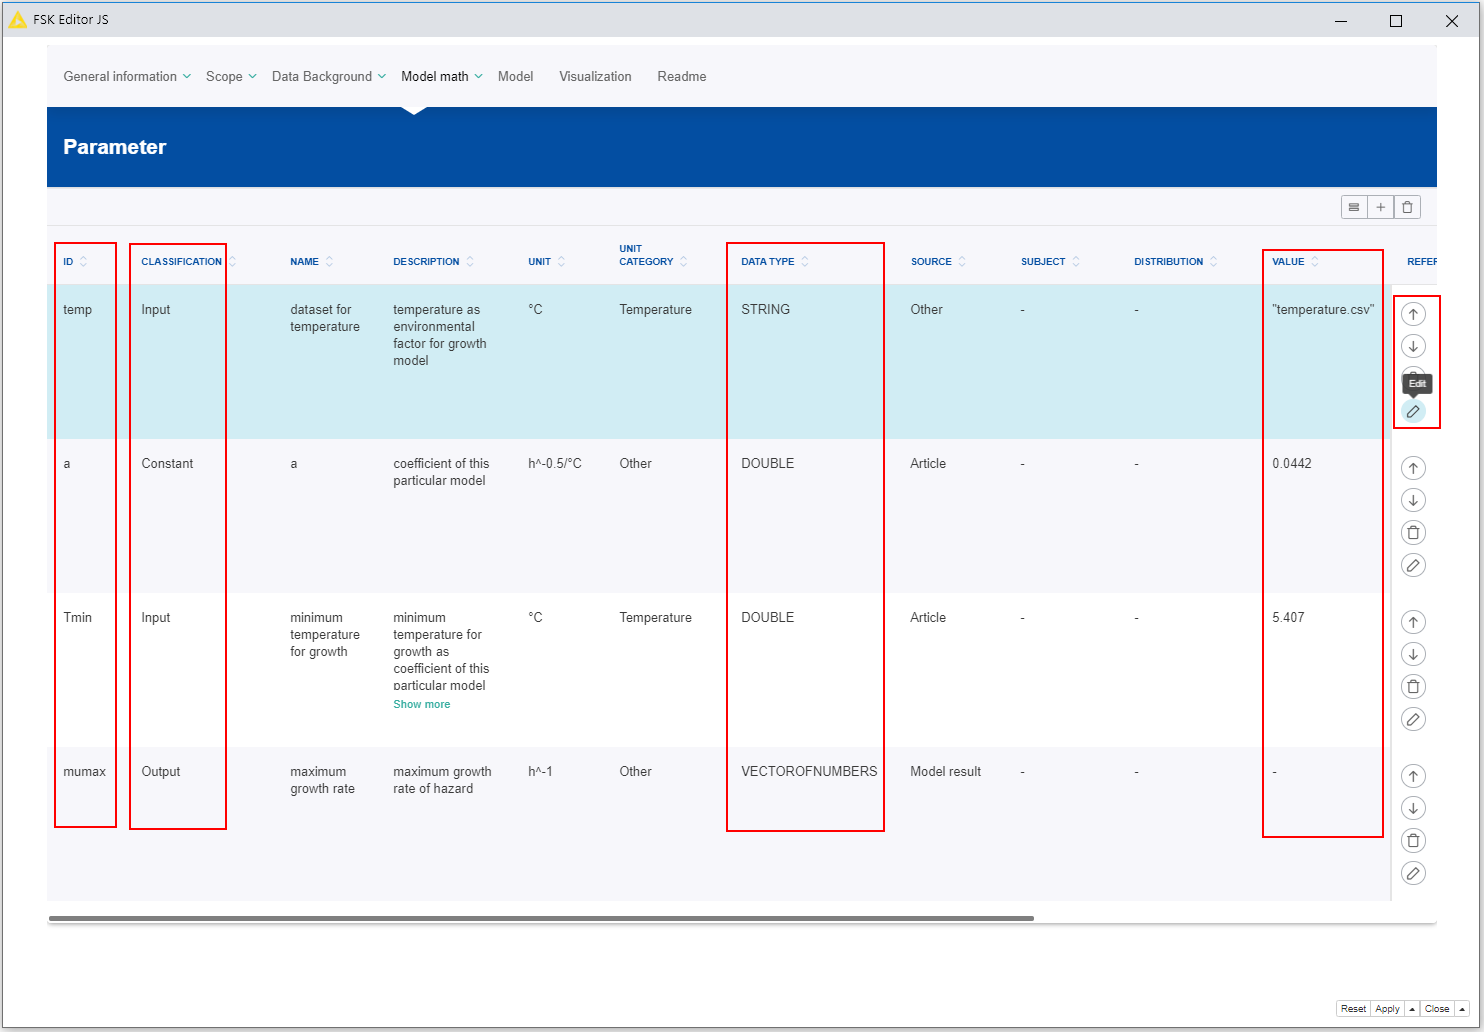
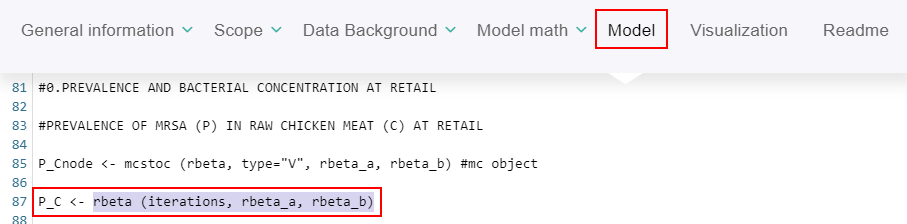
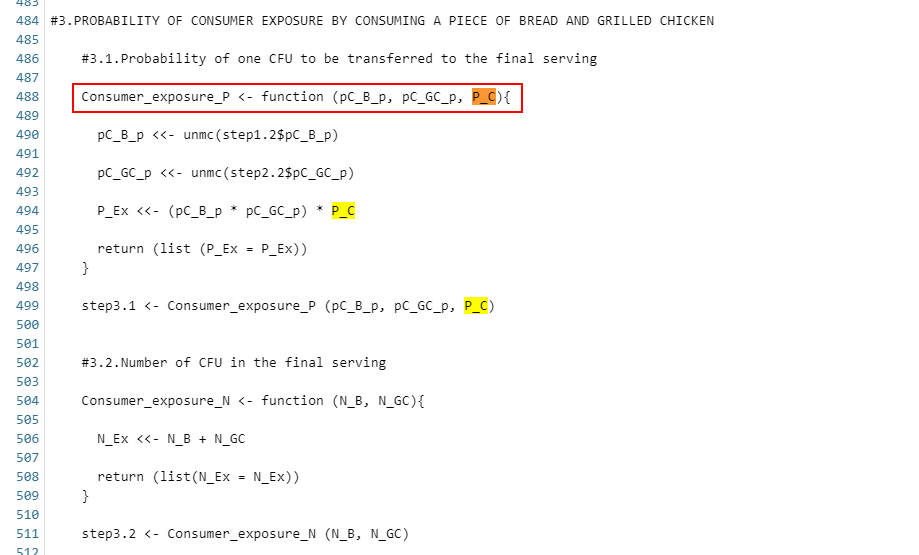
- The parameter IDs should be used as names of the variables within the model code
- The values of the parameters which are classified as “Input” can be adjusted in further simulation settings in order to create additional simulation scenarios
- The values of parameters which are classified as “Constant” cannot be modified regarding additional simulation scenarios
- The parameter data type is important for software tools interpreting the metadata and generate user interfaces for parameter input
- For all input parameters (variable and constant) an initial value has to be provided to generate the default simulation
- The value of the output parameters will be calculated during the model execution
Model
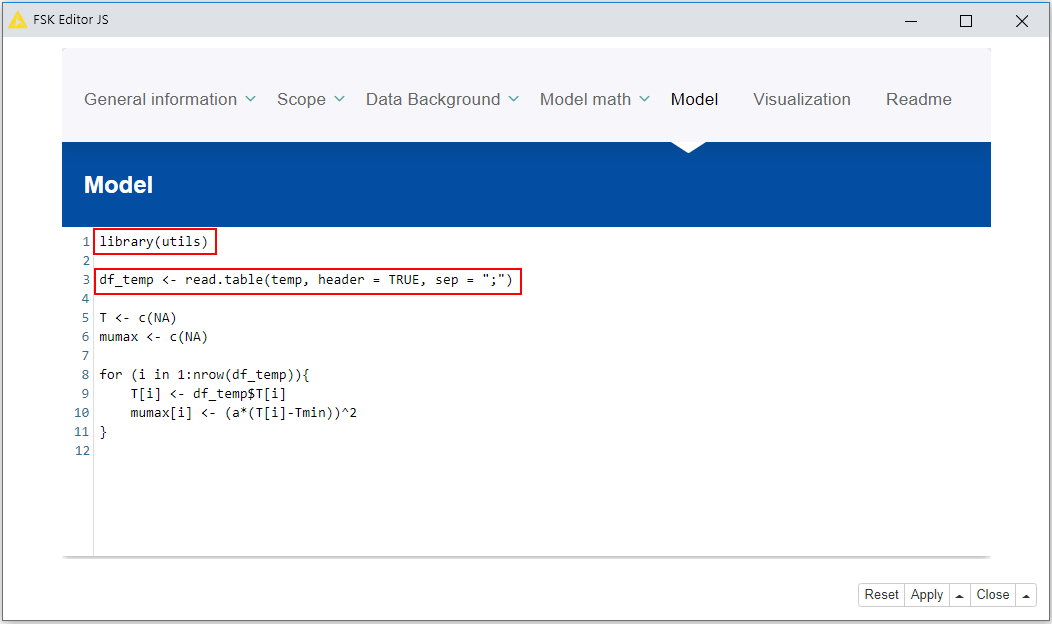
- The code for the mathematical model should be provided on the tab “Model”
- FSKX compliant models are based on script languages. For FSK-Lab v.2.0 (used in FSK-Web 1.0 ) the supported script languages are:
- R (BfR default: 3.4.4)
- Python 2 (BfR default: 2.7.13)
- Python 3 (BfR default: 3.5.3)
- Functions to load packages of the script language and to read in resource files (e.g. datasets) should be provided within the model script
- Examples:
- R
- library(utils)
- read.table()
- Python
- import pandas
- pandas.read_table()
- R
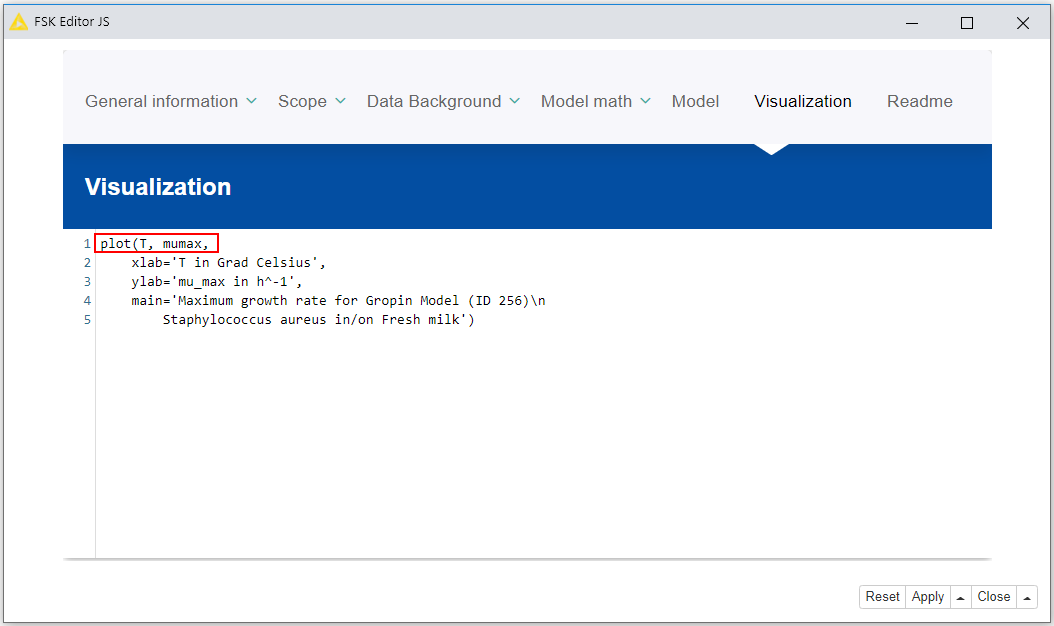
Visualization
- The code for the visualization of the model result (a plot and/or a table) should be provided on the tab “Visualization”
- FSKX compliant models are based on script languages. For FSK-Lab v.2.0 (used in FSK-Web 1.0 ) the supported script languages are:
- R (BfR default: 3.4.4)
- Python 2 (BfR default: 2.7.13)
- Python 3 (BfR default: 3.5.3)
- FSK-Lab v.2.0 (used in FSK-Web 1.0) supports the R package base plots and ggplot2 and the Python package matplotlib.pyplot for plotting or creating graphics
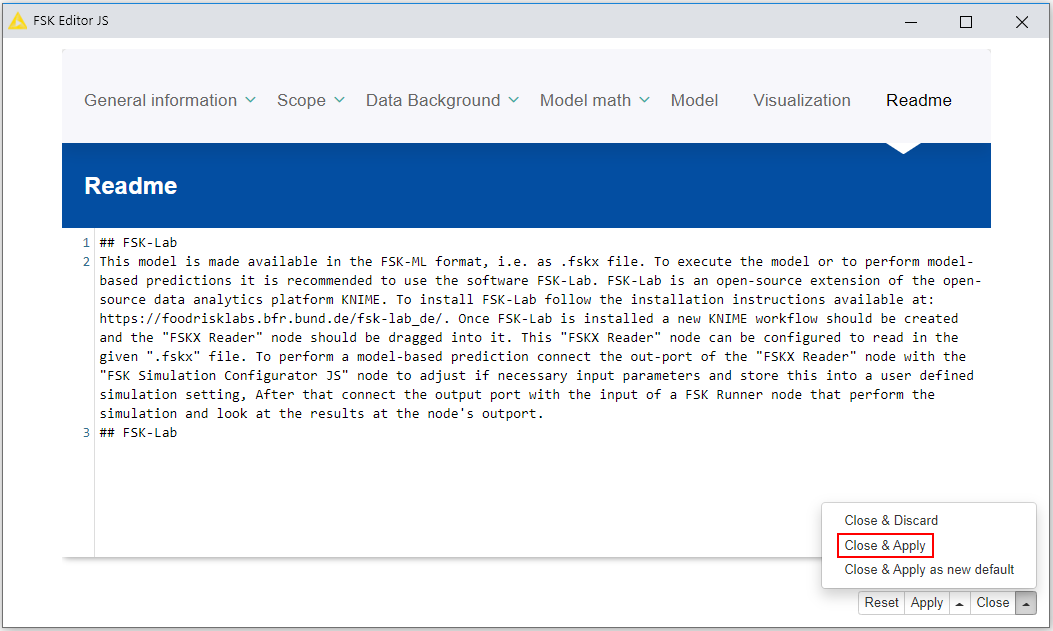
Readme
- The tab Readme should detail how the model code can be executed and which software tools and libraries (including version identifier) have to be installed within the required software
- The tab should also be used to provide information for the end users helping them to understand the mode if there is no other suitable metadata field available for that
- After the provisioning of all necessary metadata and scripts is completed in order to create the model the GUI of the FSK Editor JS node can be closed and the defined settings of the model saved by clicking on Close and Apply
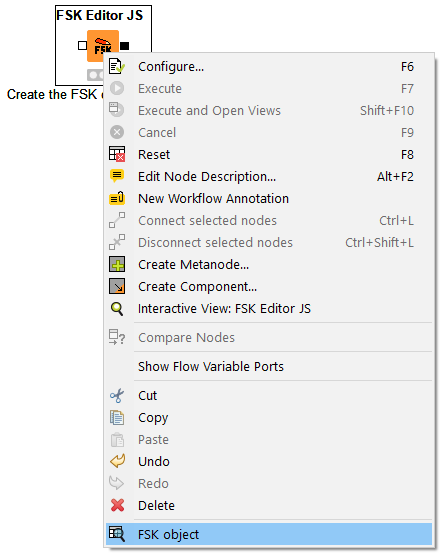
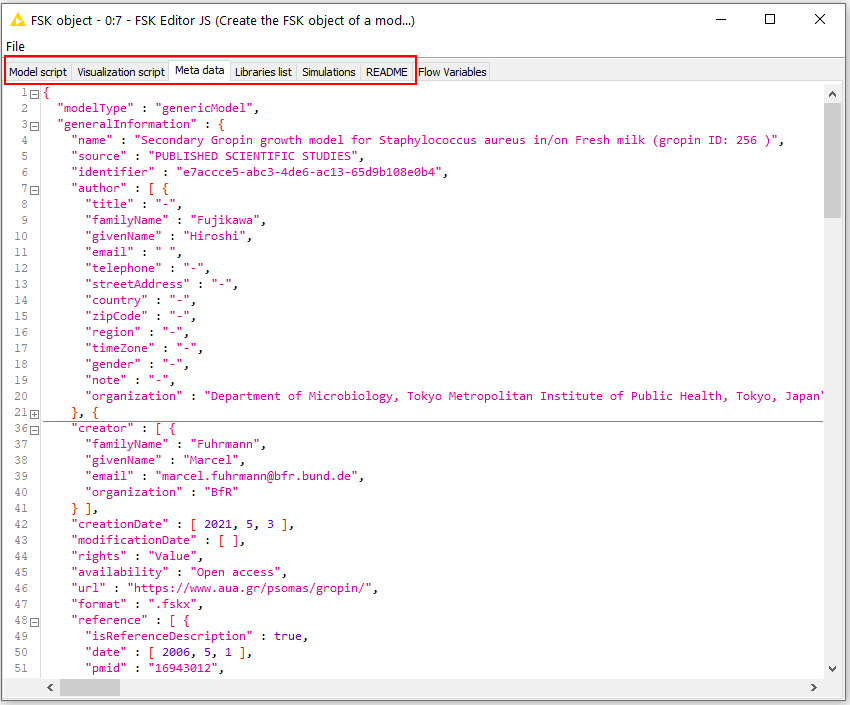
- The FSK objects containing the metadata and scripts of the models can be viewed at the output port of the FSK Editor JS nodes by selecting the option FSK object from the node context menu
2
Create a new simulation setting
- A FSKX compliant model allows to create different simulation scenarios
- Therefore, parameters are defined
- These parameters are used as variables within the model code
- The parameters are classified as input or output parameter
- There are two types of input parameters: variable and constant input parameter
- Each input parameter has an initial value, provided by the model creator, to generate the default simulation
- The values of the variable input parameters can be adjusted in order to create additional simulation scenarios
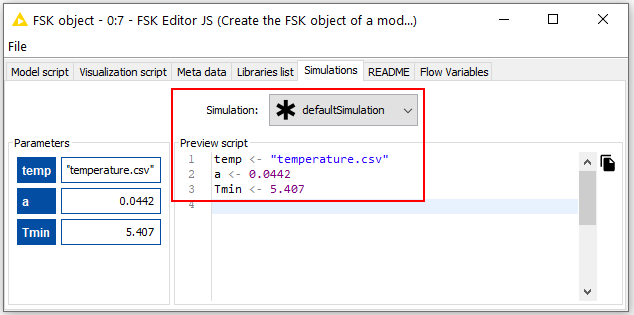
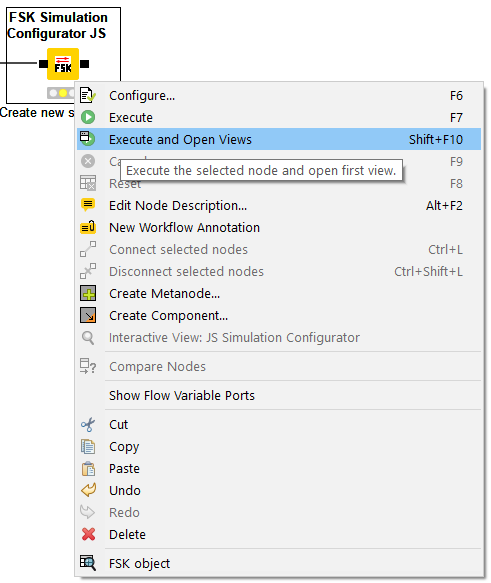
- A new simulation setting can be created by using the FSK Simulation Configurator JS node
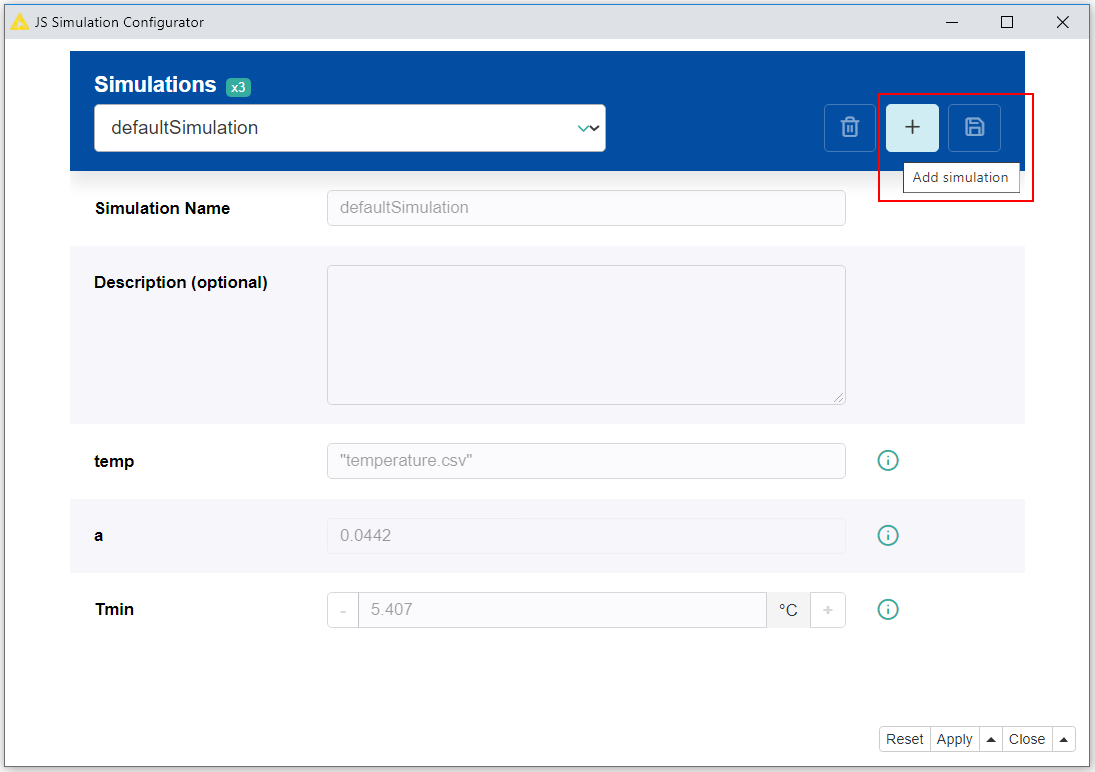
- By selecting the option Execute and Open Views from the node context menu (right click on the node) a new window will open with a GUI that allows to review predefined simulation settings like the default simulation and to add new simulation scenarios
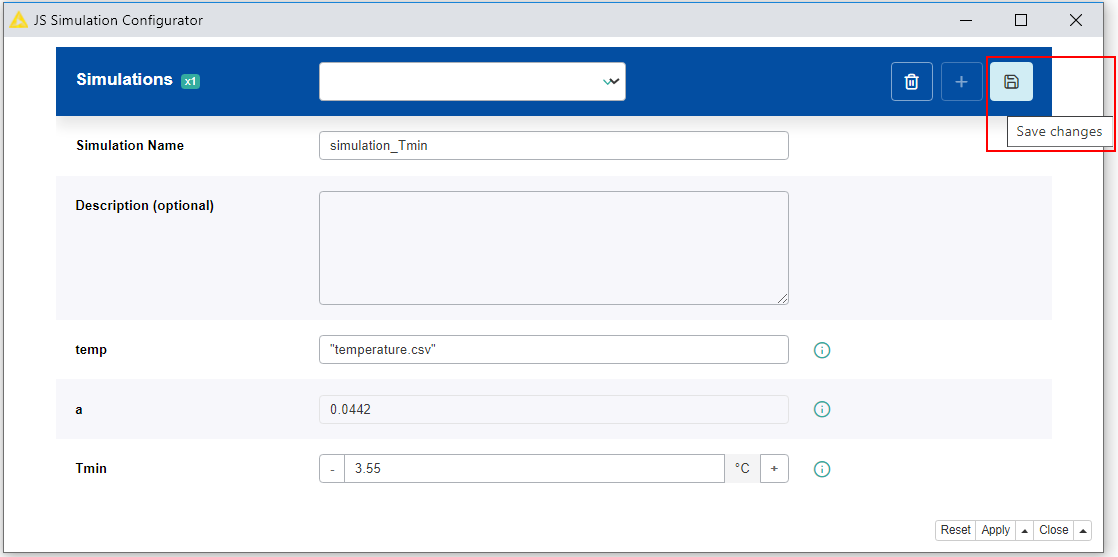
- A new simulation setting can be added by clicking on the Add simulation button
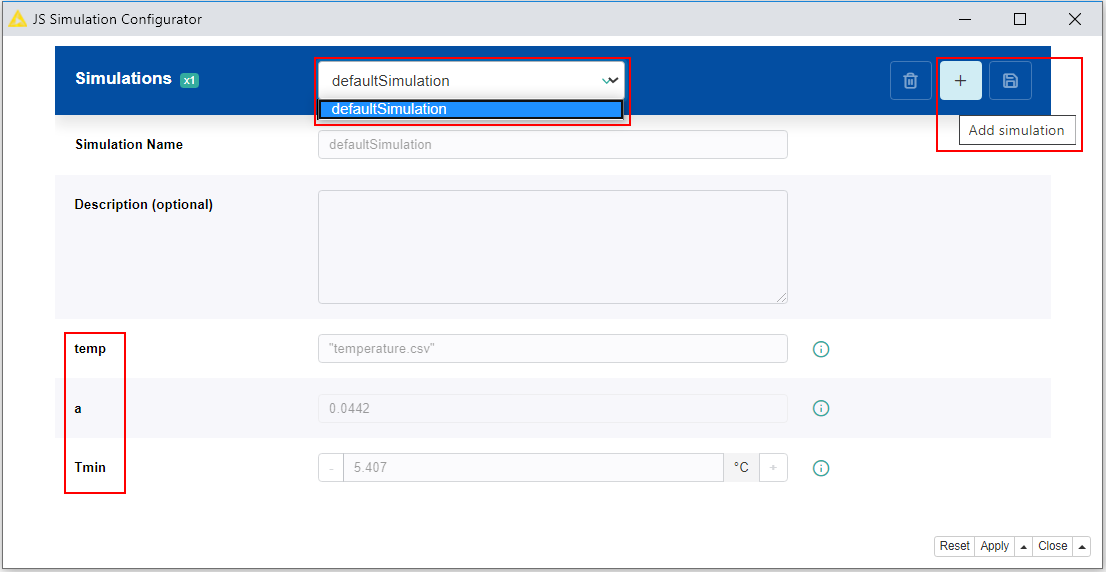
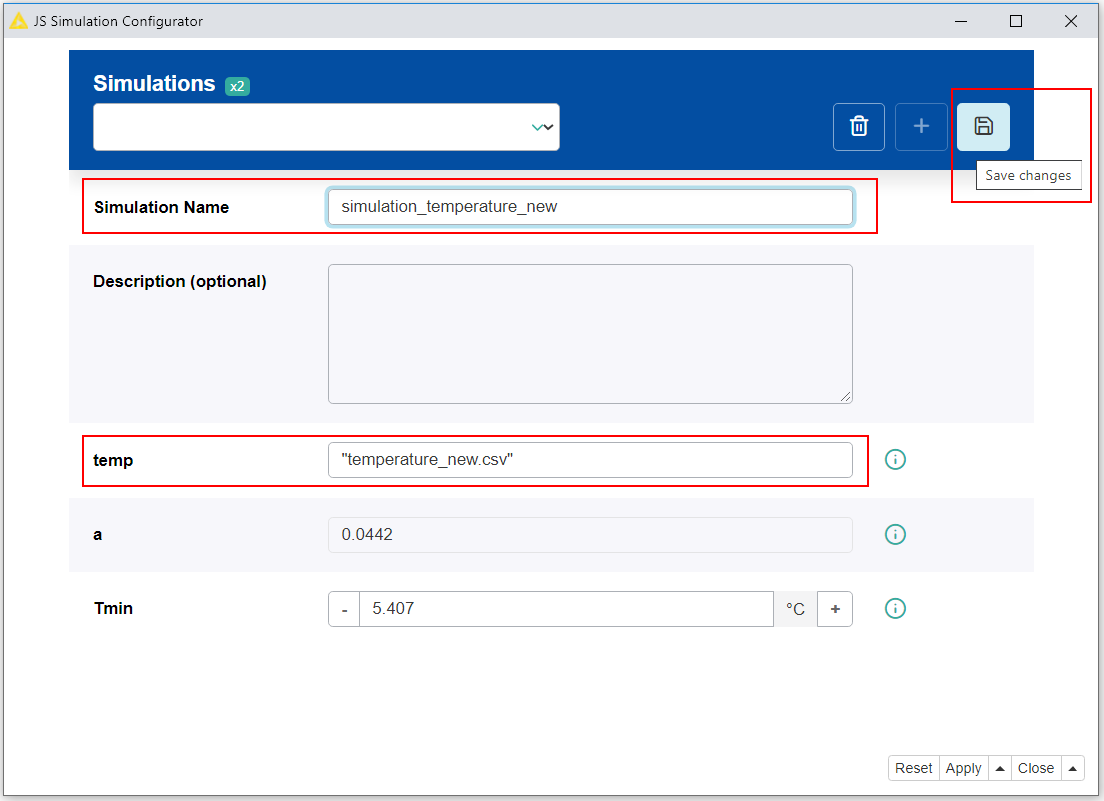
- For each new simulation setting a name has to be given
- The values of the parameters can be adjusted according to the scenario of interest
- It is possible that a range of valid values is predefined for a parameter based on a minimum and a maximum value
- Note: values of parameters which are classified as constant, cannot be modified
- To support the user in designing a new simulation, further information of every parameter is displayed when clicking on the corresponding i symbol
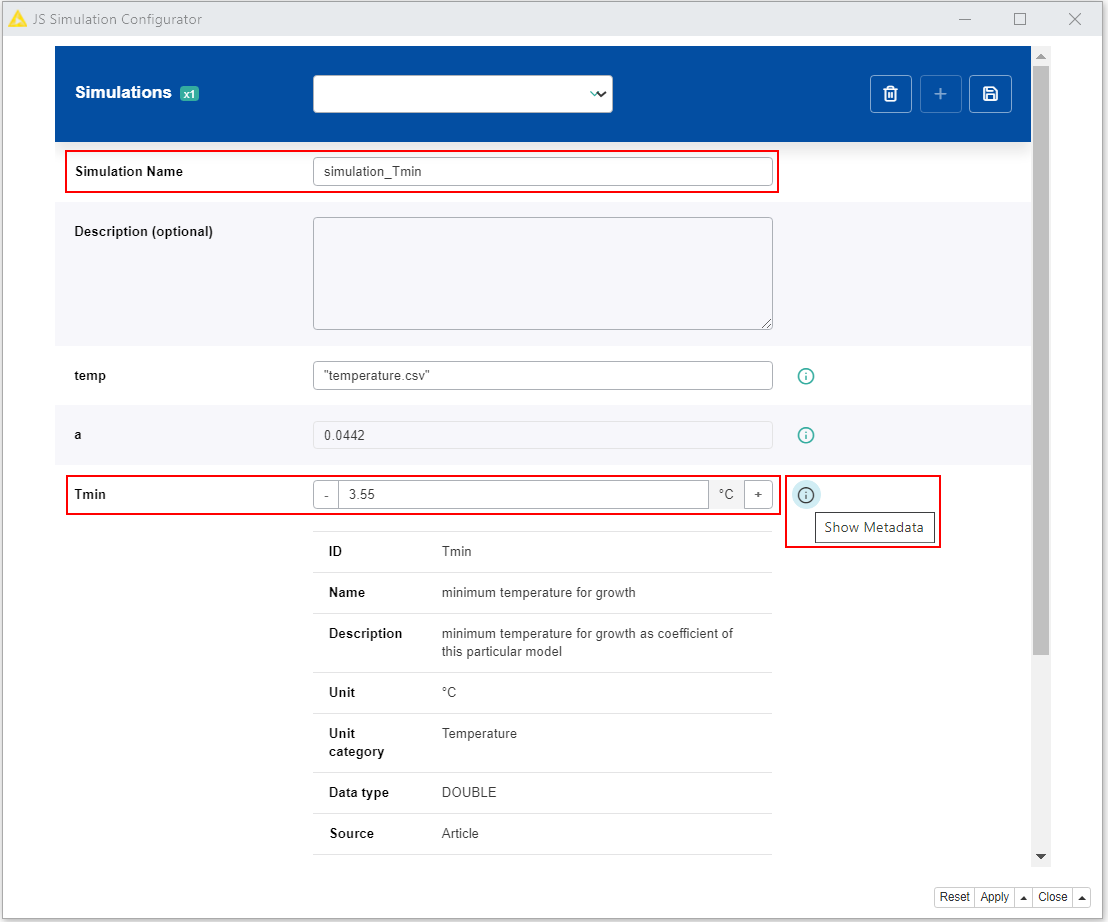
- The newly created simulation setting has to be saved by clicking on the Save changes button
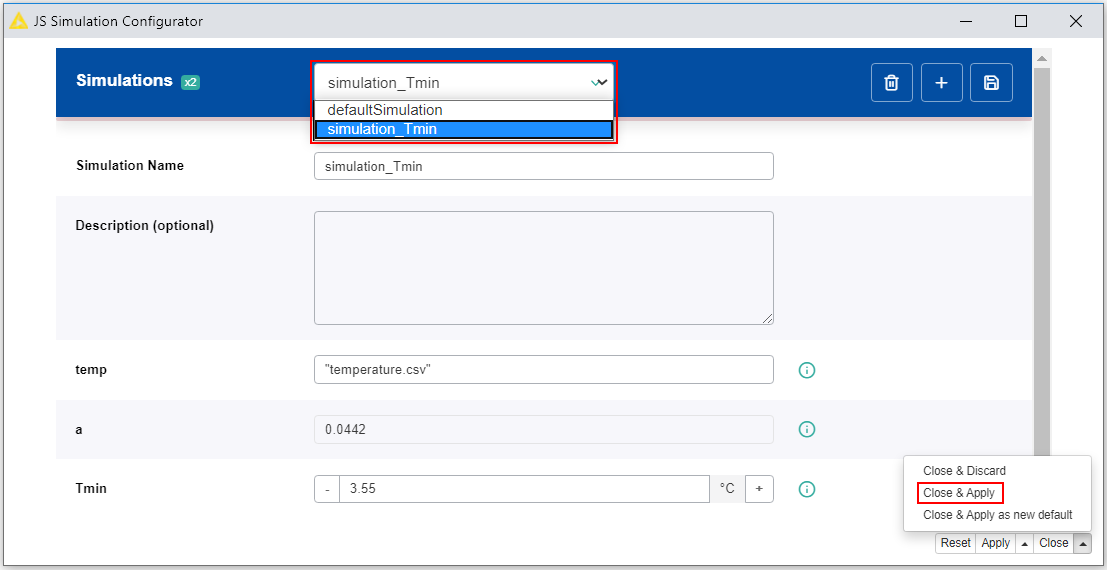
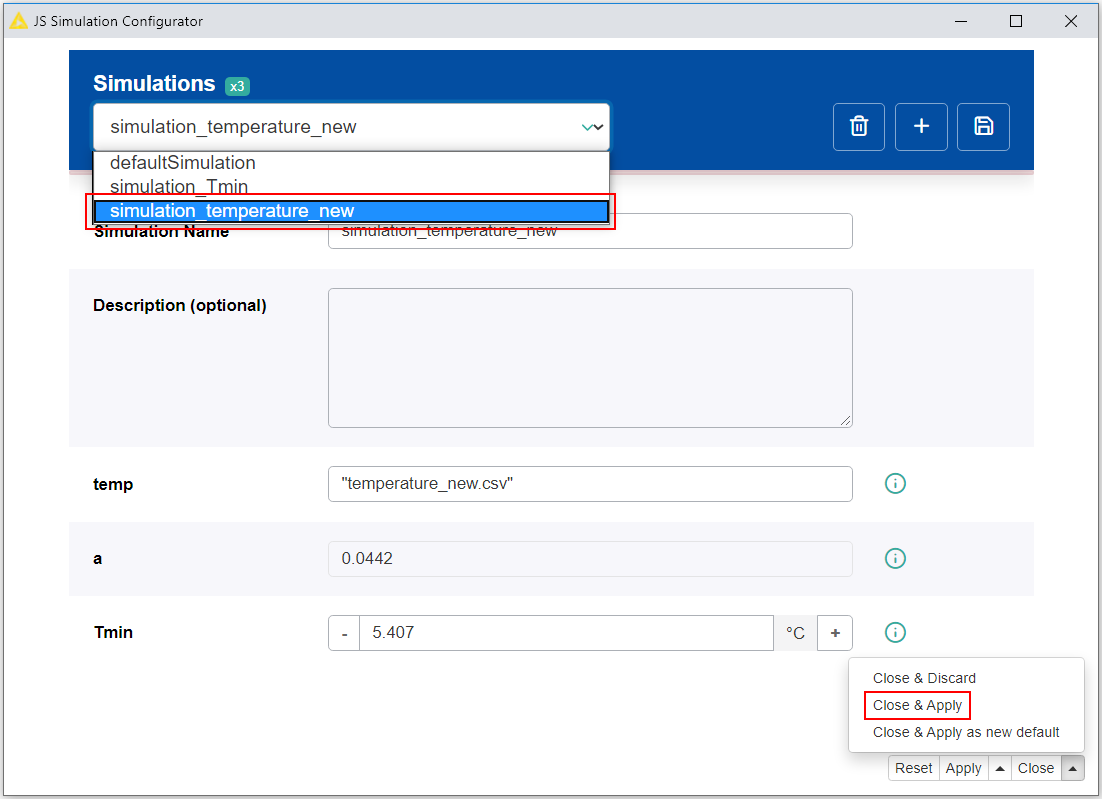
- The simulation selected in the view of the drop-down menu is set as simulation to be executed
- The GUI of the FSK Simulation Configurator JS node can be closed and the selection of the simulation for execution saved by clicking on Close and Apply
Note
- A FSKX compliant model allows to perform Monte Carlo simulation (example reference 10.5281/zenodo.4713653)
- The following steps are required regarding the creation of a model using Monte Carlo simulation
- Define parameters for the number of iterations and for the domain of possible inputs
- Provide code in the model script to generate inputs randomly from a probability distribution over the defined domain
- These inputs can be further used to perform deterministic computation of interest
- Define parameters for the number of iterations and for the domain of possible inputs
3
Execute the model with a selected simulation setting
- A FSKX compliant model can be executed by using the FSK Runner node
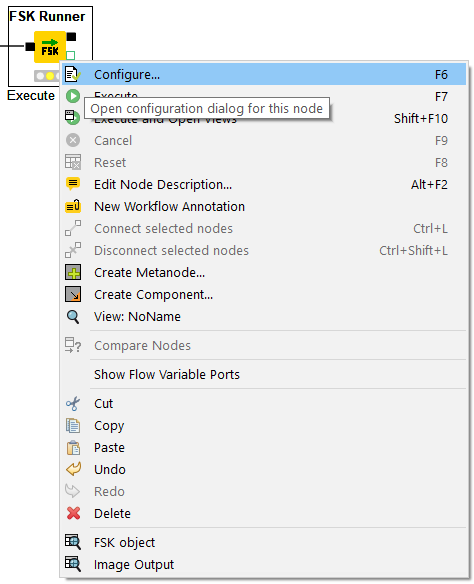
- First the FSK Runner node can be configured by opening the node context menu (right click on the node) and selecting the option Configure
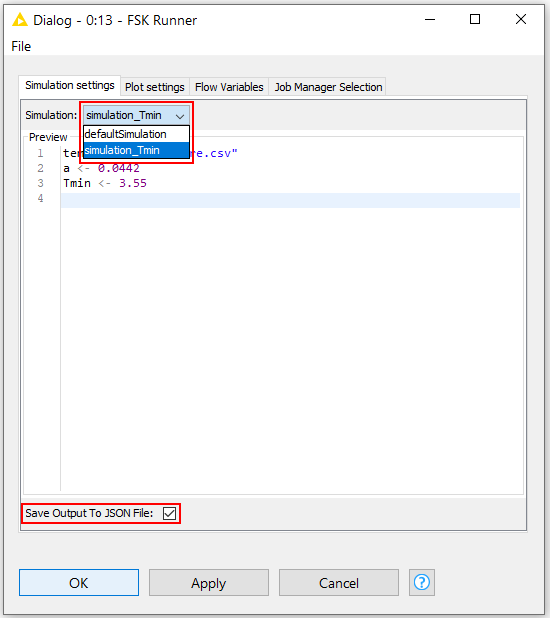
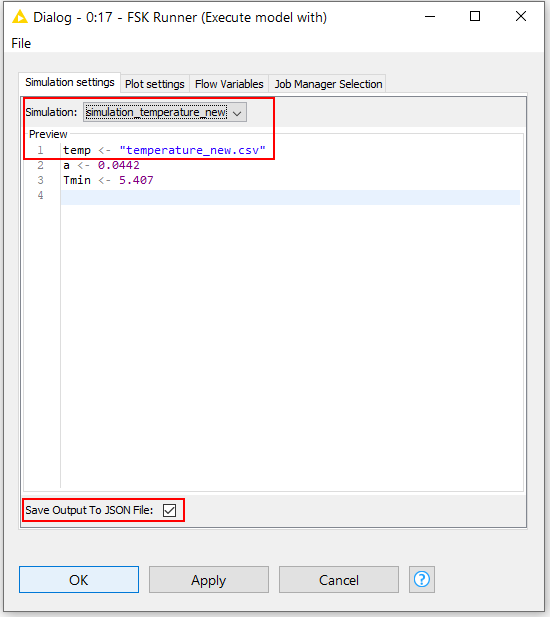
- In the configuration dialog, a predefined simulation scenario can be selected for execution from the drop-down menu (defaultSimulation, additional simulation settings)
- If desired the output of the model can be saved to a JSON file by ticking the corresponding box
- In order to apply the execution settings, close the configuration dialog by clicking OK
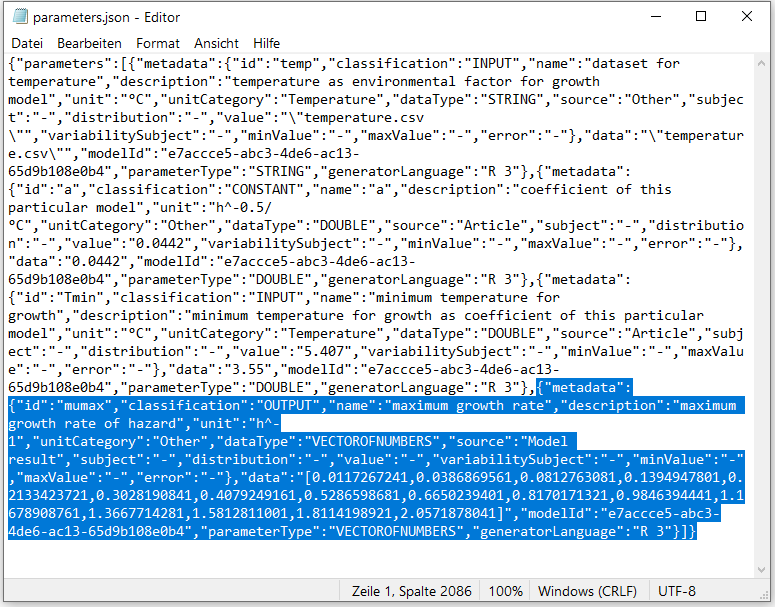
- The JSON file parameters.json, generated after the execution of the FSK Runner node, will contain a list of all input and output parameters with their corresponding values
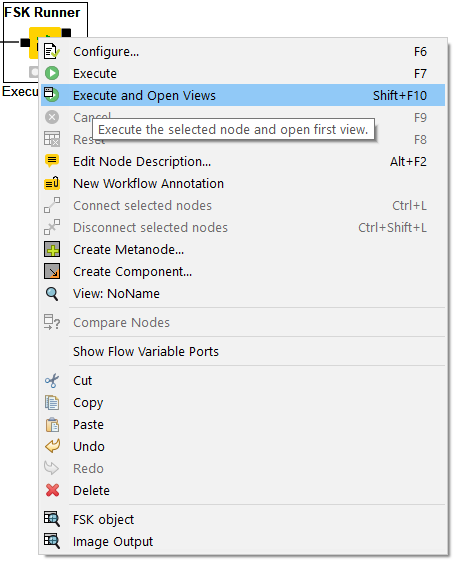
- The FSK Runner node can be now executed by selecting the option Execute and Open Views from the node context menu
- The plot of the model result, generated based on the visualization script, will be shown in a pop-up window (Image output)
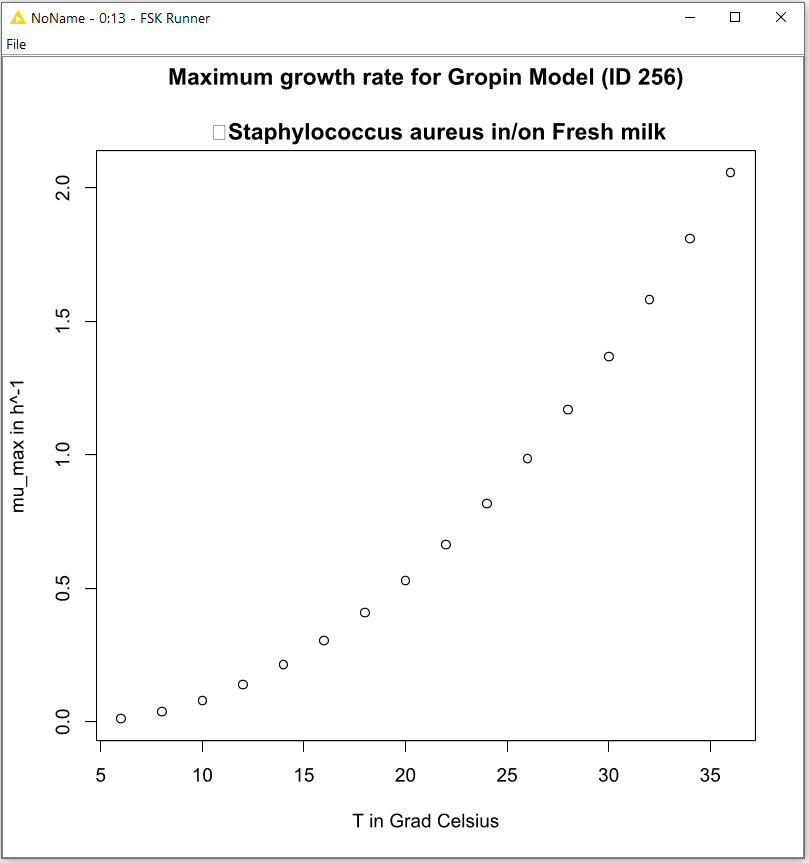
- The model results will be stored in a R workspace if the model script is provided in the programming language R
4
Write the FSK object of the model with simulation results into FSKX file
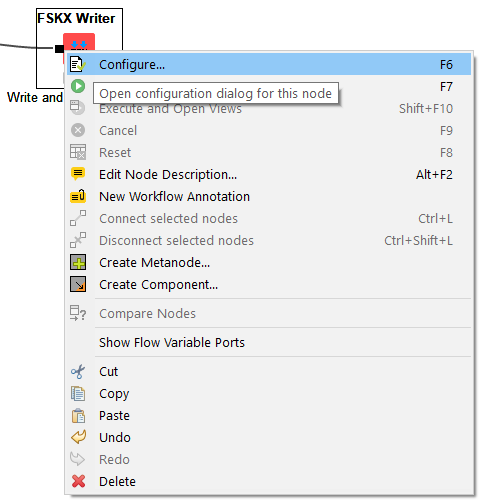
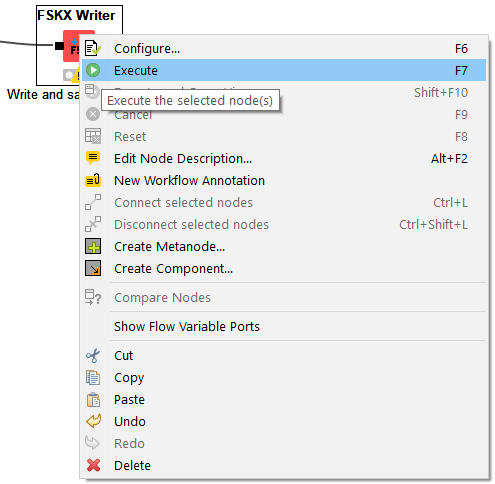
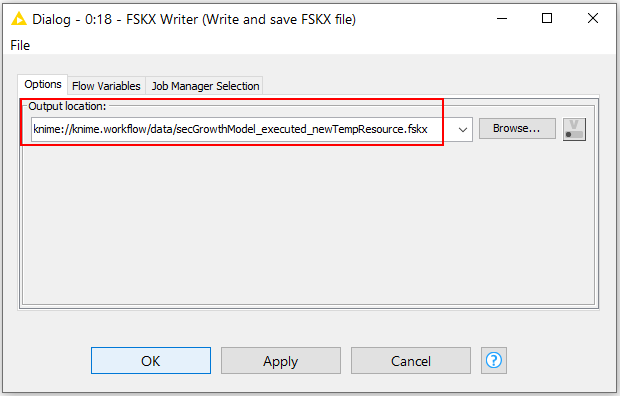
- First the FSKX Writer node should be configured by opening the node context menu (right click on the node) and selecting the option Configure
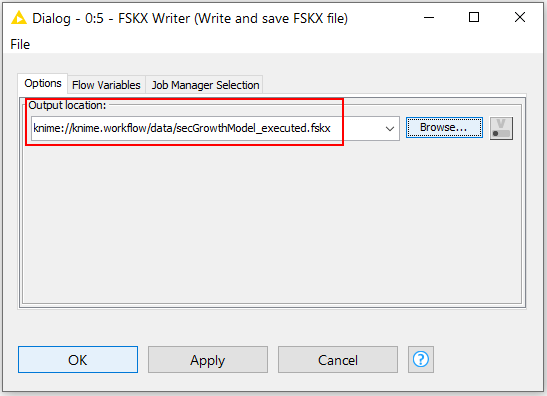
- In the configuration dialog, define the file path by clicking the Browse button in order to provide an output location and a name for the FSKX file of the model
- The FSKX file can be stored inside the current workflow data area (e.g. C:/knime-workspace/workflow/data/modelname.fskx), so that the KNIME URL knime://knime.workflow/data/modelname.fskx could be used as output location for the model
- In order to apply the file path settings, close the configuration dialog by clicking OK
- The FSKX Writer node can be now executed by selecting the option Execute from the node context menu
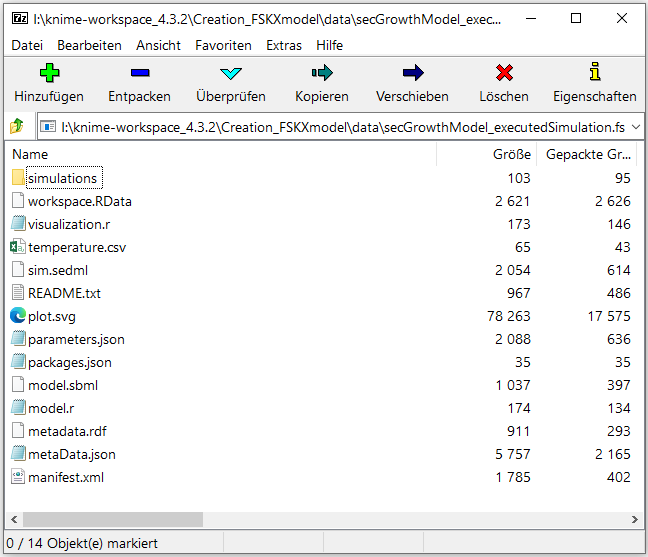
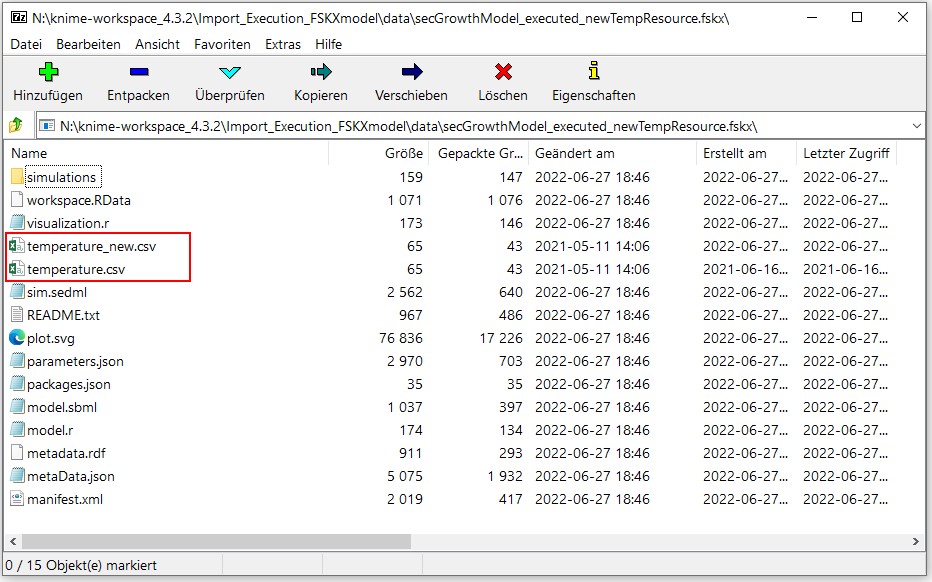
- The harmonized file format FSKX is a ZIP container which includes all necessary files for the annotation and execution of the model (model metadata and model code)
5
Addition of resource file to an existing FSKX model
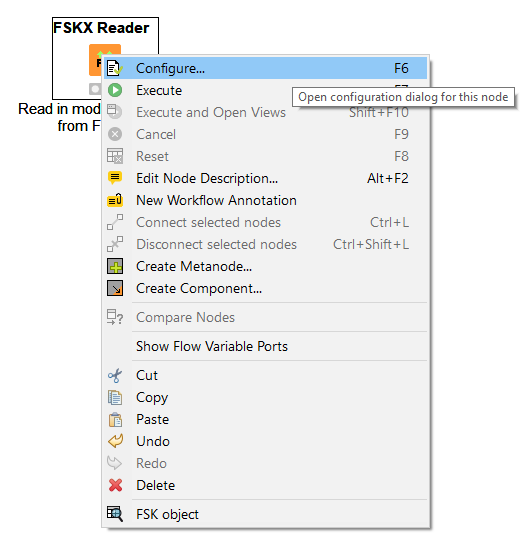
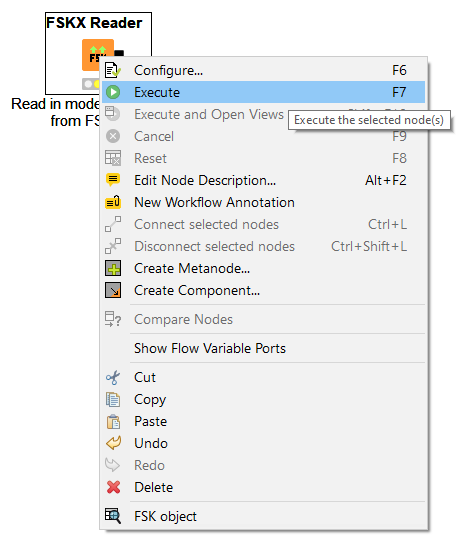
- First the FSKX Reader node should be configured by opening the node context menu (right click on the node) and selecting the option Configure
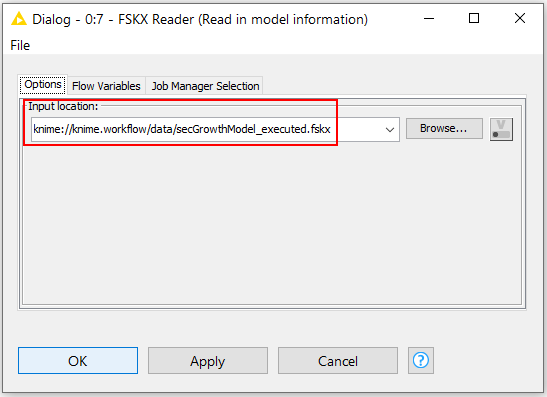
- In the configuration dialog, define the file path by clicking the Browse button in order to provide the input location for the FSKX file of the model
- In order to apply the file path settings, close the configuration dialog by clicking OK
- The FSKX Reader node can be now executed by selecting the option Execute from the node context menu
- Connect an FSK Editor node to the FSKX Reader node
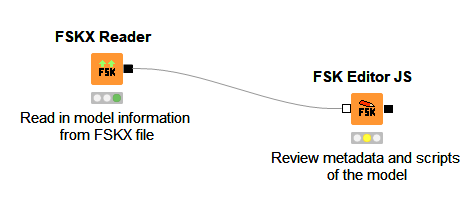
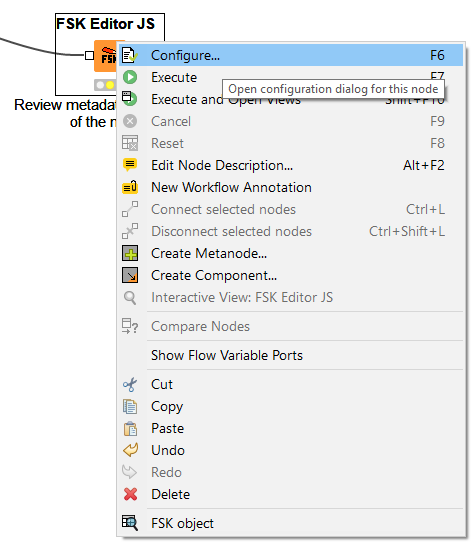
- Open the node context menu of the FSK Editor node and select the option Configure
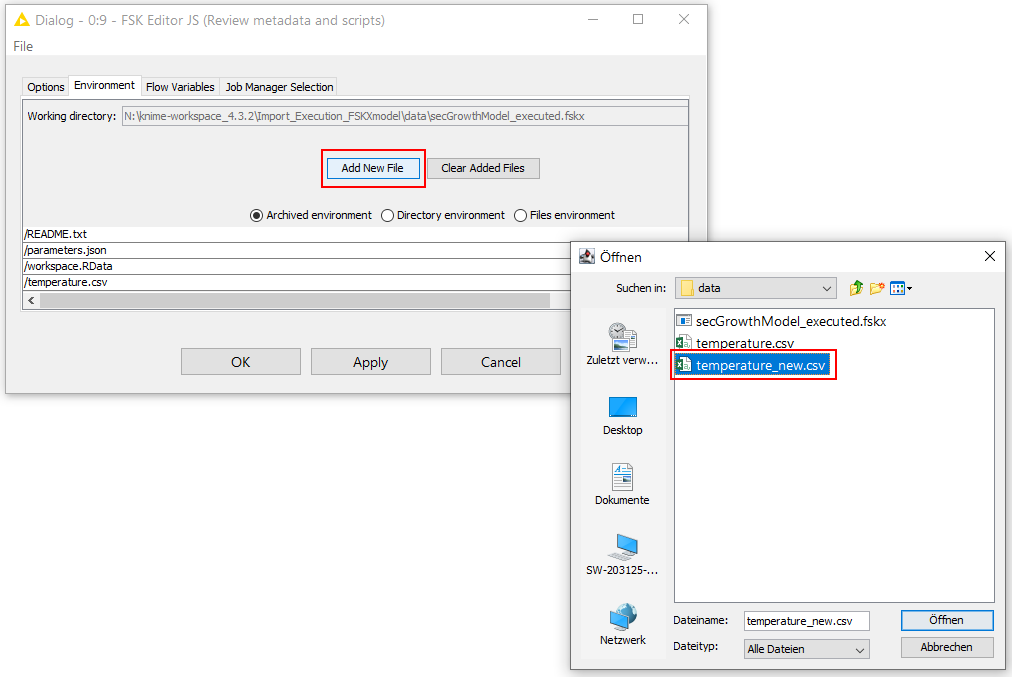
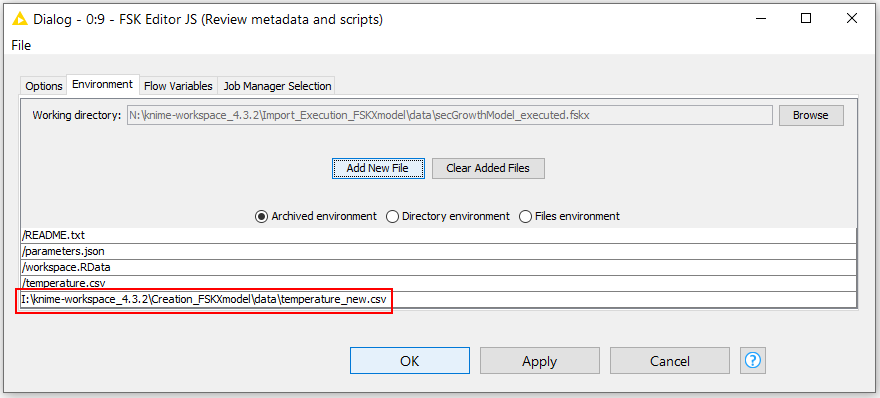
- In the configuration dialog on the tab “Environment” a list of the archived environment with the resource file included in the model is shown
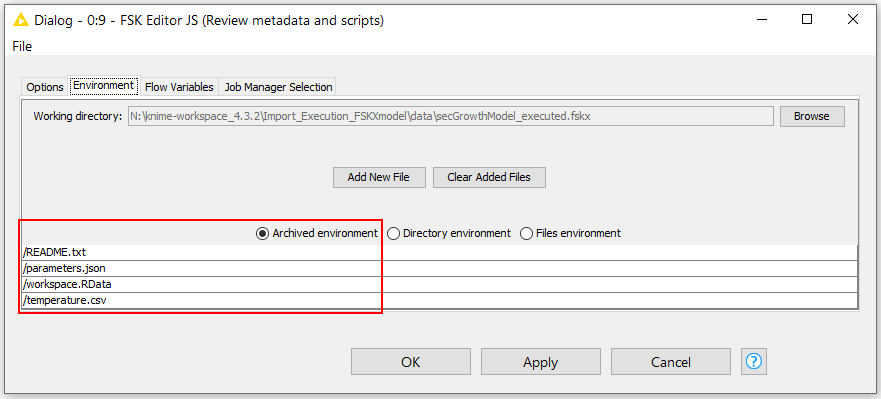
- A path to the working directory for a new resource file can be defined by clicking on Add New File
- Apply the new working directory settings and close the configuration dialog by clicking OK
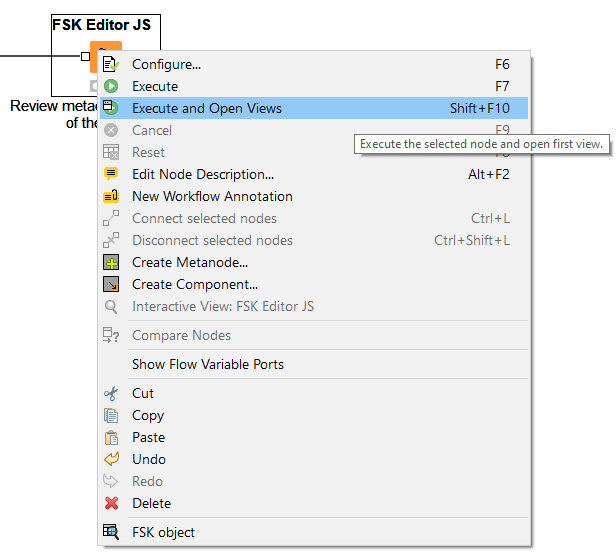
- Execute the FSK Editor node by selecting the option Execute or Execute and Open Views from the node context menu
- Attention: The data saved in the new resource file should have the same structure as the data in the original resource file, otherwise an adaption of the model code could be necessary to exucute the model.
- Normally the resource file for a dataset is defined within the FSKX model as an input parameter, which default value is the name of the file (string)
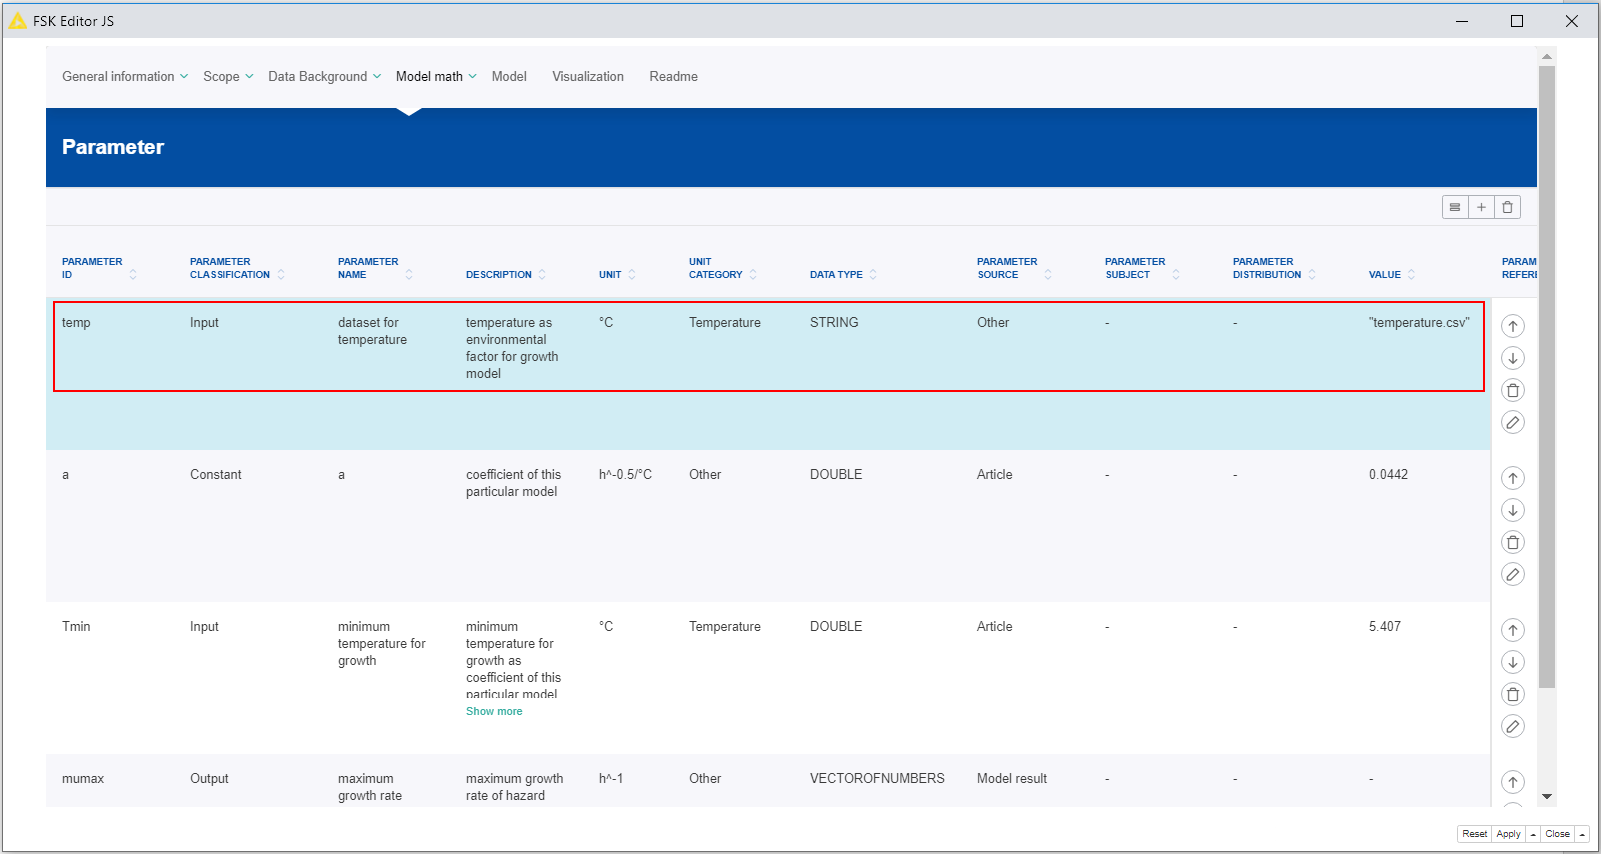
- It is also possible that for reading in a resource file, the name (string) of this file is hard coded in the model script. In this case, the hard-coded name in the model script should be adapted to execute the model successfully
- If the input parameter for the resource file is defined as variable, the value of this parameter can be adjusted by creating an additional simulation scenario based on the new resource file
- A new simulation setting can be created by using the FSK Simulation Configurator JS node
- By selecting the option Execute and Open Views from the node context menu (right click on the node) a new window will open with a GUI that allows to review predefined simulation settings like the default simulation and to add new simulation scenarios
- A new simulation setting can be added by clicking on the Add simulation button
- For each new simulation setting a name has to be given
- Note: values of parameters which are classified as constant, cannot be modified
- The newly created simulation setting has to be saved by clicking on the Save changes button
- The simulation selected in the view of the drop-down menu is set as simulation to be executed
- The GUI of the FSK Simulation Configurator JS node can be closed and the selection of the simulation for execution saved by clicking on Close and Apply
- The FSKX compliant model can be executed by using the FSK Runner node
- First the FSK Runner node can be configured by opening the node context menu (right click on the node) and selecting the option Configure
- In the configuration dialog, a predefined simulation scenario can be selected for execution from the drop-down menu (defaultSimulation, additional simulation settings)
- If desired the output of the model can be saved to a JSON file by ticking the corresponding box
- In order to apply the execution settings, close the configuration dialog by clicking OK
- The FSK Runner node can be now executed by selecting the option Execute and Open Views from the node context menu
- The plot of the model result, generated based on the visualization script, will be shown in a pop-up window (Image output)
- The model results will be stored in a R workspace if the model script is provided in the programming language R
- The FSK object of the model with simulation results and the new resource file can be written into an FSKX file using the FSKX Writer node
- First the FSKX Writer node should be configured by opening the node context menu (right click on the node) and selecting the option Configure
- In the configuration dialog, define the file path by clicking the Browse button in order to provide an output location and a name for the FSKX file of the model
- The FSKX file can be stored inside the current workflow data area (e.g. C:/knime-workspace/workflow/data/modelname.fskx), so that the KNIME URL knime://knime.workflow/data/modelname.fskx could be used as output location for the model
- In order to apply the file path settings, close the configuration dialog by clicking OK
- The FSKX Writer node can be now executed by selecting the option Execute from the node context menu
-
The harmonized file format FSKX is a ZIP container which includes all necessary files for the annotation and execution of the model (model metadata, model code and resource files)
6
An example KNIME workflow for this manual can be downloaded here.