Prefer video tutorials over written guides? Explore our video tutorials here.
This manual gives an instruction on how to create an FSKX file from a given model and annotated metadata using the FSK Creator node from the FSK-Lab node repository.
The FSK Creator node is a dedicated node available from the FSK-Lab extension in KNIME. This node creates an FSKX object from a model script and metadata provided by the user.

1 – Prepare your workflow: Providing data files, scripts, and annotated metadata
Before using the FSK Creator node to create an FSKX object, prepare the required files, preferably in a single folder.
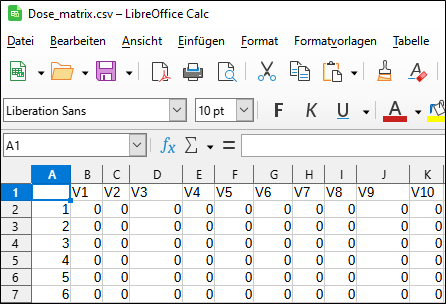
First, if you have data that the model should be applied to, please provide it, preferably in a dedicated subfolder (e.g., ‘/Data’). For example, the data can be supplied as a .CSV file.
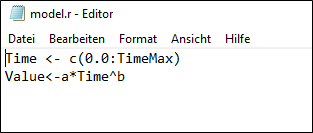
Next, provide the mathematical model. In the example given the model is provided as an .R script (it could also be provided as a .py script).
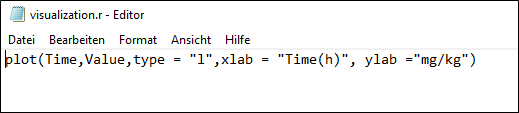
Optionally, provide a visualization script to generate graphical illustrations of the model execution results.
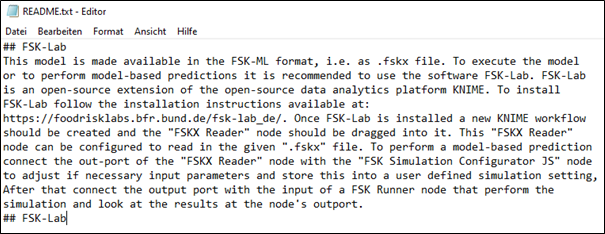
The user can also provide some additional info via a ReadMe file, which should be presented as a .TXT file.
The ReadMe file can contain information about:
- Model execution and the study (e.g. Instructions, dependencies).
- Legal Disclaimers, such as terms of use, including disclaimers and liability limits.
- To aid in using the model, editing parameter values, etc.
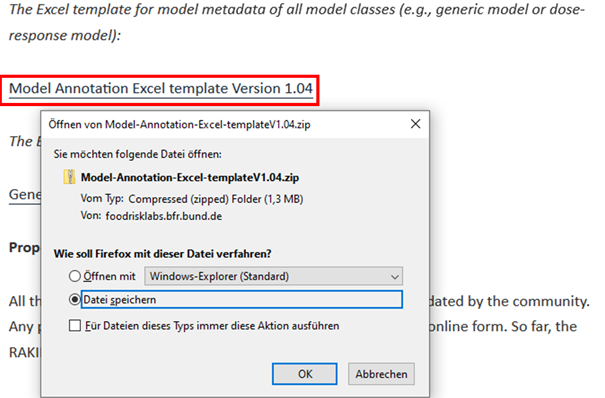
Lastly, provide the necessary metadata using the Excel template available here. Click ‘Model Annotation Excel Template Version 1.04‘ to download it. Save the .ZIP file to your computer and extract the Excel template to proceed.
The Excel file contains several sheets, each serving as a template for different model types (e.g., dose-response model, predictive model, etc.). In the following example, the “Generic Metadata Schema” sheet is used to explain how to fill in the mandatory metadata.
The metadata fields in the provided Excel table are aligned with the model annotation schema from the RAKIP community. You can add detailed annotations for all relevant aspects of the model.
The metadata annotation template is organized by different topics (column D) with corresponding detailed metadata concepts (column F). Rows marked as mandatory (column A), are the metadata that are required as minimum to annotate food safety risk assessment models (MIRARAM guidelines). For further information on MIRARAM, click here.
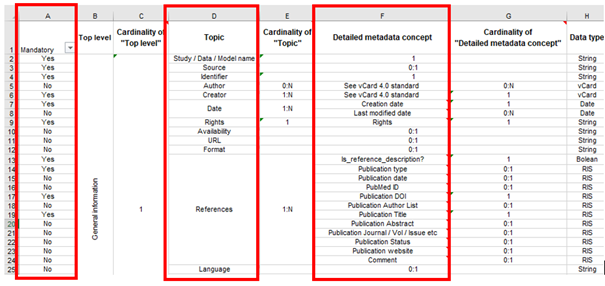
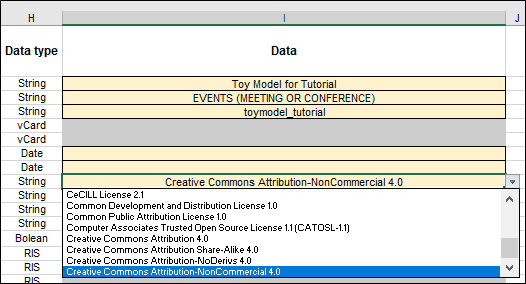
The actual metadata then have to be provided in the yellow fields (column I). Some of the metadata fields have dropdown menus where the user is able to choose from a list of controlled vocabulary. For more information on controlled vocabularies, click here.
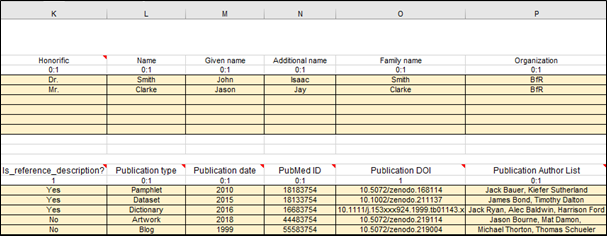
Additional information regarding the creator, author, and references should be provided in columns starting from column K. Note: The creator refers to the person who generates the .FSKX file, while the author is the individual who originally created the model. Additionally you can provide information on the product, hazard or population group.
Under the topic “model math / data definition” the user has to provide parameter definitions for the corresponding model. Here it is necessary to provide a default value for each input parameter, so that a default simulation can be run upon execution of the model (column W).
Once all necessary metadata are provided, save the template, for example, as “metadata.xlsx”.

An example folder containing all the necessary files for .FSKX file creation, with the metadata template pre-filled, can be downloaded here.
2 – Configure and run the FSK Creator node in KNIME
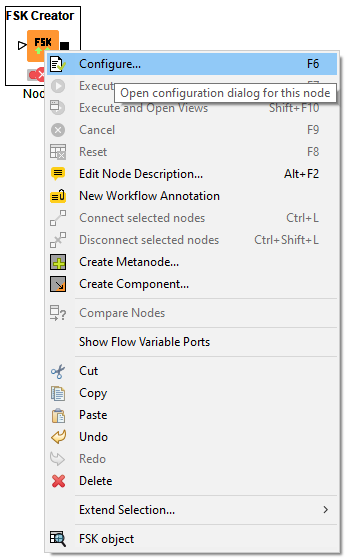
In KNIME software, choose the FSK Creator node from the FSK-Lab node repository and add it to the workflow editor via drag and drop or by double-clicking on the node. Subsequently, the FSK Creator node should be configured by opening the node context menu (right click on the node) and selecting the option Configure.
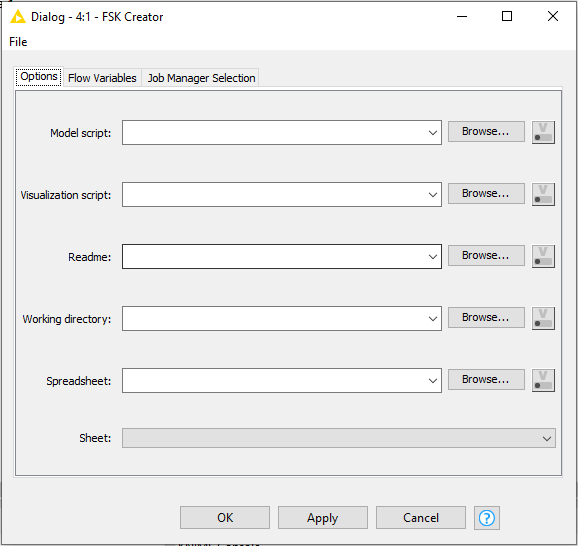
In the configuration dialog, ensure that the following fields are filled in correctly with the prior provided scripts and files (see Section 1):
- Model Script (mandatory):
- Provide the path to the model script file. Use the Browse button to navigate and select the appropriate script from your system.
- Spreadsheet (metadata template, mandatory):
- Provide the path to the spreadsheet that contains the metadata. This spreadsheet should follow the structure defined in the metadata template. Use the Browse button to select it.
- Under the Sheet field, select the appropriate sheet based on the schema used to fill in the metadata (e.g., Generic Metadata Schema, Dose-response Model, etc.)
- Working Directory (optional):
- Specify a working directory that contains all the necessary data and resources required for the model. You can select a folder by clicking the Browse button.
- Visualization Script (optional):
- If you have a visualization script, provide its path here. This script is optional but can be included to enhance the model with visualization capabilities.
- Readme (optional):
- If available, provide the path to a ReadMe file (README.txt). This document should contain additional information or instructions related to the model.
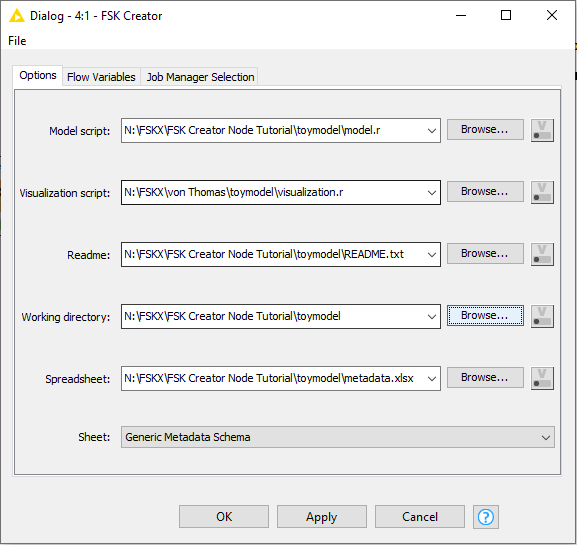
Once all the necessary files have been selected and paths configured, click OK to apply the settings and close the dialog.
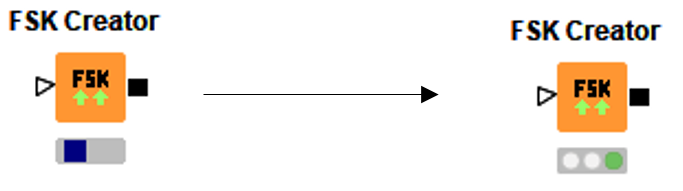
After doing so, the traffic light indicator below the node will turn yellow, indicating that the node is ready to be executed.

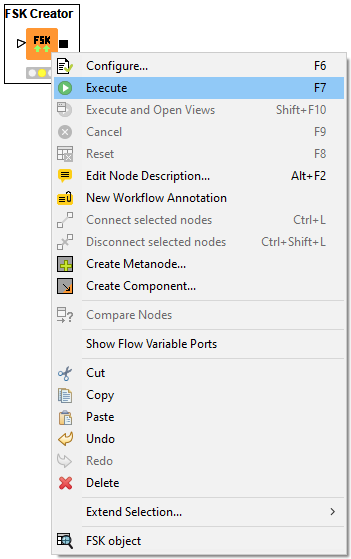
To run the FSK Creator node, right-click on the node and select Execute from the context menu.
After a brief processing period (indicated by a blue square moving side to side below the node), the traffic light below the FSK Creator node should turn green, signaling that the execution was successful.
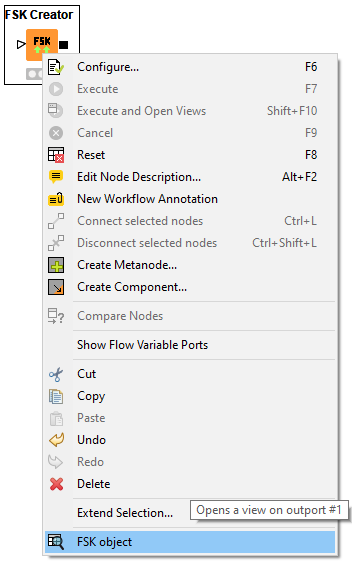
You can now view the created FSK object by right-clicking on the FSK Creator node and selecting FSK Object from the context menu.
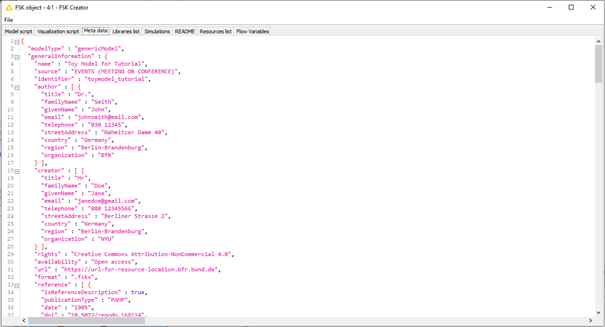
In the context window of the FSK object, you will find various tabs containing the previously provided data. The FSK Creator node automatically converts the metadata from the Excel spreadsheet into a machine-readable JSON format, which can be viewed under the Meta data tab.
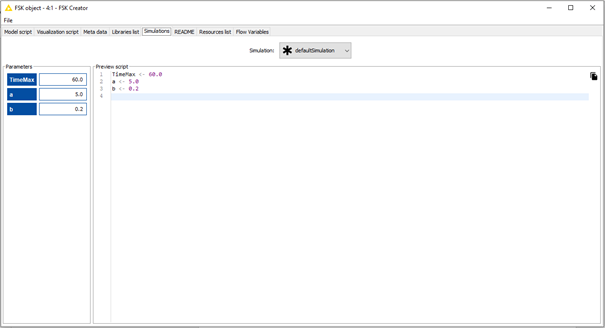
The FSK Creator node automatically takes the parameter values (which must be described in the metadata spreadsheet) and sets them as the default settings for a simulation. At least one simulation setting (the default simulation) must be provided, which will be saved in the sim.sedml file when the FSK Writer node is executed. For more information about the FSK Writer node click here.
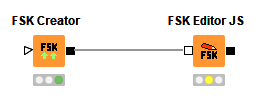
If you need to edit the metadata or add another simulation setting, the FSK Editor JS node is required. Simply connect the FSK Creator node to the FSK Editor JS node to proceed with editing. For information on how to edit and add new simulation settings, follow the guide here.
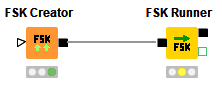
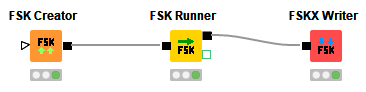
3 – Execute and run the model with a selected simulation setting
The FSK Runner node is a dedicated node available from the FSK-Lab node repository. It can execute FSKX-compliant models and run them with visualization scripts using selected simulation settings.
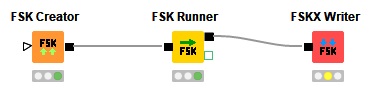
Connect the FSK Creator node to the FSK Runner node. The yellow traffic light below the FSK Runner node indicates that the required input data has been received and the node is ready for execution.
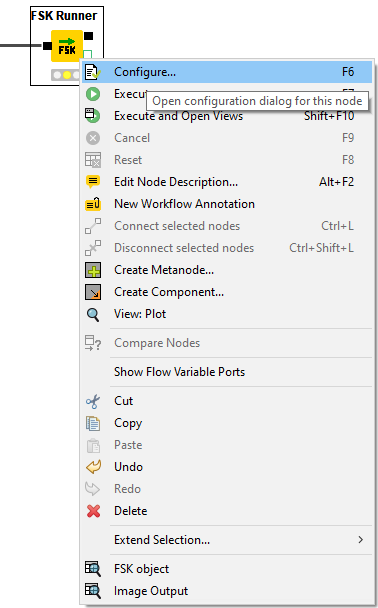
The FSK Runner node can be configured by opening the node context menu (right click on the node) and selecting the option Configure.
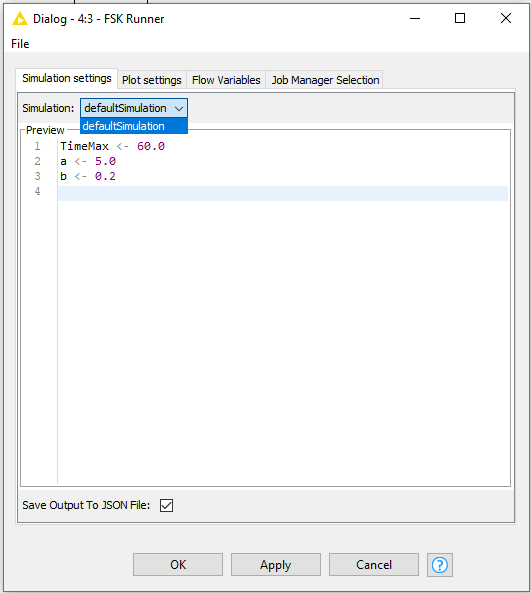
In the configuration dialog, a predefined simulation scenario can be selected for execution from the drop-down menu (defaultSimulation or additional simulation settings).
If desired the output of the model can be saved to a JSON file by ticking the corresponding box.
In order to apply the execution settings, close the configuration dialog by clicking OK.
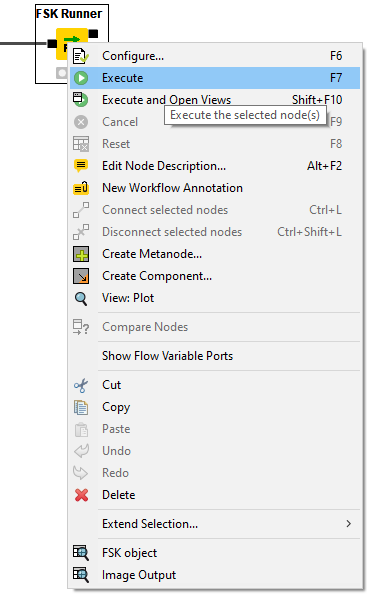
The FSK Runner node can now be executed by selecting the option Execute from the node context menu
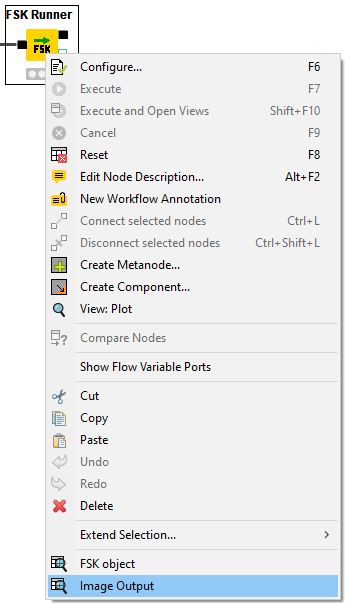
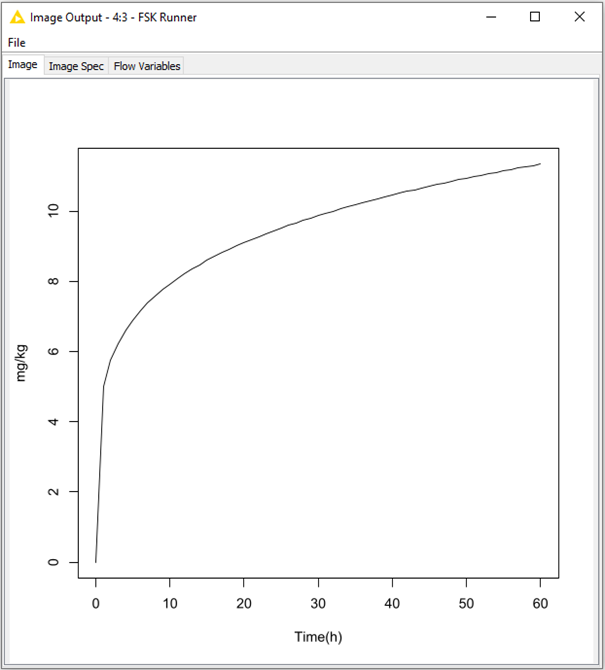
After the traffic light below the FSK Runner node has turned green, you can either view the Image Output when a visualization script has been provided. To view it, click on Image Output from the node context menu.
4 – Write the FSK object of the model with simulation results into an FSKX file
The FSKX Writer node is a dedicated node available from the FSK-Lab node repository. It takes FSKX objects and writes an .FSKX file to your system, which then can be shared.
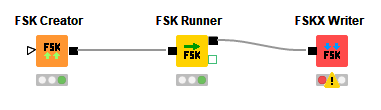
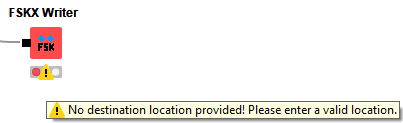
Connect the FSK Runner node to the FSKX Writer node. The traffic light indicator below the FSKX Writer node remains red and an exclamation mark signals that there is an error occurring. The error indicates that a valid location is needed to store the .FSKX file.
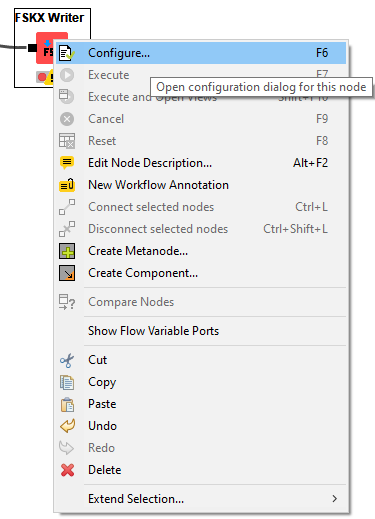
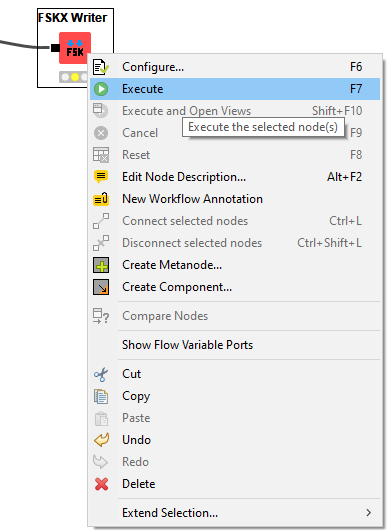
The FSKX Writer node should be configured by opening the node context menu (right click on the node) and selecting the option Configure.
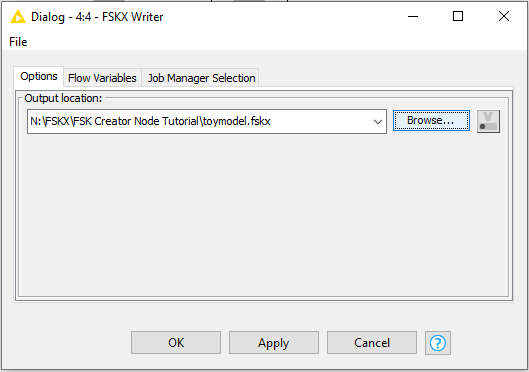
Within the context window of the configuration settings click on the “Browse…” button and choose an output location where the the .FSKX file shall be saved. Also provide a name for the .FSKX file (e.g. toymodel in the given example). Proceed by clicking on OK.
Upon setting the output location, the traffic light indicator below the FSKX Writer node should turn yellow, indicating that the node is ready to be executed.
The FSKX Writer node can now be executed by selecting the option Execute from the node context menu.
Upon successful execution the traffic light indicator below the FSKX Writer node should turn green.
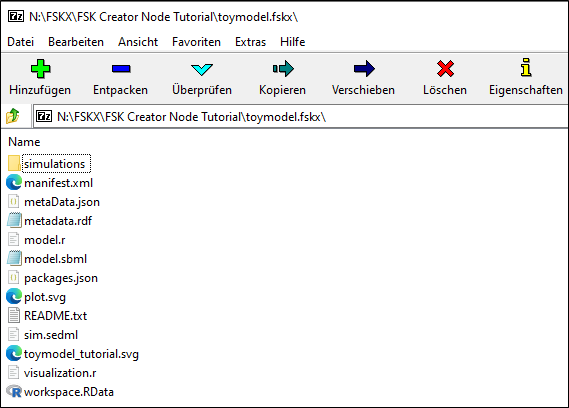
Within the chosen output location you will now find the .FSKX file. Since it is a ZIP-folder you can open it for example with software tools like 7zip and see all files that have been created upon FSKX writer node execution. Your .FSKX file is now ready to be shared or to be read in again via the FSK Reader node.
An example KNIME workflow for this manual can be downloaded here.